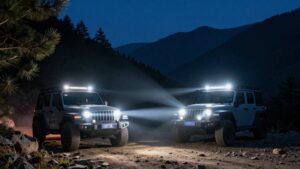
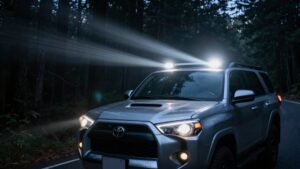
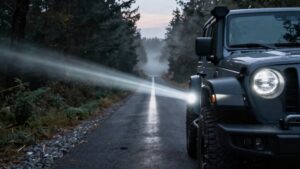
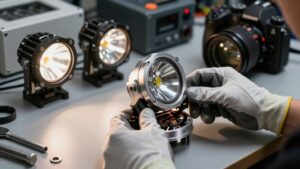
Light Bar Beam Pattern Types: Spot, Flood, Combo, Driving and Wide
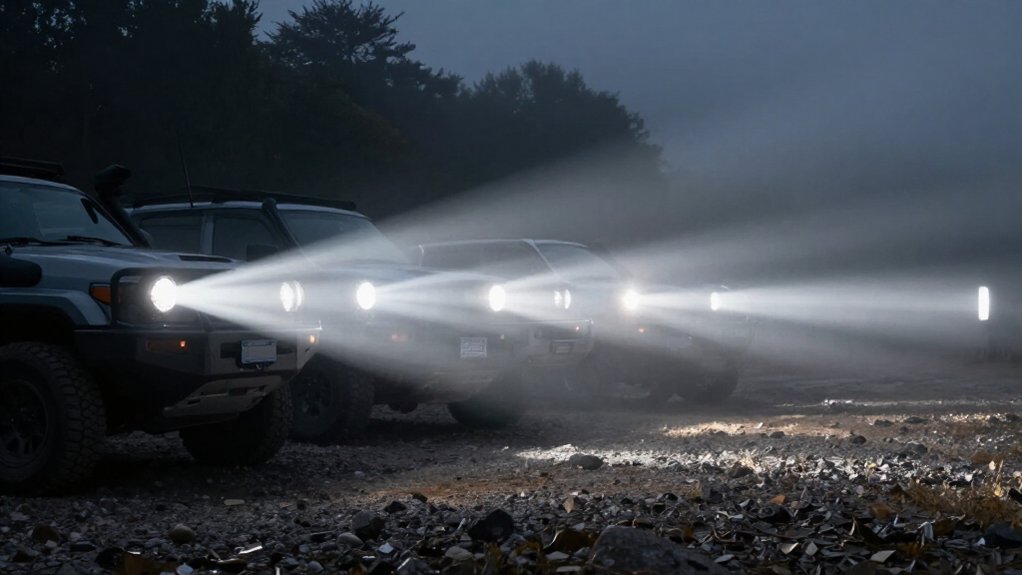
A light bar’s beam pattern determines how far ahead you see and how quickly you detect hazards. Spot beams concentrate light into a narrow 10–15° cone for distant features; flood beams illuminate nearby ground.
Combo pairs central spot reach with peripheral flood; driving beams flatten coverage for cornering, while wide beams light track edges. Choose by terrain: wider patterns reveal close obstacles, while narrow beams extend reaction distance. You’ll also learn how optics and aiming affect fit.
Five Beam Pattern Types
Choosing the right beam pattern depends on the terrain, speed, and visibility you need. A spot pattern concentrates light ahead, helping you identify distant trail features with little illumination at the sides. A flood pattern spreads light across the scene, so you can monitor nearby ground and obstacles around your vehicle.
A combo pattern pairs a central spot with outer flood sections, giving you forward focus and peripheral awareness. A driving pattern provides a flattened field that supports cornering and comfortable travel. A wide pattern distributes light evenly across the track, helping you spot hazards along trees, fence lines, and drains. Match the pattern to your route and pace: use focused output where distant detail matters, and broader coverage where side hazards demand attention.
Beam Width and Reach
Beam width determines how much light reaches ahead versus around your vehicle, directly affecting how soon you can detect hazards. A 10–15° spot concentrates output for hazards 300m+ ahead, while flood spreads light across the near scene, typically 30–80m. Combo beams put a long-range center, commonly about 250m, beside roughly 60° of outer coverage. Driving or wide-driving beams use a flattened 42° horizontal pattern for comfortable side visibility at closer-to-mid distances, not extreme throw.
| Pattern | Typical emphasis |
|---|---|
| Spot | Far-hazard detection |
| Flood | Nearby terrain awareness |
As you widen coverage, you illuminate shoulders and edges but sacrifice concentrated distance. A narrow beam can reveal distant hazards sooner; a broad beam can expose nearby obstacles sooner. This changes reaction time, so match reach to where you need to detect threats.
Optic Shape Variations
You’ll see how reflector geometry, TIR optics, and lens profiles shape beam spread and reach. Faceted and smooth reflectors control how each optic directs light, affecting visibility near the vehicle and farther ahead.
Match these features to your driving conditions so you can spot hazards without sacrificing useful peripheral coverage.
Reflector Geometry
At the reflector, geometry determines how each LED’s output spreads or projects. Deep, narrow parabolic reflectors collimate light into a tight 10–15° cone, helping you reach distant targets. This forward concentration can limit nearby peripheral visibility, so aim carefully and pair it with suitable coverage.
Shallow, wide reflectors disperse output across 40–60°, giving you broader scene coverage rather than long-distance projection. Combo bars divide these geometries by zone: center spot reflectors support 250m reach, while outer flood reflectors spread light laterally.
Driving and wide patterns favor horizontal comfort and coverage; wide optics can reach about 42° horizontally, unlike tight spot beams. Manufacturers tune reflector depth and angles with CAD and goniophotometer testing. Small shape changes affect beam distribution across angles in the IES photometric output.
TIR Optics
Beyond reflector geometry, TIR optics use molded lens shapes to capture and redirect each LED’s light. Straight projector-style TIR designs create a narrow, spot-like beam, keeping its center controlled for long-distance visibility. Choose this distribution when you need reach, but aim it carefully to protect oncoming drivers.
TIR reflector/lens combinations can spread light across a wider arc, producing an even flood for near-to-mid field coverage. You gain broader awareness, though throw distance may decrease.
Step or cutoff shapes can limit glare and keep the beam from climbing too high while preserving distance. Because an optic captures and re-aims LED output, small shape changes can shift beam width and the spot-to-flood balance. Check the pattern against your mounting height and road conditions before driving.
Lens Profiles
Because optic depth controls how LED output leaves the bar, deeper, more parabolic profiles collimate light into a tighter spot beam—often about 10–15°—for greater forward focus, while shallower profiles disperse it across a wider flood beam, often about 40–60°, for better side visibility but less reach.
Match profile to speed, terrain, and mounting position. A narrow beam extends your sightline on open roads, but may leave nearby hazards unlit. A broad beam reveals shoulders sooner, yet offers less forward reach. Some bars place deeper optics centrally and shallower optics at the ends, balancing distance with lateral coverage.
Manufacturers validate profiles through optical design and goniophotometer testing, recording measurements in IES files. Check beam aim before driving; misalignment can impair your view or dazzle road users. Choose carefully for your route.
Faceted Reflectors
Lens depth sets the beam’s reach and spread; reflector faceting fine-tunes where each LED sends its light. Faceted reflectors use angles and shapes to redirect output into an optic pattern, helping you choose Spot, Flood, or Combo behavior.
For Spot use, deeper, narrower optics and central facets concentrate light into a 10–15° cone. Combo bars place these facets across the center third, supporting reach near 250 m, while broader, more dispersive facets in the outer thirds provide 60° of lateral coverage.
Flood facets are shallower and wider, spreading light across 40–60° for scene visibility. Check photometric testing, including goniophotometer measurements and IES files, to confirm the intended angles. Match the pattern to conditions so you can see hazards without directing excess glare toward others.
Smooth Reflectors
Smooth reflectors shape LED output through reflector depth and angle, concentrating light into a tight 10–15° spot for range or spreading it across a 40–60° flood for broader scene coverage.
Deeper, narrower geometry collimates the beam into a cone, helping you illuminate distant hazards while keeping your aim on the travel path. Shallower, wider geometry disperses light across terrain, supporting visibility at the sides of your vehicle.
In a combo layout, center-third spot optics can reach about 250 m, while outer-third flood optics provide roughly 60° of lateral coverage. Keep the beam aligned and confirm roadside objects and people remain visible without directing intense light toward oncoming traffic.
Manufacturers use optical CAD to position each LED for its reflector shape, then verify intensity distribution with goniophotometer testing. That validation helps ensure the bar produces its pattern, so you can choose coverage suited to your driving conditions and avoid relying on beam claims.
Optic Shape Tradeoffs
Optic shape determines how far a light bar throws light and how quickly coverage fades toward the sides. A deep, narrow spot reflector, often parabolic, concentrates output into a 10–15° cone, extending your forward sightline while leaving shoulders and ditches darker. Flood optics use shallower, wider reflectors to spread light across 40–60°, trading reach for near-to-mid coverage, typically 30–80 m, where you’ll need to detect obstacles around your vehicle.
Combo optics place spot in the center third and flood on the outer thirds, targeting roughly 250 m of central reach with about 60° lateral coverage. Driving wide-cornering optics flatten the beam to around 42°, improving turn control and usable side visibility while reducing harsh glare in poor visibility. Reflector depth, angle, and LED placement also govern throw and falloff.
Best Fit by Terrain
Match your beam to terrain: use flood patterns for close-to-midrange obstacle visibility on rocky trails, and spot or combo beams to extend reaction distance across open desert.
On forest tracks, spread beams reveal the track edges and side hazards, while combo patterns balance reach with peripheral coverage on mixed routes. If you corner in dust or weather, a flattened 42° driving beam provides even lateral illumination without depending on long-range spot reach.
Rocky Trail Visibility
On rocky, technical trails at low speeds, choose a Flood or Wide/Spread (Widr®) beam to illuminate nearby obstacles, trail edges, rocks, and trees. Use Flood/Widr for immediate awareness as you pick through uneven ground and tight turns.
When faster stretches connect obstacles, choose a Combo beam: it reaches about 250 m and spreads roughly 60° laterally, helping you spot trail sides sooner and react. Reserve Spot for straight, longer sight-lines; its narrow 10–15° cone can reach 300 m or more, but leaves shoulders and ditches darker.
In dust, rain, snow, or fog, Wide Driving’s flattened 42° horizontal pattern can improve comfort and control when terrain appears unpredictably. Match beam choice to speed and terrain; prioritize hazards, then add reach when you need earlier reactions.
Open Desert Coverage
When open desert routes let you travel at speed, use a Spot beam’s narrow 10–15° pattern for long-distance hazard and wildlife detection, often at 300 m or more, while recognizing that it leaves more of the track edges dark.
For routes with side hazards, choose a Combo beam: its center throw reaches about 250 m, while outer thirds spread roughly 60° to reveal movement and reduce blind spots. If you’re moving slowly through technical ground or scrub and terrain edges block sightlines, a 40–60° Flood or Scene beam improves near-to-midfield visibility, typically around 30–80 m. Driving or flattened 42° Wide patterns give even horizon coverage on long, glare-prone stretches.
Match the beam to your speed and visibility; maintain controlled speed and scan the route.
Forest Track Lighting
Forest tracks favor a Flood/Spread or Widr® beam at low speed, where wide, even coverage helps reveal close hazards along the shoulders, such as trees, drains, and fence lines. For faster forest trails with longer sightlines between turns, a Combo beam often suits you best: it combines forward reach with peripheral awareness.
Choose Spot only when you need to identify hazards farther along open sections; its narrow pattern gives up much of the light you’d otherwise put on shoulders. On routes that shift between tight brush and open stretches, you can mix beams: pair Spot or Combo for distance with Flood/Spread or Widr® for immediate side visibility.
Aim and mount each light securely, then test coverage at the speeds you’ll use. Plan for limited stopping room on tight, unfamiliar forest bends. Keep your pace within the distance you can reliably see and stop, since close obstacles may emerge beyond the beam’s brightest area.
Dust and Weather Conditions
In dusty conditions, a Combo beam pairs a narrow 9–10° center spot for distance with wider coverage to reveal trail edges before dust reduces contrast. In rain, snow, or fog, choose a Driving/Wide pattern with a flatter horizontal spread, about 42°, to limit glare; a tight Spot can scatter light back toward you.
On wet, technical terrain, a 40–60° Flood beam brightens the nearby 30–80 m scene, helping you identify close obstacles and hazards at the sides. Reserve a 10–15° Spot for clear, open stretches when you need maximum distance identification, accepting reduced side lighting.
If your route shifts from dusty mornings to foggy evenings, pair Spot/Combo distance lighting with Driving/Wide or Flood coverage at the periphery. Slow down whenever visibility can’t support safe stopping distance.
Adjust Aiming After Suspension Lifts
After a suspension lift, re-aim your light bars: the added ride height changes beam height, so a pattern that aimed correctly on stock suspension may now sit too high or too low. Verify aim for each pattern.
A narrow spot beam (10–15°) reaches farther but exposes mis-aiming as a high or low stripe. A wider flood or driving beam (40–60°) can mask slight errors. Set driving/Wide beams to improve near-field control; don’t throw excess light above the road.
With a combo bar (250 m center reach, 60° lateral coverage), aim its distance center and confirm shoulder spill lights track edges without glaring oncoming traffic. Recheck after tire changes, added weight, or further lift adjustments; sag and load shift alignment even if optics haven’t changed.
Securing Lights Against Vibration
Correct beam aim depends on a stable mount, especially after you’ve adjusted lights for a suspension lift.
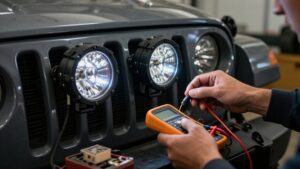
Mount your light bar at the manufacturer’s bracket points and clamp it firmly so corrugations can’t shift optical alignment. Use specified quality rubber isolators or vibration-damping mounts to limit fatigue at mounting points on uneven trails. Don’t substitute improvised hardware that can loosen or concentrate load.
Re-torque bolts after your first few drives and periodically thereafter, especially after demanding trail sessions.
Check cable strain relief; secure wiring with suitable grommets and clamps or zip ties so movement won’t stress the harness, connections, or grounds. Inspect the lens-to-bracket seal and housing tightness over time. Vibration can admit moisture or cause flicker, reducing output and undermining reliable beam aim.
Road-Legal Beam Terminology
Choose a road-legal beam pattern to match the coverage you need: spot beams concentrate light into a narrow 9–15° cone for long-range hazard identification, while flood beams spread it across roughly 40–60° for closer, wider visibility.
Combo beams pair a narrow center, often using 9–42° driving or spot elements, with outer coverage reaching about 60° laterally, so you can illuminate distance and nearby edges in one pattern. Driving beam usually describes a flattened horizontal spread near 42° that complements standard headlights with road-friendly reach and width. Wide or spread terminology means even forward and side coverage; it can reduce harsh hot spots and help you see roadway edges. Check the product’s approved road-use rating and aim it correctly; beam labels alone don’t confirm legal use.
Choose by Night-Driving Priority
Beam labels describe coverage, but your night-driving priority determines which pattern fits: choose Spot for hazards 300 m or more ahead, Flood or Wide for nearby obstacles and side visibility, or Combo when you need both without switching bars.
Match the beam to the first risk you must detect; don’t assume maximum reach improves safety if it leaves close hazards or road edges unlit.
- Spot: its 10–15° beam reaches 300 m or more, helping you identify distant obstacles or wildlife early; aim it carefully.
- Combo: its 250 m central throw and roughly 60° outer coverage balance distance with lateral visibility, avoiding a second bar.
- Flood: 40–60° spread lights roughly 30–80 m; Driving/Wide’s flattened 42° beam supports cornering in dust, rain, snow, or fog safely.
Conclusion
Choose your light bar by the beam pattern that matches your terrain and night-driving priority: spot for reach, flood or wide for peripheral coverage, driving for forward visibility, and combo for balance. Check optic shape and confirm the beam is aimed correctly, especially after a suspension lift. Secure the light against vibration, and verify road-use rules before driving.
Proper selection, installation, and aiming help you see hazards sooner without creating avoidable glare for other road users.
Spot vs Flood Beam Width Calculator
Enter two beam angles from a spec sheet and compare how wide each beam is at 50, 100, 200 ft or a custom distance.
LED Light Bar & Whip Light Remote Control App Finder
Filter 24 verified iOS and Android apps that control LED light bars, whip lights, rock lights and underglow by brand, light type and features.