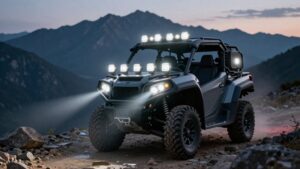
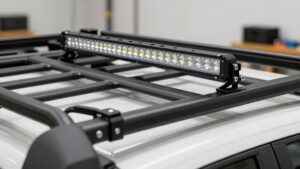
Driving Lights vs Light Bar: Which Is Better for Night Trail Runs?
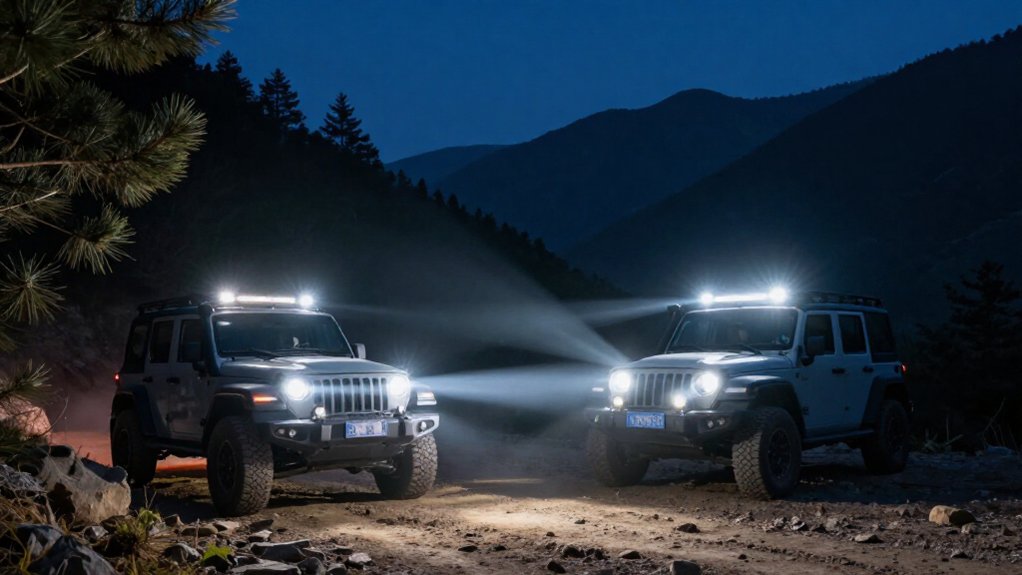
For night trail runs, choose a light bar when you need broad near-field coverage for crawling, turns, and uneven ground.
Driving lights suit faster sections because focused beams reveal distant hazards sooner.
A combo setup can reduce blind spots, but match beam choice to speed and stopping distance.
Aim lights down, dim them for oncoming traffic, and check electrical capacity and water ratings before crossings.
More on mounting and switching can help refine your setup.
Trail Beam Coverage
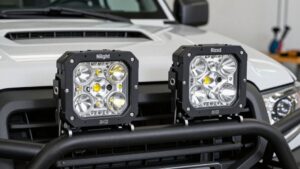
When choosing trail lights, match beam coverage to your speed and terrain: a light bar spreads a wide flood across the trail for close-to-midrange visibility, while spot-beam driving pods project a narrower, longer column that can reveal hazards farther ahead at higher speeds.
On slow, technical sections, broad lateral coverage helps you spot ditches, bushes, potholes, and uneven ground near your route. At higher speeds, longer throw gives you more time to identify hazards and react. A combo beam pairs both patterns, reducing blind spots.
| Setup | Coverage | Best use |
|---|---|---|
| Light bar | Wide, close-to-midrange | Slow technical trails |
| Driving pods | Narrow, long-range | Faster sections |
| Combo | Wide plus long throw | Uneven terrain |
Keep light on the ground you scan next; aim errors cause glare and delay reactions.
Beam Shape and Mounting Location
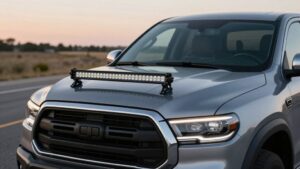
Beam coverage matters, but beam shape and mounting height determine where that light reaches: roof-mounted light bars spread a broad beam across nearby terrain, while bumper-mounted driving pods project a narrower beam farther ahead.
Roof racks and windshield headers place bars higher, reducing shadows over dips and potholes while lighting ditches, bushes, and nearby obstacles. Angle the bar slightly down and outward toward the area you scan next; this limits spill above the trail. Bumper or bull-bar mounts let you control pod aim and reduce unwanted glare.
Because narrow beams can leave gaps, align pods, especially on tight trails where you need side coverage. For a balanced setup, use the bar’s wide flood or combo pattern, then aim spot or driving pods ahead.
Beam Reach and Trail Visibility
Match beam reach to your speed: a light bar’s wide flood or combo pattern helps you read ruts, rocks, and drop-offs during slow technical crawling, while spot or driving pods throw light farther ahead for earlier hazard detection at higher speeds. Your pace determines whether terrain detail or distant warning matters most.
Use these checks:
- At crawl speed, favor broad coverage to reveal uneven ground across your path.
- At higher speeds, prioritize long throw so you can spot hazards and preserve reaction time.
- A roof bar can expose ditches and brush laterally, but its reach tops out near 100 meters.
- Aim wide beams slightly down and outward toward the scan area; focus spots ahead without wasting light on the ground or creating glare.
Switching Between Lighting Modes
Switch lighting modes as speed and terrain change: use the roof bar’s wide flood or combo pattern at roughly 20–30 km/h and while crawling into turns or across ditches, then rely on focused spot or driving beams on faster, straight sections to spot hazards farther ahead. Choose the pattern before each section; don’t wait for a hazard. Aim the wide bar slightly downward and outward to limit hood glare while retaining side coverage of rocks, ruts, and drop-offs.
On straight trail, use long-range beams to concentrate light down the route, recognizing that narrow output reveals less terrain nearby. If you run both outputs together, use the bar for near-field detail and pods or driving lights for distance. Keep your beam choice aligned with speed, and slow whenever visibility doesn’t support a safe stopping distance.
Electrical Load Limits
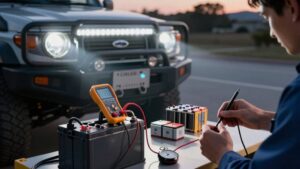
Before adding driving lights or a light bar, check that your alternator and battery can support the combined wattage of all auxiliary lamps, including pods. Don’t assume efficient LEDs draw negligible power when you run several lamps together. Use this checklist before wiring:
- Add the wattage of driving lights, the bar, pods, and harness components.
- Compare that total with your vehicle’s rated electrical capacity and alternator output.
- Choose a relay harness with proper fusing and clean, secure wiring runs.
- Match switch and relay wire gauge to current, battery distance, and expected heat.
Long or undersized runs can cause voltage drop, excess current, and hot terminals.
Keep the combined load within limits before operating every lamp at once; if capacity is uncertain, reduce the load.
Repair Costs and Serviceability
When budgeting for repairs, compare how each setup is wired and serviced: a roof-mounted light bar may require extra labor to access its relay harness and cab-to-roof wiring, while an accessible pod can often be replaced individually without dismantling a long housing.
Use a correctly fused relay harness and protected power runs; a fault may require pulling wiring back out, adding labor. A bar’s single-array design can make one failure a repair to the whole assembly, while you can usually swap one failed pod. Because you can aim pods independently, you can isolate uneven illumination or glare after maintenance. Check ingress rating: IP67/IP68 sealing helps limit dust and water entry, reducing corrosion-related failures. Retest operation and aim before driving on the trail at night.
Lens Damage and Replacement Costs
Despite weather-sealed IP67/IP68 ratings, repeated vibration, trail impacts, and road grit can crack either setup’s lens, often requiring replacement of the entire lamp housing rather than just the front cover. Roof bars face more overhead brush and bouncing debris than bull-bar lights, raising crack risk. Higher placement also makes inspection and protection more important on brush-lined routes.
A damaged lens may mean you’ll replace the complete LED lamp housing; confirm parts availability before purchase. Inspect after impacts, and stop using a lamp if a crack compromises its seal or beam.
- Secure mounts; check for looseness.
- Aim focused beams correctly; excessive upward aim can create coating heat hotspots.
- Use the specified relay-and-fuse harness to limit electrical stress.
- Keep the model number for replacement sourcing.
Glare for Oncoming Drivers
Aim your lights slightly downward and outward to keep the beam below oncoming drivers’ eye level. When traffic approaches, dim or switch off auxiliary lights and use your low beams. A focused driving beam usually spills less light than a wide roof bar, but correct aiming still matters.
Aim Lights Downward
Angle your roof light bar slightly downward and outward to keep its broad flood pattern on the trail rather than reflecting off the hood or shining into oncoming drivers’ eyes. That aim also reduces glare from reflective road signs, which can briefly obscure trail detail. Keep the bar’s wide flood beam in the near field; use tighter spot or driving beams for longer reach.
As you adjust, check the beam from the driver’s seat and confirm it reveals ruts, rocks, and dips without sending much light above your intended scan area.
- Aim the flood beam downward.
- Keep broad light close to you.
- Focus low-mounted spots farther ahead.
- Recheck for upward spill and sign glare.
Make small adjustments carefully before driving.
Dim for Oncoming Traffic
High-mounted light bars and long-throw driving lights can glare into oncoming drivers’ eyes when their beams reach eye level.
Driving lights and spotlights use narrow beams that reach farther, so an upward error can send concentrated light into an approaching driver’s view. Roof-mounted bars sit higher and may reflect from signs or bright surfaces, even with a wide pattern.
Mount and aim fixtures slightly downward and outward, following the trail sightline, not eye level. Combine a lower bull-bar spot beam for distance with a higher, wider bar for side coverage; fine-tune both to keep spill out of the opposing lane.
If you’re seeing eye strain or harsh reflections, correct aim first; brightness alone may not be the problem. Improve visibility; protect oncoming drivers.
Water Crossing Durability
Before a crossing, check that your lights carry an IP67 or IP68 rating and use sealed housings and connectors. A higher-mounted bar may take less direct spray, but either setup needs wiring protected with proper fusing and clean, secure runs.
Afterward, inspect the lenses, seals, connectors, and wiring for water intrusion or damage before driving on.
IP Rating Protection
When trail spray, puddles, or water crossings threaten your lights, check the IP rating for protection against dust and water ingress. That rating helps you compare driving lights and light bars by resistance, not appearance.
- IP67 is dust-tight and withstands immersion to 1 meter for up to 30 minutes.
- Choose it for muddy trails and brief crossings, while respecting the depth and time limits.
- IP68 offers greater immersion capability than IP67, making it a stronger target for deeper or longer crossings.
- Verify stated conditions; IP68 performance isn’t one universal depth or duration.
Before a night run, prioritize IP67 or IP68 so water and debris exposure is less likely to interrupt reliable output. Match the rating to your route, and don’t exceed its limits.
Sealed Housings And Connectors
An IP67 or IP68 rating helps protect off-road LEDs from dust and high-pressure water, but sealed housings and connectors also matter on water crossings.
Choose lights with housings that keep moisture out of the LED cavity and circuitry, reducing corrosion and early failure. A rating alone can’t compensate for gaps around fittings or exposed wiring. Mount each lamp firmly with compatible brackets, and use sealed connectors to resist vibration that can loosen joints.
Route connectors and the power feed away from direct spray and standing water, then seal connections as specified by the manufacturer.
Protect the circuit with a proper relay harness and correctly fused wiring. Keep cable runs clean and secure, so water-related shorts won’t disable your lights mid-crossing or compromise safe progress.
Post-Crossing Inspection
After a water crossing, inspect your driving lights or light bar for cracked housings, loose brackets, and lens clouding that may signal water intrusion. Before continuing, check beam alignment; splash or impact can shift mounts, alter the flood/spot pattern, and reduce trail visibility.
- Check wiring and relay harnesses for chafing, exposed conductors, or moisture at lamp-body entries; keep connections dry.
- Look for condensation inside each lens; it can mean the unit’s IP-rated seal, such as IP67 or IP68, is compromised.
- After submersion or heavy splash, briefly test low and high beams; confirm full output without flicker.
- If you find damage, moisture, or misalignment, stop and repair it before tackling a long night stretch.
This helps you catch failures before they compromise safe night driving.
Factory Warranty Considerations
Before choosing pods or a light bar, check the factory warranty for coverage of off-road or auxiliary lamps, since trail-use lighting may fall outside public-road coverage. Compare the policy’s definitions with the lamp’s IP67 or IP68 rating; these levels show dust and water resistance, which can reduce claims disputes after crossings.
If you install pods or a bar, use a relay harness and correct fusing, then verify the warranty accepts correctly wired systems. Route from cab to roof, control current, and keep connections sealed; poor installation may void coverage.
Check whether terms cover mounting or aiming damage, including glare or inadequate alignment, rather than manufacturing defects alone. Finally, match warranty language to the brand’s testing claims; SAE J581-style testing can clarify performance and durability.
Conclusion
Choose driving lights or a light bar by matching beam pattern to your trail and mounting options. Driving lights can add focused reach, while a bar may widen near-field coverage. Before you buy, check glare, electrical capacity, water sealing, lens replacement cost, and warranty terms.
Use separate switches when you need different modes, and aim each beam below eye level. Test the setup off-road, then slow down whenever visibility or traction falls short. Safety comes first.
LED Light Bar & Whip Light Remote Control App Finder
Filter 24 verified iOS and Android apps that control LED light bars, whip lights, rock lights and underglow by brand, light type and features.