How to Stop Light Bar Wind Noise: Whistle Fixes That Work
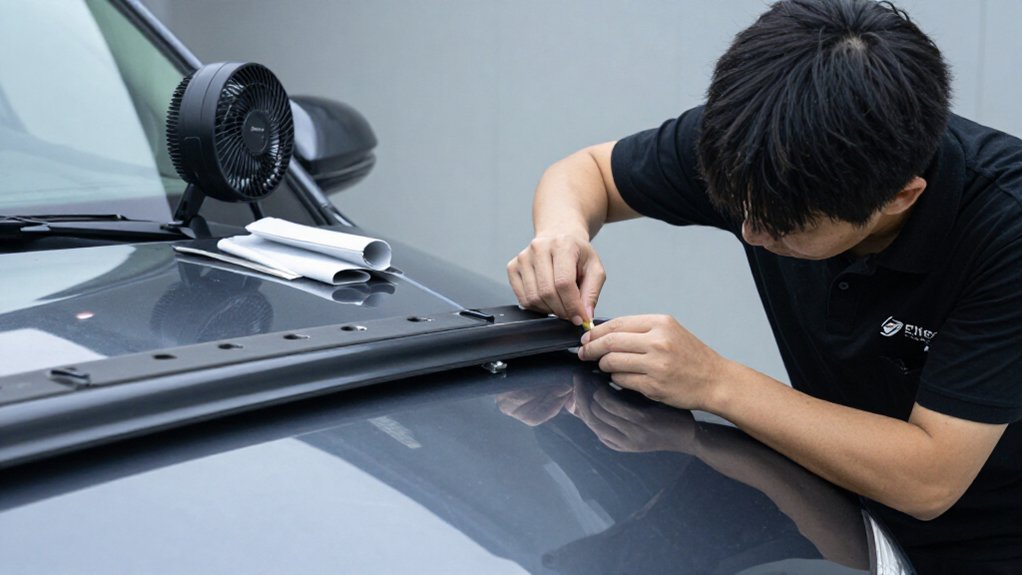
To stop light-bar wind noise, block airflow across the rear cooling fins by sealing bar-mount gaps with flyscreen spline, without obstructing wiring or cooling.
Inspect end caps and fasteners for looseness; fit a secure rear deflector if wind still reaches the fins.
Tighten mounts to manufacturer torque specs, and secure loose harness sections.
Record audio near the bar, then compare tones after each change.
Park before inspecting or adjusting anything.
More fixes can isolate remaining noise sources.
Light Bar Whistle Causes
A light bar usually whistles when airflow hits its rear cooling fins and makes them vibrate. As you drive, air can pass through small gaps behind the bar and sweep across its heat sink. That airflow excites the fins, turning vibration into the audible whistle.
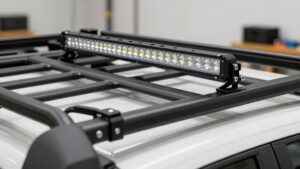
The mounting arrangement leaves these openings, so check the space behind the bar rather than assuming the lamp has a fault. You may notice the problem on a Jeep Wrangler, where the roof and windscreen geometry directs airflow toward a roof-mounted bar. To address the cause, block airflow between the fins; pressing flyscreen spline along the heat sink’s length can seal those channels. Secure the bar and any added material, and verify nothing interferes with wiring, cooling, or safe operation.
Identify the Whistle Frequency
To identify the whistle frequency, record audio near the light bar while driving at a steady speed, then use a phone or PC spectrum analyzer to find the dominant tone.
Wind excites the cooling fins, and airflow through each fin gap sets the tone. The peak often shifts as vehicle speed changes, so compare like with like.
- Choose a safe, repeatable route; don’t handle devices or watch the display while moving.
- Keep gear, speed, recording position, and wind direction consistent.
- Secure your phone or recorder near the bar before departure, away from moving parts.
- Review the spectrum afterward and note the strongest peak in hertz.
Test again at another steady speed: a shifting peak supports an airflow-driven fin whistle; never test roadside in traffic.
Step 1: Seal Bar-Mount Gaps
Once you’ve identified the whistle, close the gaps that let airflow vibrate the light bar’s cooling fins.
With the vehicle parked and the light bar switched off, inspect the spaces between the rear heat-sink fins and the mount. Press flyscreen spline into these openings to block airflow; don’t force it against wiring or damage the fin assembly. Run the spline along the entire length of the heat-sink, seating it in the fin-to-mount gaps.
In many installations, you’ll need spline only on the bottom half of the fins. Check that it stays secure and doesn’t obstruct the bar’s electrical connections or mounting hardware.
If gaps remain, spline is the primary fix: it blocks wind-driven resonance without remounting and reduces vibration in the cooling-fin assembly.
Step 2: Inspect Bar-End Caps
At both ends of the light bar, check that the end caps sit fully in place and aren’t cracked, loose, or missing; gaps can let wind reach the cooling fins and create an audible whistle.
Inspect seal around each cap and confirm it covers the fin area without a visible gap. Check nearby fasteners and the bar housing for looseness or play; movement can amplify airflow noise and transmit vibration.
Reseat shifted caps according to the manufacturer’s instructions. Replace damaged or missing caps; don’t rely on tape or improvised covers that could detach while driving.
Before working, switch off the light, let it cool, and follow the manufacturer’s service guidance. After refitting, test at a speed that’s legal and listen for a change in the whistle.
Step 3: Fit Rear Air Deflector
Fit a rear air deflector behind the light bar to redirect airflow away from its cooling fins and reduce whistle-causing vibration.
Choose a deflector that spans the wind path formed by your roof and windscreen airflow; vehicles such as Jeep Wranglers can be sensitive because of their windscreen geometry. Mount it firmly, following the manufacturer’s hardware and torque guidance. Check that brackets sit securely and no gaps or loose edges remain, since the deflector can otherwise resonate in passing air.
If your installation permits, add flyscreen spline along the heat-sink fin-gap airflow, across the lower half, to reduce noise without blocking cooling. After fitting, test at driving speed with the windows closed and listen for a quieter high-frequency whistle around the light bar.
Step 4: Move Bar Below Roofline
If airflow still crosses the rear heat-sink fins, reposition the light bar below the roofline so air no longer passes directly over them. Lowering the bar changes how air reaches the fin area, reducing turbulent patterns that can make the housing vibrate and whistle or buzz. On a Jeep Wrangler, the windscreen can send airflow toward the bar, so a lower position may be effective.
Don’t rely on tightening the mount alone; that won’t redirect air away from the fin backs. Adjust the bar’s height until airflow no longer strikes that surface directly, while keeping the lamp supported and clear of the hood and windshield. Follow the vehicle and light-bar maker’s mounting instructions. Then test safely; listen for reduced whine after each adjustment.
Step 5: Check Crossbar Alignment
Because a slight misalignment can direct airflow across the cooling fins and amplify vibration, check that the light bar and brackets are level and the crossbar sits square against the heat-sink area. Use a level to verify the bar and brackets, then center the crossbar end to end; don’t offset it. Uneven pressure can flex the bar and trigger a whistle.
Inspect the contact line between the crossbar and heat-sink surface. If you find a gap, realign the parts so airflow can’t enter and strike the fins. Keep the vehicle parked while you work, and follow the manufacturer’s alignment guidance. Afterward, take a road test on a safe route and listen at speeds.
Park and recheck alignment; changing noise can signal movement. Don’t drive if the bar looks unstable.
Step 6: Torque Mounting Bolts
Once the bar and crossbar are aligned, torque the mounting bolts to the manufacturer’s specification; many small roof or brush mounts call for about 7–10 ft-lb.
Use a calibrated torque wrench and follow the specified value for your bracket; don’t assume every mount shares the same rating. On multi-point mounts, tighten bolts evenly in a cross pattern so the bar sits flat. Uneven clamping can leave gaps that let airflow excite vibration.
Avoid both under-tightening and over-tightening: either can alter the bracket’s grip and transmit wind-driven movement into the housing, amplifying fin whistle. Apply thread-locking compound only if the manufacturer recommends it; the product helps bolts retain tension against vibration. After installation, recheck torque once the mount has settled, such as after a drive.
Road-Test at Highway Speed
At a steady 55–70 mph, road-test the light bar first into the wind, then with a crosswind, and listen for whistle or vibration from airflow over the rear cooling fins.
Have a passenger monitor sound, or record it hands-free; keep your attention on driving and maintain a steady throttle for several minutes. Repeat the same route with the vehicle heading about 90° to the wind, noting whether noise changes.
Compare the sound before and after pressing flyscreen spline along the fin heat-sink; insert it along the length, often only the lower half. If fin turbulence causes the whistle, you’ll often hear an immediate reduction after sealing gaps.
Record the light bar model and mounting position so you can verify results under the same airflow conditions.
Water-Test Sealed Mounts
Before water-testing a sealed mount, press flyscreen spline continuously into the gaps between the heat-sink fins, end to end; in many installations, sealing the lower half is sufficient.
Wind rushing through open fin gaps can vibrate the heat sink and create a whistle. Continuous spline blocks that airflow path and helps preserve water resistance. With the bar cool and vehicle parked safely, inspect the seal for breaks. Use a water stream across the mount; avoid pressure that could force water past seals. Check inside the mounting area for moisture, then let it dry. A gap-free seal should lock the fins out of wind interaction and prevent speed-related noise.
| Check | Action | Result |
|---|---|---|
| Coverage | Seal continuous gaps | No airflow path |
| Test | Apply gentle water | Confirm dryness |
Inspect Wiring for Rattles
If the sealed mount stays dry but wind noise persists, inspect the wiring harness along its full roof-mount path. With the vehicle parked and lights switched off, check for loose clips, rubbed insulation, or wire sections that flex in airflow. Secure each wire at intervals, especially near brackets and behind the bar, so it can’t strike body panels.
Inspect connector pins for bends and confirm the plug clicks into place; a loose connection can buzz and carry vibration.
With the bar mounted, press and wiggle the harness while listening; note where the resonance changes or begins. Don’t pull wiring or work near exposed conductors. Finally, tighten the ground/negative lead and remove corrosion, since intermittent grounding may create a buzz that mimics a rattle.
Conclusion
To stop a light bar whistle, first pinpoint the speed and pitch, then seal mounting gaps, check end caps, and add a rear deflector if airflow still creates noise. Tighten bolts to the manufacturer’s torque, and secure wiring so it can’t vibrate or snag.
Road-test gradually on a safe route, listening for changes; never adjust hardware while moving. After sealing, use a gentle water test and recheck fasteners before relying on the setup at speed.