What Beam Pattern Is Best for Ditch Lights? Flood vs Wide vs Spot
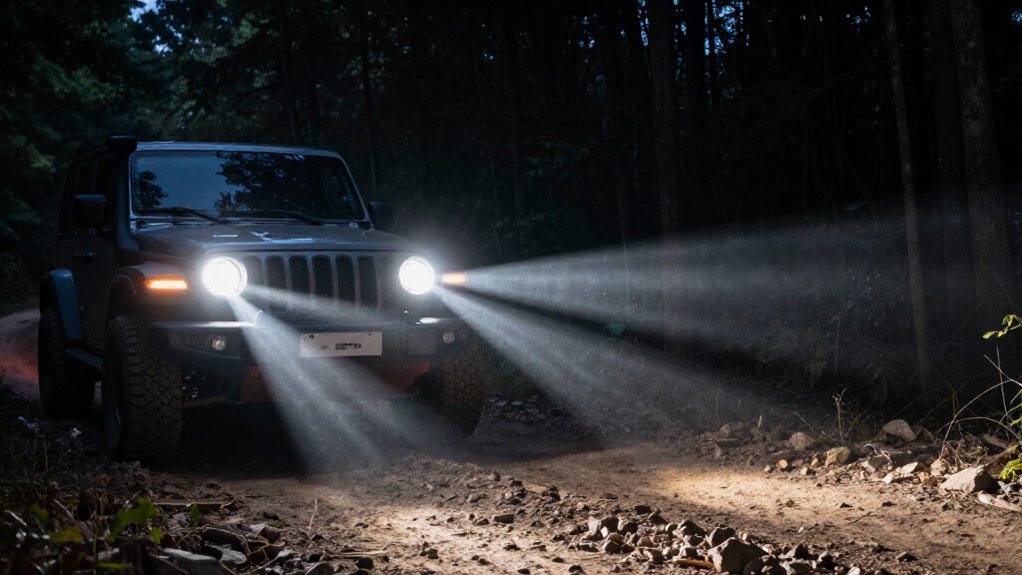
Choose flood or wide ditch lights for slow, technical trails and frequent turns, where nearby edges and tire-path hazards matter most. Use a combo beam when you need side coverage plus some forward reach.
Reserve a narrow spot for faster, open terrain; its 10-degree beam reaches farther but can leave nearby hazards in shadow. Aim outward, not upward, to limit hood and windshield glare.
Check hoodline clearance, then test safely in expected conditions before departure. Further setup details matter, too.
Flood, Wide, or Spot?
For ditch lights, choose a flood beam for broad, nearby awareness on technical trails, during recovery, or around camp; a wide or diffused beam helps you read turns and side terrain without a tight distant hotspot. Use flood when you need to identify trail edges, rocks, and nearby hazards; its broad spread supports controlled movement and safer recovery work. A wide, diffused pattern extends horizontal coverage, so you can read bends and side terrain earlier without a concentrated distant hotspot.
If you aim lights outward, choose flood or a combo pattern to push illumination across the trail. Reserve spot beams for open backroads when distance matters more than cornering visibility; their narrow reach provides less peripheral light. As a rule, match the pattern to the task: flood for nearby awareness, spot for far spotting, and wide or combo when you need both reach and surrounding detail. Verify the beam illuminates your intended area without obscuring other drivers or creating glare.
Account for Hoodline Obstruction
Beam choice also depends on how much of the ditch-light pattern the hood blocks. If the hoodline clips the beam, choose a wider flood or scene pattern, often 100–120°, so light still reaches around the vehicle. When you aim outward, a 60° flood pod or 180° side shooter can use side illumination more effectively than a narrow, long-throw spot. Don’t mount or tilt the lights so high that they illuminate the hood; glare and backscatter can erase near-ground detail.
If you need more forward reach, use a tighter spot or combo aligned with the unobstructed path; but expect the hood’s shadow to reduce side coverage. Swivel the lamps and test them in dust, fog, or rain; adjust outward to limit glare and verify usable illumination.
Peripheral Trail Hazard Coverage
When trail hazards can emerge near a turn, a flood or wide beam helps reveal edges and obstacles to your left and right. A narrow spot, typically about 10°, reaches farther but leaves limited side visibility, so you may miss hazards beside your turning path.
Use this comparison to match coverage to the task:
| Pattern | Side coverage | Best use |
|---|---|---|
| Flood | Broad | Trail edges / turn-in hazards |
| Wide | Broad | Tight turns / junctions |
| Combo (8° spot + 90° flood) | Near-and-far | Edge detection plus reach |
When you aim lights outward, wider optics help expose side obstacles. Mount and test them on real trails; then recheck for glare and back-scatter in dust, fog, rain, or snow, where scattered light can reduce useful contrast before relying on the setup at night.
Beam Angles and Hood Glare
A wide flood beam, such as 60° or 100° diffused, spreads light toward trail edges, while a 10° spot concentrates it and can increase backscatter.
Aim your ditch lights outward, not upward, to reduce hood and windshield reflections that can wash out the ground and limit side visibility. Re-test your aim in dust, fog, or rain, where reflected light can increase glare.
Beam Angle Basics
Your ditch lights’ beam angle determines whether they reveal trail edges or push light farther ahead: wider patterns, roughly 60° flood to 100° diffused or 120° ultra-wide, help fill blind areas during turns, while narrow spots concentrate illumination at distance. Choose a pattern that matches your route: outward-facing ditch lights benefit from broad coverage beside the vehicle, especially on tight turns where a spot may leave nearby edges unlit, while a narrower beam can extend visibility along a straight approach.
At windshield-corner mounting positions, begin with the lamps aimed outward rather than forward to prioritize peripheral coverage. Then adjust each lamp in increments and check the beam from the driver’s seat. Re-test in dust, fog, and rain; wide patterns can scatter light back toward you.
Hood Glare Causes
Hood glare occurs when ditch lights are aimed too high, reflecting off the hood and back toward your eyes instead of illuminating the trail edges. Flood and wide-angle beams are especially vulnerable because their broad spreads illuminate more hood surface when their aim rises. Even modest upward movement can create a bright reflection that reduces contrast and distracts you from obstacles at the trail edge.
Forward-biased setups can also send more light into dust, fog, snow, or rain, where suspended particles scatter it back toward your windshield and eyes. That back-scatter compounds hood reflections. After a beam-angle change, inspect the hood for a hot spot and evaluate visibility in actual weather conditions. Glare can mask hazards even when the lamps appear bright in darkness.
Aim Lights Outward
Toward the trail edges, outward-aimed ditch lights improve peripheral visibility around turns while reducing the chance of light reflecting off the hood into your eyes.
With this orientation, choose flood or wide-scene patterns to cover the corners and reveal hazards. A narrow spot concentrates output forward and may leave gaps beside the vehicle.
If you use a combo beam, such as an 8-degree spot with a 90-degree flood, aim it outward to retain some near-forward reach while spreading most light across the trail edges.
Keep the vertical angle low; aiming high can increase glare and backscatter in dust, fog, rain, or snow. Use swivel-able mounts to test your setup in conditions. Start outward, then turn slightly forward only when you need short- or mid-range reach.
Reduce Reflected Light
To reduce hood glare, aim ditch lights outward toward the trail edges rather than straight ahead, keeping the beam off the hood and out of your line of sight. Choose flood or wide scene patterns: about 60°, 100°, or 120°, and aim outward to illuminate beside the vehicle without washing the hood or front deck.
A roughly 10° spot can form a bright hotspot on nearby surfaces, increasing perceived glare, especially when mounted low or angled inward. After installation, test in dust, fog, and rain; suspended particles scatter light back, and body panels add reflections.
If glare persists, lower the aim slightly, keep the beam clear of the hood plane, and avoid mounting height. Fine-tune the swivel, then confirm you can see the trail edge while preserving forward visibility.
Trail-Speed Beam Selection
At trail speed, prioritize a wide flood pattern so you can spot trail edges and turn hazards quickly. Choose a combo beam when you need near-side coverage and some farther projection; a spot beam’s narrow footprint may hide hazards near your tire path.
Aim outward first, then adjust slightly forward if the terrain demands more range.
Speed-Based Beam Choice
When you travel faster, choose a spot-style or spot-combo beam to project light farther down the trail and reveal hazards sooner; for slow technical crawling or frequent turns, choose a flood or wide beam to light trail edges as you enter corners and junctions. If your ditch lights compensate for poor side visibility despite headlights or a light bar, favor wider coverage at low-to-mid speeds, when tight reactions leave less time to correct your line.
For mixed use, a combo pattern—about an 8° spot with a 90° flood concept—balances forward reach with peripheral illumination. After installation, swivel-aim the lights and test them at your actual trail speed. Recheck in dust, fog, or rain; reflected light can cause glare or back-scatter, reducing visibility. Check your setup on your routes.
Fast Trail Visibility
For fast trail driving, wide or flood ditch lights usually improve visibility by revealing trail edges and nearby obstacles before you commit to a turn. Choose a broad pattern when you need to read corner shape and loose rocks early; it gives your eyes lateral cues that a tight spot beam can miss.
Spot optics, often around ten degrees, suit open backroads where long-range detection matters, but they narrow coverage as you enter tight turns. For outward-aimed ditch lights, use a wide, flood, or combo optic to illuminate the boundary rather than the hood.
Re-aim and test at trail speed in dust, fog, and rain; wide output can increase backscatter and delay hazard recognition. Reduce speed when visibility falls. Verify beam aim on a safe, level surface before departure and after each adjustment.
Near-Far Coverage Balance
Although spot beams reach farthest, flood or wide ditch lights usually provide the better trail-speed balance by revealing nearby obstacles and route edges before you turn. At trail speed, show both immediate hazards and enough distance to react. A narrow spot, typically 10°, projects far ahead, but its tight hotspot can leave sides dark and weaken the cornering awareness ditch lights should provide. A combo, such as an 8° spot with a 90° flood, adds forward reach while preserving peripheral route-edge coverage.
If you’re aiming outward, choose a spread pattern to limit dark areas around the vehicle, particularly when GPS or trail markers aren’t reliable. After installation, test in dust, fog, and rain; wider beams can cause back-scatter or glare, so verify near–far visibility.
Pattern Selection By Terrain
Match the beam to your terrain and speed: use a 60°-120° flood or wide pattern for slow, technical trails where nearby edges, obstacles, and recovery spots matter most; choose an approximately 10° spot for faster backroads or open terrain where you need to see hazards farther ahead.
If your route shifts between straight runs and tight turns, choose a combo beam: 8° spot paired with 90° flood. It throws light ahead while keeping peripheral trail edges visible. For outward-facing ditch lights, flood or combo patterns widen horizontal coverage and reduce blind zones as you corner.
Before relying on your setup, retest it in dust, fog, and rain. A wide beam may create backscatter, while too much spot can hide hazards at trail junctions.
Wiring Harness Reach
Choose a ditch-light harness that reaches from the battery and relay to both pods near the windshield corners without pulling the cables taut. Before you buy, measure the route to each pod, including slack for aiming, tubing, and paths around the hood and hinges. Confirm the harness splits to serve both lights, or provides enough lead length for parallel wiring without extension cords.
Place the switch and relay close enough to keep the run within the harness rating; excessive length can increase voltage drop and dim output. Route cables clear of sharp edges and moving hinges, then secure them every 6–12 inches. Leave service slack for adjustment, but don’t let cable hang or become a pull point. Check hood movement so it can’t pinch or stretch the wiring.
Lens Cleaning After Mud
Once the harness is secure and the hood clears the wiring, clean the lights after muddy drives to protect the lenses and restore the intended beam pattern.
After muddy drives, let the lamps cool before cleaning. Wipe loose soil with a dry microfiber cloth first; this lifts grit before moisture could drag it across the lens. Then use a damp cloth and a lens-safe cleaner, or mild soap and water.
Avoid paper towels, ammonia, and harsh solvents, which can scratch or damage protective coatings.
If mud has dried onto the lens, hold a water-soaked cloth against it briefly to soften the deposit. Don’t scrape it off: abrasion can reduce light output. Dry with a clean microfiber, then buff lightly to remove water spots that may distort the beam.
Once the lenses are clear, recheck alignment; mud can alter how flood, wide, or spot optics illuminate the trail under actual trail conditions.
Overlooking Mount Compatibility
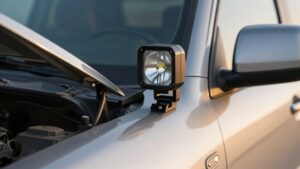
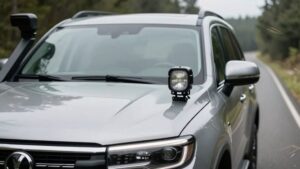
Even a correctly selected beam can miss the trail edge if its mount holds it at the wrong height or angle. Your beam choice must match bracket position. Vehicle-specific mounts near lower windshield corners or the A-pillar support true ditch-side aiming. A wide lens with a 100–180° spread can still cause glare or uneven coverage if the bracket points it too high.
- Check bracket height and angle before choosing flood or wide.
- Aim a roughly 10° spot carefully; it may light distant terrain but miss the trail edge.
- Set side-shooters outward without reflecting light off your hood.
- Use swivel or adjustable mounts to correct alignment.
- Test the installed beam against your hood and windshield at night before driving on rough terrain.
Verify Connector Compatibility
After confirming the mount’s position and aim, verify that the exact light SKU’s connector matches your vehicle harness. Check the plug type before purchase; common two-pin or Deutsch-style connectors aren’t universal.
- Confirm voltage—typically 12V—and connector gender for the exact SKU.
- Match pin configuration and wiring kit to your chosen spot, flood/wide, or combo pod.
- Check whether the beam pattern uses a replaceable lens or fixed optics.
- Verify the included harness supports that specific pattern and connector.
- Confirm the plug reaches from the A-pillar mount without tension.
With outward aiming, route and secure wiring clear of sharp edges, heat, and moving parts. Seat the connector fully before powering the lights, then check operation. A compatible, unstressed connection helps prevent intermittent illumination during night driving.
Conclusion
Choose a beam pattern that matches your trail speed and terrain: flood for close coverage, wide for balanced peripheral visibility, or spot for longer reach.
Before installation, check hood obstruction, aim lamps to limit glare, and confirm mount, harness reach, and connector compatibility. Keep lenses clean, especially after mud.
Test the beam off-road at low speed, then adjust before faster travel. Don’t let extra light compromise oncoming visibility or safe vehicle control on dark trails.
Cordless LED Work Light Runtime Calculator
Estimate how long a cordless LED work light runs on a tool battery from volts, Ah and watts, with a 2, 4, 5 and 9 Ah pack comparison.
Whip Light Height & Clearance Calculator
Add up roof or rack height, mount height and whip length, then check the total against a clearance limit you enter. Free, no sign-up.
Spot vs Flood Beam Width Calculator
Enter two beam angles from a spec sheet and compare how wide each beam is at 50, 100, 200 ft or a custom distance.