Are Ditch Lights Worth It? When A-Pillar Lights Earn Their Place
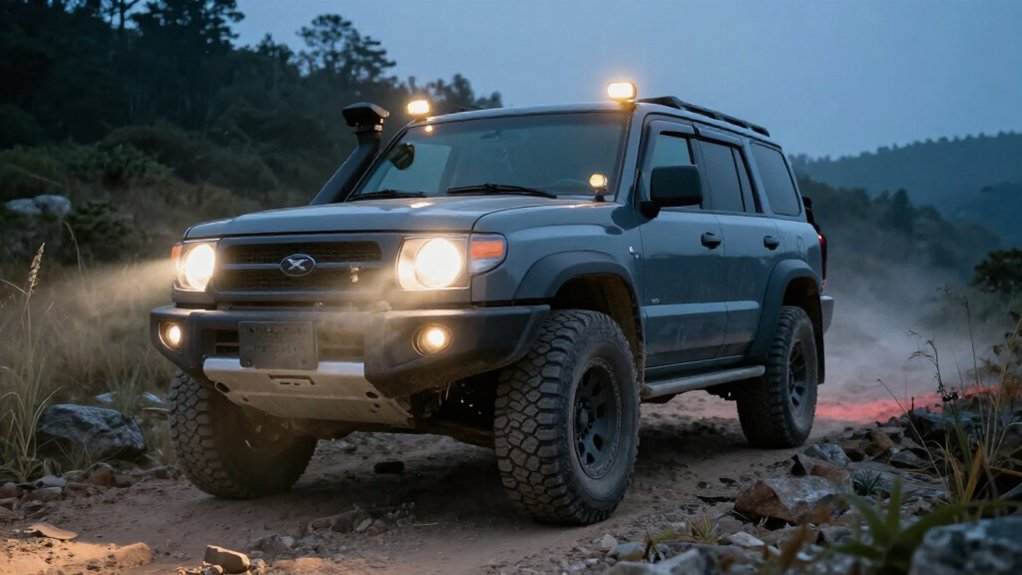
Ditch lights are worth it when your headlights leave trail edges, ruts, or drop-offs in shadow.
Outward-aimed A-pillar floods light ground beside your tires and slightly ahead, helping you spot rocks and uneven edges before you reach them.
A combo beam adds useful distance, while an independent switch lets you use side coverage without high beams.
Mount lights clear of the hood and aim low to limit glare.
Next, see how setup affects trail safety.
Beam Coverage at Trail Edges
A-pillar lights earn their place when the trail’s hazards sit outside your headlights’ narrow beam. Their outward-aimed flood pattern extends illumination across the ground beside your vehicle and slightly ahead, where standard headlights may leave gaps. On tight, technical routes, that lateral beam can expose rocks, ruts, and drop-offs close to your tires before you reach them.
It also helps you assess obstacles beneath the frame rails, reducing the chance of scraping the undercarriage or high-centering on an edge feature. Aim each lamp carefully: a lower A-pillar mount can limit glare from dust and reflections off the hood compared with higher forward lights. Keep the beams broad enough to cover the route boundary, but avoid aiming them into oncoming drivers’ sightlines at low speeds.
Trail-Edge Visibility Needs
When your headlights leave the trail’s edges in shadow, outward-aimed ditch lights can reveal ruts, drop-offs, and brush-side obstacles beside and slightly ahead of your vehicle. Their wide beams help you read terrain close to the tires, where headlights may not show a ditch lip or uneven rock.
On tight routes, that side coverage gives you a reference as you turn around rocks and follow irregular ground. Aim the lights outward enough to expose hazards in side ditches without relying on a guess about the trail edge.
That can help you avoid scraping a tire or high-centering when the edge is hard to judge. You’ll notice the benefit most at night or in dust, when forward light fades quickly and side visibility supports safer decisions.
Independent Switch Control
With a dedicated switch, you can control your A-pillar lights independently of your headlights, using side-focused illumination only when the trail calls for it.
On tight trails, you can switch on side visibility without adding full high-beam output. Route the lights through a separate relay and fuse; that keeps auxiliary current off the headlight circuit and supports safe operation.
| Situation | Switch use | Check |
|---|---|---|
| Tight trail | Side lights | Confirm response |
| Open terrain | Switch off | Limit glare |
| Circuit setup | Relay, fuse | Verify wiring |
| Troubleshooting | Command separately | Check lamps |
On open terrain, leave them off when their outward angle could create unnecessary glare.
Independent switching helps you troubleshoot: command the lamps separately and verify that they respond, inspect wiring, fuse, relay, aiming, and mounts if they don’t.
Flood, Spot, and Combo Beams
Flood beams illuminate the ground beside your tires, revealing ruts, drop-offs, and rocks your headlights may miss. Spot beams extend your view down the trail, while combo beams balance near-field coverage with distance.
Choose the pattern that fits your terrain, and angle A-pillar lights outward to cover the trail’s edges.
Flood Beam Coverage
Beam pattern determines whether your A-pillar lights reveal nearby hazards or distant trail features. A flood beam spreads light across a wide, low-angle area, illuminating ruts, ditches, and ground beside your tires that headlights miss. From the side-mounted position, this coverage helps you judge immediate terrain during tight turns and technical sections.
Aim the lamps so the beam fills space next to and ahead of your vehicle without obscuring your view with glare. A spot pattern narrows the coverage for farther trail features, while a combo beam pairs broad side illumination with added reach. Choose flood when nearby edges and wheel-path hazards matter most; choose combo when your route alternates between close obstacles and longer sight lines. The pattern you choose supports safer placement and decisions.
Spot Beam Distance
How far you need to see should guide your beam choice: a spot beam throws light farther down open trails, while a flood beam reveals close hazards beside your tires. On faster desert or open routes, its narrow pattern helps you detect obstacles and terrain changes before they reach your headlights.
At low speeds, choose flood output to expose ruts, rocks, brush, and the ground near your tires. Ditch lights sit low and point outward, so a wide beam can cover side hazards while limiting hood-bounce glare in dust or uneven terrain.
Aim the flood portion at the ground beside your vehicle; direct any spot portion slightly above the horizon. This gives useful down-trail reach without pushing excessive glare into your sightline ahead.
Combo Beam Versatility
Spot-beam reach helps on open trails, but tight routes often demand visibility both beside the tires and a little farther ahead. Flood beams illuminate ruts, ditches, and ground beside your tires, while a spot beam helps you identify hazards farther down the trail. A combo beam blends near-field spread with useful reach, so you can read the trail edge and notice obstacles ahead without relying on your headlights.
On tight technical turns, combined coverage can reduce blind spots: outward-aimed A-pillar lights reveal side ground and cue you to changing terrain ahead. You’ll see trail edges through bends, while retaining forward warning when flood-only light leaves distant hazards unclear or a spot-only beam misses the tire line. That balance supports controlled movement as conditions shift.
Choosing the Right Pattern
Choose a beam pattern based on how far ahead you need to see and how much ground beside your tires you need to cover. Flood beams spread light widely, revealing ruts, rocks, brush, and ground beside your tires.
That near-field coverage helps you judge ditch edges and terrain changes that stock headlights may miss. Spot beams project a tighter pattern farther down the trail, helping you identify distant obstacles, but they won’t fill the immediate ditch area. Combo beams pair wide side visibility with forward reach, making them a practical middle ground for A-pillar mounts.
Match the pattern to your usual speed and obstacle spacing: choose flood or combo for tight, technical terrain; add spot reach on faster, open routes to see farther ahead.
Approach Angle and Hood Clearance
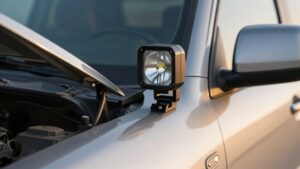
On steep ramps, A-pillar lights keep their output close to the chassis, reducing the risk of catching brush or terrain compared with higher, forward-mounted bars. Check that your brackets clear the hood, wipers, and vents, then aim each beam beyond the hoodline and low along the trail to limit glare.
This placement can preserve near-side visibility as your front end lifts and articulates.
Approach Angle Benefits
Because A-pillar ditch lights sit lower than roof-mounted lights, they can clear the hood more effectively and keep useful light on the trail. When you approach a steep entry or tight obstacle, aim the lamps outward and slightly forward to light the path edge without requiring roof-level mounting. That coverage can reveal ruts, rocks, and step-downs at the front edge, where wheel clearance matters before your bumper reaches the obstacle.
Low A-pillar placement also directs light along the vehicle’s sides, reducing foreground glare that can occur when higher beams spill onto the hood or nearby ground. During installation, fine-tune each outward angle: maximize side coverage while keeping illumination clear of the approach line’s near-field hazards. Test your beam pattern before difficult terrain at night.
Hoodline Visibility
How well can you judge a trail’s edge when the hood blocks your view? Low-mounted A-pillar lights improve hoodline visibility when you aim them slightly down and outward. That pattern should pick out the fender edge, trail lip, and ground beside your truck, where headlights may miss rocks, logs, or drop-offs hidden by the front overhang.
Keep the fixtures close to the A-pillar to preserve hood clearance as the suspension compresses. When the hood moves, side-mounted beams stay consistent along ruts and ditches. Don’t aim high: hood reflections can wash out nearby detail.
Choose a rigid bracket and verify aim after installation and vibration; misalignment can shift light away from obstacles by the tires. Check the pattern at low speed before tackling uneven terrain.
Beam Beyond the Hood
A-Pillar lights extend your view beyond the hood, revealing side ditches, ruts, and obstacles that headlights can miss.
Aiming outward and slightly forward lets you read terrain along your approach line. On technical trails, that added view helps you judge clearance beside rocks and brush, reducing the risk of scraping the undercarriage or clipping an obstacle as you turn in.
Match the beam to your hood silhouette and the way you enter obstacles; these lights don’t rely on long forward throw. Keep the beam low enough to illuminate terrain, not sky. Too much upward angle wastes light and can send glare back toward you.
Their lower position also limits hood bounce and reflected glare from dust or mud, helping you maintain a clearer view.
Bracket Clearance Checks
Before tightening the brackets, cycle the steering from lock to lock and move the suspension through its travel to check that the lights clear the fenders, windshield frame, and hood. Then assess approach angle: keep the lamp’s lowest outward edge above the arc the front end follows as it compresses, particularly on steep climbs or when the nose dips.
Tuck the housing and harness inboard to reduce snag risk from rocks and branches, but leave the lens clear of the hood line. Raise the hood fully and check its prop or struts; neither they nor hood flex should catch the bracket or wiring.
Before final torque, drive slowly over ruts and inspect for contact marks or changing glare. Those signs can reveal a mount that sits too low, projects too far outward, or points poorly for your terrain. Correct the position, then recheck every movement before securing the hardware and verify stable beam aim.
Wiring Harness Routing
For a reliable ditch-light install, route the harness through factory channels along the door sill or pillar, clear of window tracks, hinges, and sharp edges.
Protect sheet-metal pass-throughs with heat-rated, abrasion-resistant loom or grommets, and secure the harness every six to twelve inches with clips or zip ties to limit vibration. Route enough cable to reach each light without loose loops, while allowing steering and suspension movement.
Keep wiring clear of off-road chafe points where dust and mud can damage insulation. With a relay-based setup, run battery power to the relay along the protected path, and separate the trigger wire from high-current runs to reduce noise and intermittent operation.
Before final tightening, turn the wheel lock-to-lock and flex or simulate suspension travel. Check clearance.
Lens Cleaning and Replacement
Even clear-looking ditch-light lenses can lose output as dust, mud, and road film scatter the beam and increase glare, especially with flood-style lights.
Clean lenses after impacts; inspect for chips, cracks, or pits. Check that seals remain intact, because water entering the housing can fog optics or corrode internal components.
If a lens is badly pitted or yellowed, replace the lens or assembly instead of polishing it. Degraded optics can permanently cut brightness and distort beam shape.
After cleaning or replacement, verify aiming so the outward-angled beam still reaches the ruts and ditches you need to see in low-light off-road conditions.
Loose Mounting Hardware Risks
On rough trails, loose A-pillar mounting hardware can make ditch lights vibrate out of aim, reducing side coverage and creating glare or blind spots for oncoming traffic. Even slight movement can rattle or add wind noise on washboard roads and during suspension articulation. Check your installation and maintenance routine:
- Use the correct brackets and clean contact surfaces before tightening.
- Torque each fastener to the manufacturer’s specification; don’t guess.
- Apply an appropriate locking method, such as threadlocker, where specified.
- Recheck every fastener after your first hard ride, then inspect periodically.
Because these lights point outward toward ditches and ruts, small shifts can redirect their beams toward other drivers. Don’t keep driving with a loose bracket: secure it first; confirm the mount stays stable under vibration.
Compare Beam Patterns at Night
At night, beam pattern matters more than raw brightness: wide ditch-light beams reveal ruts, rocks, and drop-offs beside your tires, while spot or combo beams help you see terrain changes farther down the trail.
Use the pattern to match the hazard and your speed:
- Aim flood beams outward to light trail edges and ground just ahead, where headlights leave gaps.
- At A-pillars, verify the beam reaches beside each tire; this close coverage helps expose drop-offs, ruts, and concealed rocks.
- Choose combo or spot/flood reach when you need earlier warning of distant terrain changes.
- Lower, outward aiming can also limit hood-dust glare; adjust beams safely, then recheck alignment.
Slow down when visibility shrinks, and avoid outrunning the beam you’ve selected on uneven ground at night.
Conclusion
Ditch lights earn their place when you can’t see trail-edge hazards clearly beyond your headlights, especially on narrow or winding routes. Choose flood, spot, or combo beams to match terrain, and aim them without glare or hood obstruction. Keep controls independent, route wiring away from heat and abrasion, and inspect lenses and mounts before each trip.
Secure hardware matters; loose lights can shift and distract you. Test patterns safely at night before relying on them.