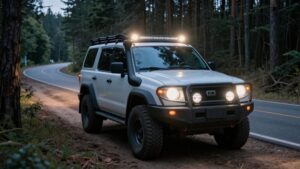
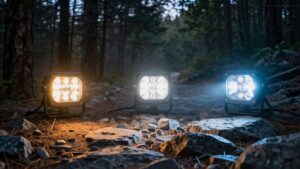
Driving Beam vs Spot Beam Off-Road Lights: Reach vs Road Coverage
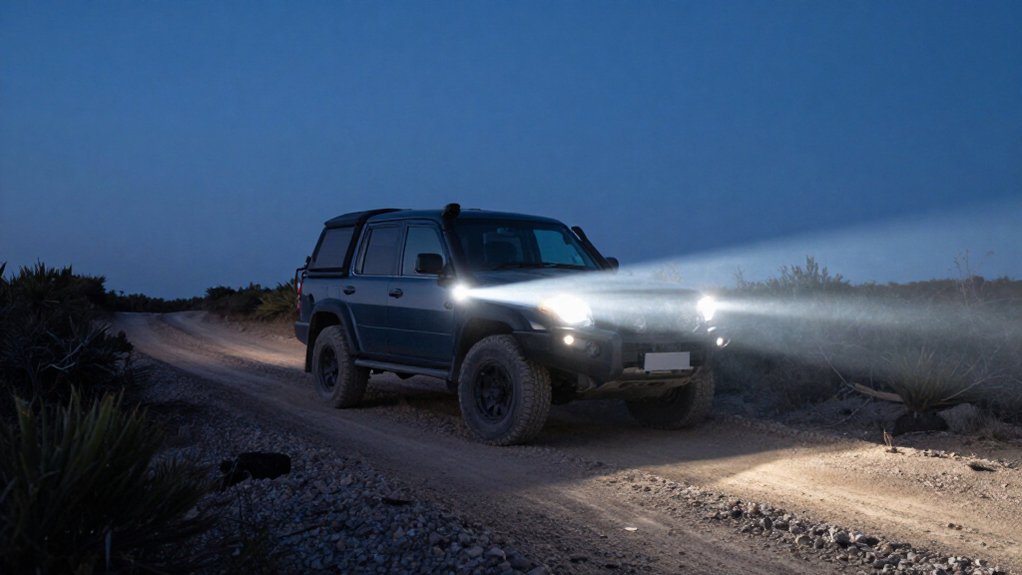
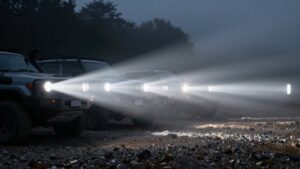
Choose a spot beam when you need long forward reach on open roads; it concentrates light to reveal wildlife, washouts, and signs sooner.
A driving beam spreads usable light wider, helping you follow lane edges and track changing terrain without giving up as much reach.
On tight trails or switchbacks, add flood coverage for nearby rocks and trees.
Aim lamps below the horizon to limit glare.
More practical guidance can help refine your choice.
Beam Shape and Coverage
Beam shape determines where your light reaches, not just how bright it appears. Choose based on your speed, terrain, and need to detect hazards safely. A Spot beam concentrates light for longer reach, helping you identify terrain changes, wildlife, and obstacles farther ahead. Its narrower coverage leaves less nearby side illumination, which can limit awareness on tight, slow trails.
A Driving beam balances mid-to-long visibility with greater width, supporting lane or track following across general off-road routes.
| Beam | Best use |
|---|---|
| Spot | Open, faster sightlines |
| Driving | Wider route coverage |
For mixed terrain, a Combo pattern can pair Spot and Flood, giving you distant definition and near-field visibility. Match coverage to conditions; don’t assume greater brightness alone improves hazard detection during route selection.
Beam Optics and Angles
Beyond choosing spot, driving, or combo coverage, consider how each optic distributes light by angle. Spot optics concentrate intensity for distant obstacles; flood optics widen near-field and side coverage. Your choice trades reach for usable peripheral vision.
Combo bars can pair an 8° center spot with roughly 90° side flood, creating long throw and broad illumination.
- Aim the housing so its narrow beam reaches the obstacle zone; too high wastes throw and may cause glare, while too low makes light fall short.
- Compare beam patterns, not just raw output: optics place luminous intensity in selected regions.
- Equal-output lamps can so perform differently.
- In fog or rain, keep light lower and wider to illuminate nearby road surface directly and limit upward glare.
Oncoming Traffic Glare Control
When you use a spot beam, its concentrated long-throw light can glare into oncoming drivers’ eyes if it’s aimed even slightly too high. Its narrow pattern concentrates intensity, so slight vertical error can put peak output at eye level. Mount lights carefully and aim them so the hottest part of the beam stays below the horizon line.
Driving patterns spread light more broadly across the road, reducing peak intensity that can cause harsh glare. In rain, fog, or snow, suspended particles scatter concentrated light and can make a poorly aimed spot feel brighter to approaching drivers.
If you need spot reach, prioritize precise vertical aiming; consider a driving or combo pattern to balance far visibility with safer coverage for other road users and nearby traffic.
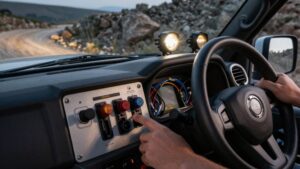
Beam Switching Convenience
For changing trail conditions, match each beam to the task: use Spot for long-distance obstacle or wildlife awareness on open stretches, then switch to Flood, Driving, or Combo for nearby trail edges, trees, or recovery work.
A Combo bar, often pairing 8° spot with 90° flood, can reduce toggling across mixed terrain. For separate pods, assign Spot to forward throw and Flood to near-field width; select distance-first or area-first visibility without changing aim or posture.
- On open stretches, use Spot to identify hazards sooner.
- On tight, slow trails, widen coverage for edges and traction cues.
- At recovery zones, choose broad light to inspect nearby obstacles.
- Choose Combo for one-command simplicity; separate beams offer finer control.
Prioritize visibility suited to speed, terrain, and task consistently.
Auxiliary Wiring Requirements
Wire each auxiliary light to suit its beam and load: spot lights typically use a forward circuit for long-range reach, while driving or flood lights use a circuit for wider coverage. Use a 12-volt relay harness so your switch carries low current while the relay supplies battery current. Select wire, commonly 10–14 AWG, for lamp draw and run length.
Check rated amperage and size the fuse accordingly; place it close to the battery. Make a clean chassis or ground-stud connection, adding a dedicated ground wire if needed. Route wiring away from heat and moving parts to prevent damage and voltage drop that can dim output. For separate spot and driving lights, use separate relays and switch outputs to control reach and wider coverage independently.
Mud Buildup on Lenses
Mud, dust, and water splatter scatter and absorb light, reducing effective intensity and distorting the beam pattern: spot lights lose reach, while flood beams become less crisp. Lens condition matters as much as beam choice. A dried-mud coating creates more glare and light loss than a clean, wet lens; rough deposits break up light before it exits the housing.
Check and clean this way:
- Inspect low-mounted fog or flood lights often; road spray and thrown mud foul them faster than higher-forward mounts.
- Rinse grit away before wiping; dry rubbing can scratch and permanently haze the lens.
- Use a microfiber cloth after rinsing to preserve clarity and output closer to rated performance.
- Before rides, check Combo beam areas to preserve center throw and peripheral spread.
Thermal Load at Low Speeds
Clean lenses preserve beam output, but low-speed operation creates a separate challenge: heat. When you crawl, stop, or tackle terrain, your LEDs still switch on and off, while reduced airflow removes less heat. That can raise stress at the LED die and driver.
A spot beam may run longer at power to offset its narrower illumination, increasing temperatures in the optic housing and heat sink without fast-moving air for cooling. Wider driving or flood patterns can cover close and mid-range ground with fewer repositioning cycles, reducing high-heat restarts.
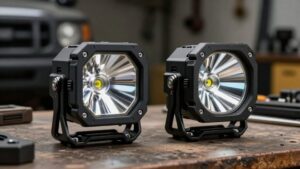
Low bumper or grille pods face risk: dust and mud can restrict convection and trap heat behind the housing. Choose quality pods with aluminum heat sinks, and check temperature ratings; thermal protection may dim hot lights.
Tradeoffs on Narrow Trails
On narrow trails, a Spot beam gives you long forward reach but limited light on rocks, trees, and recovery areas beside your vehicle. That tunnel vision can delay hazard detection at low speeds.
A Driving beam spreads more usable light across the trail, helping you track its edges without sacrificing as much forward reach.
Spot Beam Tunnel Vision
Although a Spot beam helps you identify terrain changes farther down the trail, its tight column leaves nearby trees, rocks, and trail edges with limited light. On low-speed technical paths, that narrow spread can hide hazards beside your vehicle, creating “dark-side” surprises when you turn or correct your line.
- You may spot a distant ledge early, yet miss a rock beside your tire.
- In tight vegetation, high mounting can intensify glare and flatten edge contrast.
- A bright center can make the sparse foreground seem safer than it is.
- Don’t rely on a Spot alone when slow turns demand peripheral awareness.
For switchbacks, pair it with a Combo or Flood pattern to illuminate nearby boundaries and reduce uncertainty before you commit to each maneuver safely.
Driving Beam Trail Coverage
When a narrow trail demands slow, precise steering, a Driving beam’s mid-range spread illuminates more of the lane and its edges than a Spot beam, helping you spot nearby rocks, roots, and branches without relying on guesswork. That broader footprint helps you judge the trail edge and obstacles near the hood before a tight turn. You can adjust your line with less uncertainty because the beam covers more of the lane width.
A Spot beam reaches farther, but its narrow pattern may leave nearby hazards in shadow on turns. At slow speeds through technical sections, that wider view can improve control more than extra distance. Keep speed low enough to stop within the illuminated area, and confirm your lights don’t replace careful scanning or safe trail speed.
Rural Highways vs Switchbacks
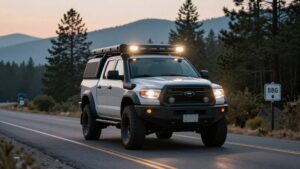
On rural highways, a Spot beam extends your forward reach so you can detect hazards sooner along long sightlines. On switchbacks, a wider Driving, Flood, or Combo beam helps you track road edges and obstacles near your vehicle through each turn.
Choose the beam for the terrain: Spot for distant hazards, wider coverage for cornering, or Combo for mixed routes.
Rural Highway Reach
At higher speeds on rural highways and backroads, a Spot beam’s concentrated pattern reaches farther downrange, helping you identify wildlife, washouts, fence lines, and terrain changes early enough to react. That distance gives you more time to assess a hazard, reduce speed, and choose a safe response; it doesn’t guarantee a clear path. Aim the beam correctly and keep your lighting setup compliant with local rules.
Use this quick check before choosing your pattern:
- On open, straight stretches, prioritize forward reach.
- For wildlife or washouts, Spot helps reveal details at distance.
- Fence lines and large rocks become visible sooner, supporting earlier decisions.
- On mixed routes, a Combo setup can pair centered Spot reach with wider near-field coverage.
Adjust speed to your available sight distance.
Switchback Cornering
Far-reaching Spot beams help you spot hazards before a rural switchback, but a narrow, forward-focused pattern can leave the inside line and near-side trail edges underlit as you turn. At higher speeds, that reach can reveal terrain changes farther around the bend, giving you more time to adjust before you reach its blind portion.
Yet when you steer through a tight turn, the beam may stay centered ahead rather than cover the approaching road width. A Driving pattern spreads light farther across the approach while retaining forward reach, helping you read the curve without sacrificing decision distance.
At low speed, Flood or Combo coverage can illuminate the foreground and trail edges as your steering angle changes. Aim each pod with the turn in mind; excessive central aim can leave the inside line dark. Match visibility to speed, steering, and road geometry, and slow down whenever the illuminated view doesn’t support a stopping distance.
Terrain-Specific Beam Choice
Because rural highways give you more time to react, a Spot beam’s narrow, concentrated pattern helps you identify distant hazards and terrain changes sooner. On open backroads, prioritize Spot reach; its focused light supports earlier decisions at speed. On tight switchbacks, your decision distance shrinks, so near- and mid-field visibility matters more.
- Choose Spot on straight rural stretches to reveal hazards well ahead, without mistaking reach for permission to drive faster.
- Choose Flood on slow, tight curves to illuminate trail edges, trees, and rocks beside your vehicle.
- Choose Combo when terrain mixes bends and close obstacles; an 8° Spot + 90° Flood pattern pairs forward reach with peripheral coverage.
- Choose Driving when conditions change often; its balanced reach and spread suit moderate terrain well.
Prioritizing Reflective Sign Detection
For reflective sign detection, a spot beam’s narrow, high-aimed pattern can reveal distant signs earlier, giving you more time to react. A spot beam concentrates output down the trail, so you can identify reflective surfaces before reaching them and adjust speed or line safely. Its limited width, however, may leave signs near the vehicle or offset from your sightline less visible.
A driving beam balances mid-range reach with a broader spread, helping you detect nearby signs across more of the roadway. Choose based on sign distance and position: spot prioritizes far-ahead warning time; driving improves peripheral coverage. Flood beams usually offer less read-ahead because their shorter throw favors nearby edges and obstacles.
In mixed conditions, combine spot and flood lighting to improve distant detection and near-field legibility without changing lamps, while also maintaining awareness of nearby obstacles.
Conclusion
Choose a driving beam when you need long-range reach on rural roads; a spot beam spreads more light across nearby trail edges and switchbacks. Match the optic to your speed, terrain, and mounting height, then verify cutoff and glare control before driving near others.
Use switches you can reach without looking away, and size wiring and thermal capacity for sustained low-speed use. Aim lights carefully, confirm sign visibility, and slow down whenever visibility falls further.