How to Install a Tailgate Light Bar: Brake, Turn and Reverse Wiring
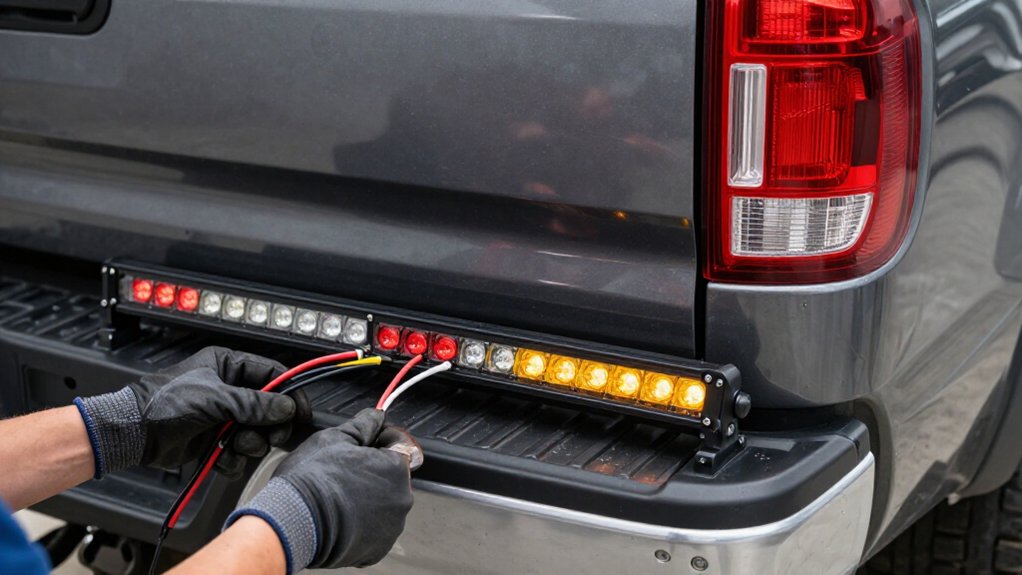
Identify each trailer-connector circuit with a test light or multimeter; don’t rely on wire color alone.
Park, remove the key, disconnect the negative battery terminal, and isolate the cable.
Connect the bar’s ground, brake, left-turn, and right-turn inputs through the adapter, then tap the verified reverse-positive and running-light wires as required.
Clean and dry the mounting surface, position the bar, and check clearance.
Seal every splice, restore power, and test functions.
More checks follow.
Wiring Connector Identification
Before tapping into the tailgate light bar wiring, identify each circuit at the vehicle’s stock trailer-light connector near the tow hitch. Plug the included connector into the stock connector to identify which wire controls each function.
Typically, white is ground; identify brake, left-turn, and right-turn positive wires rather than relying on color alone. Check brake and turn outputs with a test light or multimeter.
For reverse, locate the reverse-light positive, verify it becomes positive only in reverse, then use a T-tap to connect it to the bar’s reverse input. This makes the strip illuminate only when reversing.
If your adapter uses an opposite configuration, follow the kit’s guidance: +— and -+++ layouts can swap control roles, so connect each circuit to its designated input.
Disconnect the Negative Battery Terminal
To reduce the risk of shorts while tapping brake, turn, and reverse circuits, disconnect the battery’s negative (−) terminal first. Keep it disconnected until every brake, turn, and reverse connection is complete and you’ve checked that the wiring won’t snag or pinch. Even with a plug-and-play trailer connector, tail-light access puts you near powered circuits. Disconnect before opening a chassis-harness connector near the hitch.
- Remove the key and switch off accessories before disconnecting the negative terminal.
- Isolate the cable so it can’t spring back onto the battery post.
- Treat each tapped wire as live; don’t rely on the disconnected battery to identify circuits.
- Reconnect only after you’ve finished routing and verified polarity for brake, left/right signals, and reverse.
Then restore power and test each function.
Step 1: Clean Mounting Surface
Start with a clean mounting area: scrub the trunk or tailgate with soap and water to remove road grime, then dry it completely. Road film can prevent the adhesive or bracket base from bonding securely. Once the surface is dry, wipe the normally dirty mounting zone with an alcohol wipe, if supplied, or a clean cloth dampened with suitable alcohol.
Remove wax, polish, oil, and residue; continue wiping with a fresh section until the cloth comes away clean. Don’t use a cleaner that leaves a protective coating, and follow the light bar maker’s instructions for compatible surfaces and solvents. Plan alignment and temporary marks before final cleaning. Keep the surface free of dust and moisture, and let it dry; don’t mount over damp spots.
Step 2: Position the Light Bar
With the mounting area clean and dry, straighten the LED strip and measure both it and the tailgate. Calculate each side gap by subtracting the strip length from the tailgate length, then dividing the difference by two. Leave that measured space at both ends; don’t estimate by eye.
Hold the bar between the tailgate and surrounding sheet metal for a dry fit. Check that it sits flat, remains aligned, and keeps the calculated gaps. Adjust it before marking the position.
Mark the location temporarily with adhesive, but don’t rely on adhesive alone for exterior retention. Install the brackets in the same marked position, following the product instructions. Keep the bar clear of edges and verify the tailgate can open and close without contact.
Step 3: Connect Brake, Turn, and Reverse Wires
Once the light bar is positioned, connect its brake and turn inputs through the included trailer connector, matching ground, brake-positive, left-signal-positive, and right-signal-positive wires to the factory connector near the hitch.
Disconnect the negative battery terminal and consult the wiring diagram. Locate the reverse lamp; you may need to remove one tail light. Use a T-tap to connect the bar’s reverse input to the lamp’s positive wire.
Confirm brake triggers stop, left and right signals trigger their indicators, and reverse activates backup lighting.
If connector or hitch wiring has opposite +— versus -+++ polarity, use the hardwire method to match circuits. If the bar stays dark, check the fuse box for a blown fuse and verify tapped-circuit polarity before carefully rechecking all wiring connections.
Step 4: Tap the Running-Light Circuit
Before tapping the running-light circuit, disconnect the negative battery terminal and use a test light to identify the truck harness wire that powers the trailer tail lights.
Confirm the wire with the test light before connecting; don’t rely on insulation color alone. Use the supplied T-tap or equivalent to branch the circuit and route it to the bar’s running/brake control input.
Check running-light polarity matches the kit’s expected +— adapter setup; reversed wiring can cause incorrect operation. For reliability outdoors, solder the splice and seal it with heat-shrink tubing; electrical tape alone isn’t as secure.
Secure the wiring, reconnect the battery, and test that the bar turns on and off with running lights before proceeding to brake, turn, and reverse wiring.
Step 5: Check Tailgate Clearance
Check tailgate clearance before mounting the light bar: measure the gap between the tailgate edge and bumper or trim across the full width, then place the bar in position and slowly close the tailgate to verify consistent clearance on both sides.
Confirm that the bar’s thickness and any bracket or adhesive profile clear surrounding sheet metal when the tailgate is fully closed and latched. Keep the bar centered and level, with enough clearance to accommodate slight tailgate flex without contact. Inspect the gap along the entire width; uneven spacing means you’ll need to adjust the position. If the bar touches the bumper, trim, or body, reopen the tailgate and adjust its mounting height or position before wiring the brake, turn, and reverse connections.
Step 6: Grease Connector Seals
With tailgate clearance confirmed, seal every brake, turn, and reverse splice with the grease-proof connector seal specified for your kit. After you make each wire connection, fully seat the seal over the junction before you close or seal the surrounding harness area; this prevents gaps.
If your kit calls for a seal over a soldered, heat-shrunk joint, install it there as well. The heat-shrink provides electrical insulation, while the grease seal helps block moisture and corrosion.
Route sealed joints clear of moving parts and sharp edges so abrasion won’t split the seal. Periodically inspect the tailgate harness for loose connectors, exposed wire, or seal cracking and separation. Reseal any damaged junction before moisture or road grime can reach wire insulation or the connectors.
Test Hazard-Light Synchronization
Once the connections are secure, turn on the hazard lights and confirm the bar’s left and right turn segments flash in sync with their corresponding signals before connecting the reverse-light tap.
Have someone activate each turn signal while you watch the bar. Verify the matching side LED segments illuminate only when that signal is active. With hazards still flashing, press the brake pedal. The brake LEDs should turn on without interrupting the turn-segment flash pattern.
If a side misflashes, inspect the trailer-harness left and right signal wires against the kit’s plug mapping. Retest after correcting any mismatch. If synchronization still fails, use a test light at harness connection points to verify 12V flashing on the correct turn circuit while hazards or signals are engaged.
Diagnose Dim Reverse LEDs
If the reverse LEDs look dim, first verify that the tail-light tap is on the true reverse-positive wire and delivers the correct polarity and full 12 V when the vehicle is in Reverse. Use a multimeter or test light at the tail-light output in Reverse; confirm the bar’s positive lead receives full 12 V. Inspect each connection: replace brittle scotch-style taps, then seat and tightly crimp or solder the splice; seal it with heat-shrink. Check related reverse-circuit fuses and compare the bar’s brightness with your other lamps. If a trailer adapter uses reversed polarity, hardwire to the stock harness.
| Check | Expected | Action |
|---|---|---|
| Signal | Full 12 V | Test in Reverse |
| Splice | Firm, sealed | Repair tap |
| Adapter | Correct polarity | Hardwire stock |
Keep vehicle securely parked throughout. Use insulated probes.
Inspect Adhesive After Washing
After washing the tailgate area, inspect the adhesive contact path under bright light. Look across the full mounting zone and confirm grime, wax, and residue are gone wherever the light bar’s adhesive will touch metal. Check that the surface is completely dry before you proceed; wet or damp metal can weaken the bond.
Wipe the area with a clean cloth to detect oily spots or streaks. If you see any residue, the surface isn’t ready. Inspect the entire strip path for a uniform, clean finish; patchiness means contamination may remain.
Even dirt in one section can reduce adhesive performance and cause lifting. After inspection, proceed promptly to alcohol cleaning if the product recommends it, before dust settles. Avoid contact while you prepare the bar.
Conclusion
You’ve wired and mounted the tailgate light bar; now verify that the brake, turn, reverse, and hazard signals work in sync. If reverse LEDs look dim, check the connector, ground, and wiring before driving. Reinspect the adhesive after washing, and secure any loose sections.
Keep the negative battery terminal disconnected while correcting wiring, then reconnect it and retest every function. If you can’t confirm safe operation, don’t drive; have a qualified technician inspect the installation.