What Gauge Wire for an LED Light Bar? Sizing by Amps and Run Length
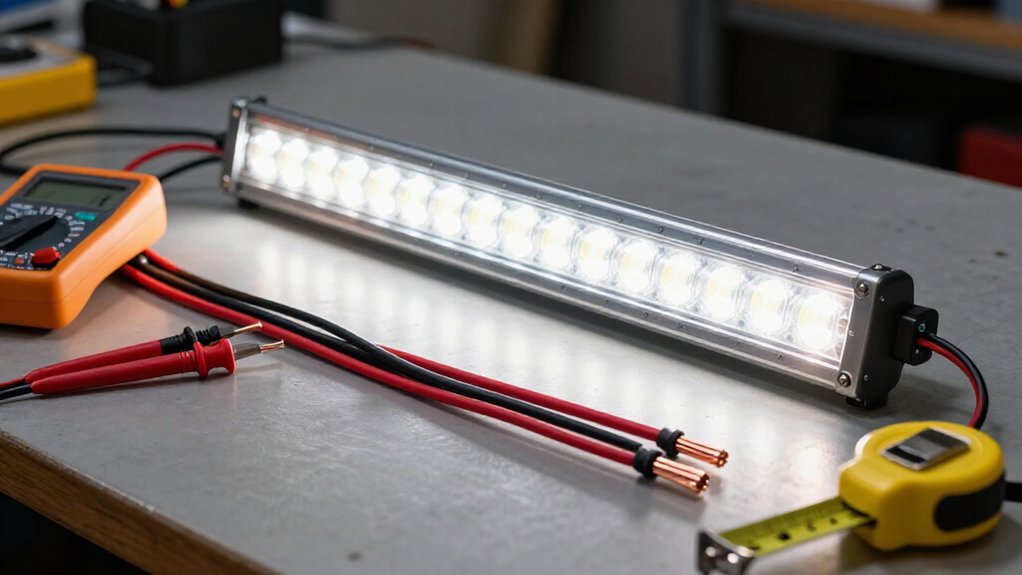
Choose your LED light bar’s wire gauge by calculating current: watts ÷ volts = amps.
Match that current to round-trip cable length, double the one-way distance, to keep voltage drop below 3% (0.36V at 12V; 0.72V at 24V).
If load or distance falls between chart entries, choose heavier gauge.
Copper outperforms aluminum or CCA at equal gauge.
Place a fuse near the battery, sized to protect installed wire.
Further sizing checks help you avoid dimming.
12V/24V Wire Chart
To use a 12V/24V wire chart, first calculate current with amps = watts ÷ volts, then select the chart’s wire gauge for that current and the round-trip run length—the distance along both the positive and negative wires. For a given wattage, a 12V system draws about twice the current of a 24V system, so the chart will typically call for a heavier wire (lower AWG) at the same run length.
Match the calculated amps and round-trip feet to the chart; don’t use one-way distance. If your values fall between entries, choose the higher amp or longer-distance selection, which specifies the heavier gauge. Keep voltage drop below about 3%—0.36V at 12V or 0.72V at 24V—when using its maximum-length recommendations; greater drop can dim the light bar.
Voltage-Drop Sizing Chart
A voltage-drop sizing chart refines the 12V/24V wire chart by matching circuit current to total round-trip wire length. Use the 3% rule: limit drop to 0.36V on 12V systems or 0.72V on 24V systems; choose AWG that keeps your feed below that ceiling. Estimate current with Amps = Watts ÷ Volts, then match its row to total round-trip length: multiply one-way distance by two.
| Supply | 3% maximum drop |
|---|---|
| 12V | 0.36V |
| 24V | 0.72V |
If length falls between chart values, choose the larger gauge (smaller AWG number) to reduce drop and prevent dimming. For long 12V runs, 15–30+ feet one-way, start at 14 AWG; higher wattage or distance may require 12 or 10 AWG. At 24V, you can step down one AWG size for similar distances, but verify chart limits.
Amps, Watts, and Length
Size the wire for current and total circuit length: divide the light bar’s watts by its supply voltage to find amps, then count both the outgoing and return conductors.
For example, a 72W bar at 12V draws 6A (72 ÷ 12); a 180W bar at 12V draws 15A. Higher current creates more voltage drop over the same distance, which can dim the bar, so use both amperage and round-trip length when consulting a sizing chart.
If the bar sits 15 feet from the source, plan for about 30 feet of conductor: 15 feet out and 15 feet back. Select a gauge rated for the load across that full run, not just the one-way spacing. When your estimate falls between chart entries, choose the higher-amperage or longer-length case and round up to the safer option. Verify the circuit’s expected load before installation; undersized wiring can cause excessive drop and overheating. Measure the complete path before you finalize the circuit’s wire size.
Copper Versus Aluminum Conductors
Copper’s lower resistance limits voltage drop and terminal heating compared with aluminum at the same gauge, which helps keep your LED light bar bright under load. If you choose aluminum or CCA, upsize the wire to meet your amperage and voltage-drop targets, and use compatible, corrosion-resistant terminals and crimps.
Weigh copper’s conductivity and flexibility against aluminum’s lower weight, then select a conductor rated for your run and installation.
Conductivity Differences
For the same LED load and run length, copper’s lower resistance usually lets you use a smaller gauge or limit voltage drop more effectively than aluminum. Your load current still depends on power and supply voltage: amps equal watts divided by volts. With that same current, aluminum and copper-clad aluminum (CCA) produce greater voltage drop over the same distance because their resistance is higher.
On a 12-volt system, even a few tenths of a volt can noticeably dim an LED bar, especially on a long run. CCA behaves electrically more like aluminum than pure copper, so don’t treat copper-clad strands as solid copper when evaluating a circuit. Aluminum and CCA also demand careful terminations: oxidation and connection resistance can create heat at joints. Use compatible terminals and make secure crimps; a poor connection can become a hot spot, damage insulation, or cause failure. Verify connections remain cool under normal load.
Wire Gauge Adjustments
When you substitute copper-clad aluminum (CCA) for copper, generally choose wire one full AWG size larger than the copper-based recommendation. First, calculate your load with Amps = Watts ÷ Volts, then size the conductor for current and total circuit length. At equal gauge, CCA’s higher resistance increases voltage drop and heat, so treat its printed AWG size as effectively smaller than copper.
For a 12V bar, a 3% drop allows 0.36V; on a long run, undersized CCA can dim output and overheat. Choose the next larger gauge, then verify voltage drop against your target using the circuit length: double the one-way distance to include positive and negative legs. Don’t assume a copper chart protects CCA; confirm the wire’s rating suits the load and installation.
Corrosion and Connections
At outdoor or off-road connections, corrosion can increase resistance, dim an LED bar, or cause premature failure.
For most light bar runs, choose copper conductors; lower resistance limits voltage drop and connection heat. If you must use aluminum or copper-clad aluminum (CCA), step up about one wire gauge to offset higher resistance and preserve performance.
Match the conductor to your connector and crimp system. A copper-to-aluminum joint can promote galvanic corrosion, raising resistance over time. For outdoor or off-road use, select marine- or UV-rated sealed connectors, and add strain relief.
Corrosion at terminals can increase contact resistance, causing dim output or premature failure.
Copper maintains consistent connections under vibration. Aluminum or CCA terminations need correct crimping procedures to prevent loosening and degradation.
Weight and Flexibility
Although CCA is lighter than copper, its higher resistance means you’ll typically need one full gauge size larger to match copper’s current capacity and voltage-drop performance. That weight advantage can help on a vehicle, but don’t treat CCA as a direct copper substitute.
At the same amperage, its added resistance produces more voltage drop and heat, which can stress insulation and reduce light-bar brightness. The risk rises on long runs already near a roughly 3% voltage-drop target, so account for conductor material when evaluating the circuit.
Stranded conductors bend more readily through tight off-road routes; solid conductors can terminate cleanly in simple mechanical connections. If you use stranded wire, secure termination carefully: a poor joint adds resistance and can create localized heating under load.
Choosing the Right Conductor
For an LED light bar, choose copper wire whenever possible: its lower resistance reduces voltage drop and helps maintain brightness on long runs. Size the conductor for both current capacity and voltage drop; don’t select it by amperage alone.
If you must use aluminum, choose a larger conductor than the copper equivalent to carry the same current safely. Copper-clad aluminum (CCA) has higher resistance than copper, increasing voltage drop and heating risk.
Start by calculating current: divide the light bar’s watts by its operating voltage (A = W ÷ V). For CCA, go up at least one full gauge size from the copper-based chart, and verify its ampacity for your installation.
Check voltage drop across the full there-and-back wire distance, targeting about 3% or less. When in doubt, use properly rated copper and protect the circuit with an appropriately sized fuse.
Fuse Placement and Protection
Place an appropriately rated fuse as close as possible to the battery or 12V bus on the positive lead, so it can interrupt a short to chassis before the wire overheats. Calculate the bar’s current draw by dividing wattage by system voltage, then select a fuse near expected operating current, using the manufacturer’s specified margin.
Match fuse rating to installed wire gauge, not just the bar. It must open before the conductor overheats without nuisance-blowing during normal operation. Choose an in-line holder and fuse rated for amperage and under-hood conditions. A long run still needs the same fused positive feed; size wire for voltage drop, while the fuse protects against overcurrent. Keep the ground return sound to prevent resistive heating that may not trip the fuse.
High-Ambient Temperature Derating
A correctly sized fuse protects the feed from overcurrent, but it won’t prevent heat-related damage. High ambient temperatures raise conductor resistance, increasing voltage drop and stressing insulation. If you route the feed through an engine bay or near exhaust, don’t size it using free-air ampacity alone. Apply the ampacity derating factor specified for the wire.
Heat trapped inside loom or bundled sections limits cooling, so that AWG may carry less current. Choose the next heavier gauge when derating puts capacity near your load or voltage-drop target. If your calculation approaches a 3% drop, heat can reduce voltage at the bar and dim its output; consider heavier wire or voltage-injection points. Use wire rated for elevated temperatures and keep it away from heat sources.
Roof-Rack Light Bar Install
Long roof-rack runs can dim an LED bar if the wiring’s undersized. First, calculate current with amps equal to watts divided by volts: a 72-watt bar on 12V draws 6A. Measure the actual battery-to-rack route, then double its one-way length for total conductor distance; a 15-foot run means 30 feet.
Size wire for continuous current and keep voltage drop below about 3%, or 0.36V on a 12V system. For many 3–8A bars on roughly 15–30-foot runs, 14 AWG is a practical baseline; select a larger gauge when your current and total length approach the next tier. If you’re feeding multiple lights or daisy-chaining, sum circuit amps and size the main feed for that total before branching to shorter pigtails. Fuse near battery.
Connector Corrosion and Water Ingress
At each splice, use a fully sealed connector—such as an adhesive heat-shrink butt splice or IP67-rated harness connector—to keep moisture off the copper and contacts. Water can still enter poorly routed joints and trigger corrosion. As corrosion builds, contact resistance rises, creating heat and worsening voltage drop.
Correct wire gauge alone won’t prevent poor performance when a connection degrades. Protect routing as carefully as connector selection:
- Route the lead with a downward drip loop, so water runs away from the connector.
- Place splices and junctions above standing water; keep them clear of wheel wells where splash and pooling are common.
- Avoid joining dissimilar metals, such as bare copper to uncoated aluminum; tin or cover every exposed strand to limit galvanic corrosion.
After installation, perform a pull and continuity check to confirm the joint is secure and electrically intact. Replace corroded connectors; don’t let damaged contacts undermine a correctly sized circuit in service safely.
Warranty and Load Verification
Before installation, verify the light bar’s labeled current draw or wattage; calculate current with I = W ÷ V using your 12V or 24V system, then check the wire gauge against the load and full round-trip run length. Keep voltage drop at or below 3%; excessive loss can dim the bar and may make the installation an issue rather than a product defect.
Check these points:
- Measure the full round-trip path; ignoring return distance can compromise performance and warranty coverage.
- If you choose CCA, go one gauge thicker than copper-chart guidance to limit resistance and heat.
- Match wire capacity to calculated amps, then fit a fuse or breaker rated for the total load; undersizing can overheat wiring or cause repeated trips blamed on user error.
Conclusion
Choose your light-bar wire by current, system voltage, and total circuit length—not wattage alone. Use the voltage-drop chart, count both conductors in the run, and select copper wire rated for the load and installation temperature.
Install a correctly sized fuse close to the battery, protect connections from water and corrosion, and secure roof-rack wiring against abrasion. Before use, verify the bar’s current draw and manufacturer requirements; if you’re unsure, consult a qualified automotive electrician.