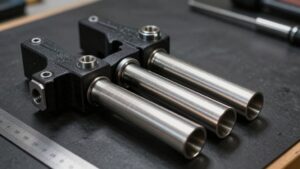
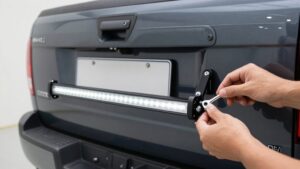
Tube Clamp vs Surface Mount Light Brackets: Grip, Vibration, Fit
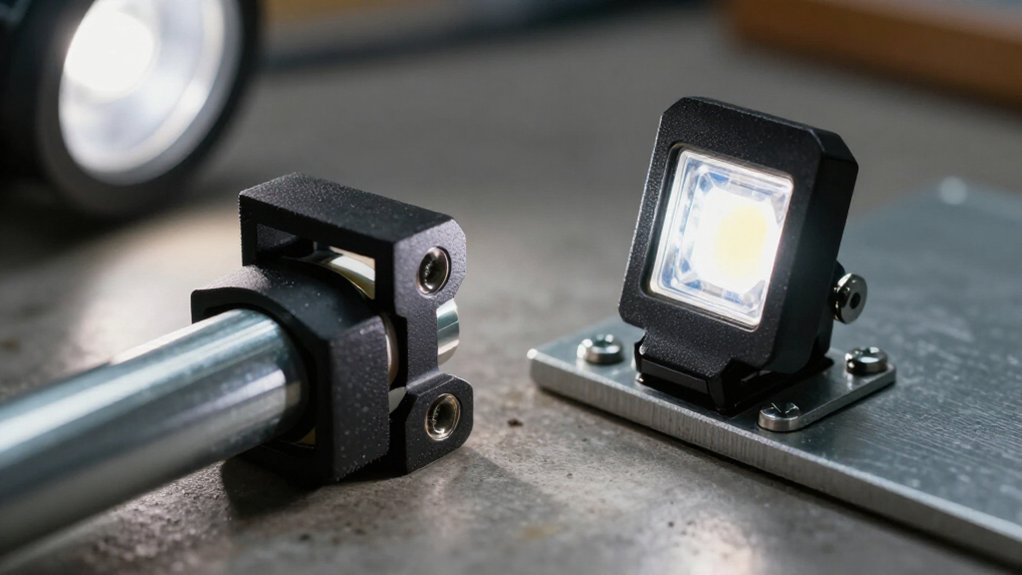
Choose a tube clamp when you have a round tube and can match its outside diameter; choose a surface-mount bracket for a broad, flat structural edge.
Rubber inserts improve grip and damp vibration, but a loose fit or weak pivot lock can allow micro-slip and aim drift.
Measure the tube’s OD, confirm the clamp closes fully with pads installed, then verify load rating.
Test for movement; add a safety cable if needed.
Next, compare fit, pivot range, and finish.
Vibration Resistance and Fit
A tube clamp resists vibration only when its jaw fully seats within the rated tube-size range and its rubber inserts maintain friction against the surface. Match the clamp to your tube’s exact outside diameter and thickness; a jaw stretched past its factory capacity can snap off under repeated impacts.
Rubberized caps preserve grip on smooth metal or PVC, where bare metal may slide; tool-induced micro-vibrations can make a mount shimmy.
| Condition | Likely outcome |
|---|---|
| Secure rubber contact | Reduced micro-slip |
| Loose or overstretched fit | Rotation, lift-off, sudden failure |
Even a correct grip can loosen over time. If your tube matches a channel profile, such as 1-5/8-inch Unistrut, that fit limits movement.
Add a safety cable or bungee to prevent rotation or lift-off and protect nearby people and equipment too.
Tube Clamp and Bracket Designs
Beyond vibration resistance and fit, the mounting design determines where you can install and aim the light.
A tube clamp uses a no-drill jaw that closes around a specific tube diameter. Check the listed capacity: common sizes include 1.38, 1.5, 1.57, 1.77, and 1.97 inches, and match it to your tube. Many commercial models grip roughly 1.5–2 inches; forcing a larger tube can overextend the jaw and cause sudden snap-off. Rubber inserts protect the surface and add friction, while a multi-angle pivot lets you direct the beam.
A surface bracket suits a flat overhead or structural edge, such as a 2×4 underside or stable shelving lip. Its broad, consistent contact depends on solid anchoring; you’ll get a fixed beam orientation determined by the fastening position.
Clamp Slip Under Vibration
Vibration can make a tube clamp walk out of alignment when its grip exceeds the rated capacity or smooth contact surfaces let the jaws micro-slide. Bare metal and PVC offer friction, so tool forces can produce shimmy. Fit rubberized jaw caps or cushioned inserts to raise friction and damp vibration.
Even a sized clamp can loosen if you rely on spring pressure without a mechanical lock, especially during use near lathes, miter saws, or sanders. Don’t overextend the jaws: many commercial models top out near two inches, and excess reach lets material flex, risking snap-off or lost clamping force. Add a bungee or safety cable between the fixture base and an anchor point. It can keep minor clamp travel from becoming full detachment.
One-Handed Installation Steps
To install the bracket one-handed, match its size to the tube diameter, such as 1.38, 1.5, 1.57, 1.77, or 1.97 inches, so the jaws engage fully without overextending.
With tool-free hardware, rotate the sure-grip base against the tube, or slide it into position, then snap it with the jaws centered on the load surface. On smooth painted metal or PVC, confirm the rubber inserts or caps are seated; they help resist slipping and pivoting under vibration.
Press the light’s base into the clamp jaws until it bottoms out. Test the pivot head’s aiming range without loosening the clamp. Before you release the fixture, secure cable slack and, for vibration-prone installations, attach a secondary bungee or safety cable from the fixture base to an anchor point.
Tube Diameter Clearance
Tube-clamp fit depends on the tube’s outside diameter (OD), not its inside diameter; measure the OD before buying, since even small differences can leave the clamp loose or prevent full closure. Compare your measured OD with the stated clearance range; the STDYSUN ZJ-D accepts 1.38-, 1.5-, 1.57-, 1.77-, or 1.97-inch tubes. Don’t assume nearby sizes will seat correctly.
Seat the tube fully in the jaw and confirm it closes completely, allowing the spring or lock to engage across the contact surface rather than catch only an edge. Near the range’s upper limit, fit specified rubber inserts to add friction and resist vibration-driven sliding. Verify grip-width capacity: many clamps top out around 1.5–2 inches. Include pad or cushion thickness in your calculation under load, since it can push the assembly beyond the clamp’s available opening.
Replacement Part Availability
After confirming tube diameter and clamp closure, check replacement-part availability before choosing a bracket.
Check each listing against your exact model and jaw or tube range; sizes such as 1.38, 1.5, 1.57, 1.77, and 1.97 inches aren’t interchangeable. Determine whether sellers offer components separately, including bases, rubber inserts or liners, pivot parts, and cushion pads.
Since worn inserts impair tube clamp grip, their availability can extend service life without replacing the assembly.
For strut-mounted systems, verify that replacement cushions and clamps are identified for strut mounting and fit your channel, such as Unistrut 1-5/8-inch. Check elastomer ratings against your operating range; many designs specify -50°F to 275°F (-45°C to 135°C).
If surface-mount replacements aren’t listed, favor systems with component availability and support for exact parts.
Finish Coating Compatibility
Match the bracket’s coating and body material to the mounting surface and operating environment. For carbon-steel brackets, choose zinc plating or hot-dip galvanizing where corrosion resistance matters. Stainless steel, especially 304 or 316, better withstands moisture and harsh chemicals.
Check local temperature and humidity, since heat and moisture can change coating performance.
For tube clamps, verify that rubber or TPE grip pads tolerate oils and industrial cleaners; incompatible chemicals can degrade elastomers over time. When you mate dissimilar metals, insulated or cushioned inserts reduce metal-to-metal contact and help limit galvanic corrosion.
On painted or powder-coated surfaces, keep rubber inserts intact to prevent abrasion that exposes bare metal. These checks help you select a finish suited to actual service conditions without compromising the mounting surface.
Mounting-Style Load Limits
Check the fixture’s weight and holding-force requirements against the bracket’s rated capacity and anchor condition. Tube clamps typically grip 1.5–2 inches; exceeding that range or clamping smooth surfaces without intact grip pads can cause slippage or failure.
In vibration, even a tight clamp can shift over time, while a surface mount into sound structural material may resist loosening more reliably.
Grip and Weight Limits
Because tube clamps rely on a fixed jaw range, you must match the clamp to the tube diameter and fixture weight: common commercial clamps grip roughly 1.5–2 inches, and forcing a jaw beyond its rated width can cause sudden failure, especially under vibration.
For a tube-mounted setup, assess the load path: a heavier fixture needs a sturdier tube or structure and jaw engagement; don’t assume a clamp’s fit establishes capacity. Lightweight aluminum or plastic LED fixtures place less demand on the grip, so a smaller clamp may be suitable when its rated range matches the tube. Surface-mounted brackets distribute force across an area, but you must still compare fixture weight with the bracket’s rated holding capacity. Add a safety cable as secondary retention.
Vibration and Load Stability
When tool-generated vibration is present, a bracket’s grip and its attachment surface both affect load stability.
Tube clamps with rubberized inserts can reduce vibration transfer; surface-mount brackets need equally grippy pads to resist micro-movement. You should fully engage a clamp on a sound structural member, such as a 2×4’s bottom edge, and avoid weak wood or smooth surfaces.
- Don’t exceed the clamp’s rated grip; overextension can trigger sudden failure or snap-off.
- Add a short bungee or safety cable between the fixture base and an anchor; primary clamps can loosen over time.
- Match fixture weight and leverage to the mounting style; heavier lights need stiffer points, such as solid framing.
- Check for shifting under vibration; movement can progress to a fixture crash. Inspect connections before each use.
Adjustability for Angled Lighting
Choose a tube clamp or surface-mount bracket with a multi-angle pivot to direct the beam at your target without loosening the mount. Check that the clamp fits your tube and locks securely under vibration; rubber grip pads can reduce angle drift.
Adjust beam direction for the required task or ambient lighting, then recheck the aim after the first minute of use.
Pivot Range and Reach
A multi-angle pivot lets a tube-clamp light mount such as the STDYSUN ZJ-D direct an LED, HID, or halogen beam at different elevations without drilling or modifying the vehicle. Use the pivot to match beam direction to the task and available reach. For close work, aim directly at the target; for ambient lighting, angle the beam toward a wall or ceiling.
Your selected elevation changes glare and usable spread, so keep the fixture clear of reflective metal or glass surfaces to limit eye fatigue. Before aiming, check that the clamp matches your tube: 1.38″, 1.5″, 1.57″, 1.77″, or 1.97″ diameter.
- Aim the beam directly at your task.
- Redirect the beam for ambient spread.
- Check clearance from reflective surfaces.
- Fit included rubber inserts at the clamp.
Angle Locking Stability
Secure the angle-lock pivot firmly to keep vibration and tool-induced shocks from shifting the beam. Check that the lock fully clamps at your selected angle; otherwise, vibration or micro-shocks can cause creep. Engage it without exceeding the bracket’s rated grip thickness, often about 1.5–2 inches of effective jaw capacity.
Over-tightening can trigger snap-off or movement. Use the multi-angle pivot to set task lighting onto the work area or ambient lighting toward a wall or ceiling, then lock it securely. On smooth tubes or painted finishes, verify the rubber inserts are seated and intact to maintain friction and resist slip. After tightening, push the fixture lightly. If the pivot moves visibly, reseat the clamp and relock it before operation, especially where frequent vibration is present.
Beam Direction Adjustments
For precise beam direction, use a tube or surface bracket with a multi-angle pivot to aim the light bar or spotlights at a work area, wall, or ceiling. Set the angle before you fully tighten the fastener; the pivot redirects the beam without changing clamp grip thickness.
- Aim task lighting at specific targets; direct light toward a wall or ceiling for a softer ambient glow.
- Check beam distance and glare, especially on reflective surfaces, where slight angle changes can increase backscatter.
- After aiming, verify that rubber inserts and firm tube grip prevent vibration-driven rotation and beam drift.
- Near tools or micro-vibration sources, add a short bungee or safety cable around the fixture base to limit angle creep.
Recheck the setting during routine equipment inspections.
Fastener Corrosion Resistance
In damp or chemically aggressive environments, fastener material and coating largely determine how long tube-clamp and surface-mount brackets resist corrosion.
Choose hardware for exposure and bracket metal. Carbon-steel fasteners may use electro-zinc plating; hot-dip galvanizing provides thicker zinc for outdoor moisture and industrial exposure, slowing rust that can loosen clamps. Electro-galvanized coatings suit milder service but provide less zinc than hot-dip finishes outdoors.
For coastal or highly corrosive conditions, choose stainless: 304 resists general corrosion, while 316 better withstands salt and chlorides. These grades help prevent rust staining and preserve clamping torque. Match fastener material and finish to the bracket—coated steel or stainless—to limit galvanic corrosion when wet. Rubber liners or thermoplastic elastomers reduce metal contact, especially where vibration causes rubbing.
Conclusion
Choose a tube clamp when its diameter matches your bar and its grip resists vibration without crushing the tube. A surface-mount bracket suits a flat, reinforced panel, provided its fasteners and substrate meet the load. Check clearance, coating compatibility, corrosion resistance, and adjustment range before installation.
You’ll reduce movement by tightening hardware to specification and verifying alignment under operating load. Don’t rely on appearance alone; match mounting style to actual conditions and fixture weight first.