A-Pillar vs Hood Hinge Ditch Light Mounts: Which Position Wins?

A-pillar ditch lights win for visibility: their higher, outboard position spreads light along the ditch and reveals ground near your front tires during turns. They reduce hood reflections.
Hood-hinge mounts use existing hardware and sit lower, but can bounce light off the hood and need clearance checks through hood travel. Whichever you choose, aim low toward the ditch, check coverage from the driver’s seat, and test at night before driving.
More on fitment and wiring follows.
Windshield Pillar Light Spread
At the windshield pillar, ditch-light pods can spread illumination farther across the roadside than hood-hinge mounts, helping you see ditches and trail edges near the front wheels. That broader lateral pattern can reveal hazards during tight turns and at intersections, especially beside your front tires. Choose compact, roughly three-inch pods to fit the windshield area, then confirm their brackets allow downward and outward adjustment. Keep beams low; avoid windshield reflections and glare, and inspect coverage from the driver’s seat before travel.
| Check | Practical target |
|---|---|
| Side coverage | Beside front tires |
| Aim | Downward and outward |
| Glare control | Keep beam below windshield |
Recheck after installation on level ground, then test slowly in a safe area; adjust until roadside detail stays visible without dazzling other drivers nearby at night.
A-Pillar vs. Hood Hinge Locations
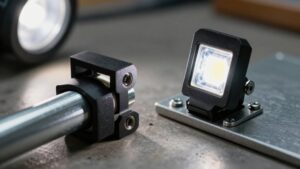
A-pillar and hood-hinge mounts place ditch lights at different points, so their brackets and clearance needs matter. A-pillar brackets attach at factory body or trim points beside the windshield, giving you a stable position to aim light toward trail edges and alongside the front wheels. Vehicle-specific brackets usually align cleanly with the pillar’s shape and bolt locations; universal versions may need extra measuring to set aim accurately.
Hood-hinge mounts sit lower and farther outward, but you must check hood movement and confirm the pod won’t contact the windshield or body panels. Fitment can vary by truck generation and trim, so don’t assume a bracket will transfer between model years. For either location, match the pod’s dimensions and bolt pattern to the bracket, and verify its adjustment range. Tighten fasteners securely and recheck them after driving on rough terrain before each trip.
Hood Glare and Reflections
Mount position also affects what you see from the driver’s seat: hood-hinge ditch lights sit close to the hood, where their beams can bounce off the metal and create glare or windshield reflections.
That reflection may form a windshield band or obscure your view. A-pillar pods often aim outward over the fender, reducing hood bounce versus hinge placement. You still need aiming: level each pod toward the ditch edge, not the glass, to limit backscatter and hot spots.
Hood angles and hinge geometry vary by model year, so the bracket can produce different reflections. Test at night from the driver’s seat, with the hood closed and fully latched. Look for distracting reflection bands and beam spray across the hood; adjust aim or clearance before driving.
Electrical Wiring Route
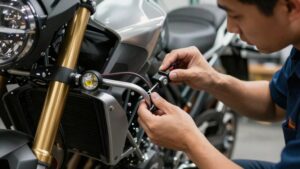
For a reliable ditch-light install, route A-pillar wiring through factory grommets or loom channels, clear of door hinges and window tracks; at the hood hinge, use flexible conduit and a secured service loop so wires flex without snagging. Choose 10–14 AWG wire to suit total current draw, and terminate with sealed connectors to resist water, dust, and vibration.
Secure every section with clips; keep the harness away from exhaust heat and sharp or moving edges, and don’t leave cable hanging. Before final tightening, dry-fit the lights and check full hood travel, closure, windshield clearance, and adjustment so wires won’t bind or obstruct. Protect exposed runs with abrasion-resistant sleeve. Disconnect the battery before connections, then test the lights and inspect for chafing after your first rough drive.
Hood Hinge Bolt Patterns
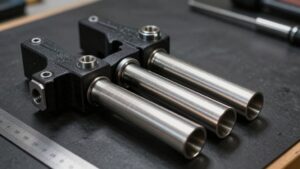
Before ordering hood-hinge ditch-light mounts, verify the bolt spacing and layout for your vehicle’s exact year, make, model, and trim; patterns can change across generations and trims. Most hood-hinge mounts follow the factory fastener pattern, so they attach at existing hinge bolts without drilling the fender or cowl. Many designs sandwich the bracket against the hinge hardware, helping keep the pod rigid and limit alignment drift on rough terrain.
Still, compare the bracket’s stated pattern with your hood’s hardware, including left- or right-side orientation; a reversed fit can mis-aim the beam. If your bracket has an adjustable arm, check its full aiming range with the hood open and closed, confirming it clears the windshield and hood edge. Tighten fasteners to the vehicle maker’s specification.
Test hood operation and light aim before driving, then recheck both after installation for secure fit and safe visibility before driving, especially after the first rough-road trip.
Corrosion Around Mounting Bolts
At the A-pillar, water spray and road grime can collect along the vertical seam and wick into mounting-bolt threads, increasing corrosion risk compared with the more sheltered hood-hinge area.
After washing, inspect bolt heads and the first thread turns for rust creep: orange staining that signals moisture intrusion. Hood-hinge mounts sit in a more sheltered area, but corrosion accelerates without anti-seize or zinc plating.
On reinstallation, use stainless hardware or dielectric-compatible anti-seize to limit galvanic corrosion and thread seizure. Correct damaged paint beneath the bracket and seal contact points to reduce exposed metal. Replace heavily corroded fasteners with suitable hardware and tighten to the maker’s specification. Recheck after wet, salty-road use. Use the specified torque, and verify the mount remains secure during routine maintenance.
Bracket Flex Under Load
Check bracket stiffness under load: A-pillar mounts face upright, side-loaded vibration on washboard roads, while hood-hinge mounts experience movement from hood flex and changing airflow. These loads can shift beam aim even when your pod lights remain attached. Choose rigid, corrosion-resistant brackets with a vehicle-specific interface, and favor designs with short unsupported spans; longer distances between attachment points increase bending moment.
Center each pod’s mass over the bracket’s support area, then use sized hardware and specified bolt torque so loosening won’t amplify flex after repeated impacts. During installation, shake or impact the assembly and watch for movement. Recheck beam aim after your first few off-road drives; early settling signals inadequate stiffness. Correct any movement before relying on the lights, since shifted beams can reduce illumination.
Hood Access Tradeoffs
Before choosing hood-hinge mounts, verify the lights and brackets clear the cowl through the hood’s full opening and closing travel. Make sure they don’t obstruct latch or hinge access during routine service.
Test fitment with the hood moving slowly, and stop if any part binds or contacts the body.
Hood Opening Clearance
When you open the hood, hinge-mounted ditch lights move with it, so confirm the pods clear the windshield and A-pillar through the full arc, not just with the hood closed. Hinge mounts can sit higher and closer to the hood, helping you aim into roadside ditches, but measure pod height and bracket offset from the mounting plane before buying. Check clearance at every point of travel, with a safe margin to nearby body panels; closed-hood fit alone proves little.
A-pillars generally avoid this swing path, keeping light placement consistent as you raise or lower the hood. Near the hinge, leave enough wiring slack for repeated cycles, including on spring-assisted or heavy hoods, so the harness won’t pinch or strain. Also assess aiming range: limited lateral adjustment may restrict light toward tight turns or terrain beside the front wheels. Test the installed setup slowly before relying on it for safe, predictable operation under real conditions.
Latch and Hinge Access
Because hood-hinge lights move with the hood, they can complicate latch and hinge access and may need wire-slack adjustments after installation. Check clearance through hood travel. A closed-hood fit may bind during opening. Route wiring away from pinch points and leave slack, not loose loops.
- With a hood-hinge mount, you may need to revisit the harness or adjust slack after opening and closing the hood; movement can stress wiring.
- An A-pillar mount keeps hardware out of the moving hood area, so latch access stays simpler.
- Check from the driver’s seat that its bracket doesn’t block windshield visibility.
- For tight turns or roadside ditches, hood-hinge geometry can support predictable outward aiming, though A-pillar brackets may need more adjustment.
Trail and Street Driving
On trails, A-pillar lights can reveal ditch lines beside your front tires during off-camber turns.
For street use, hood-hinge lights can throw light farther ahead, but aim them carefully to limit glare for oncoming drivers. You’ll need finer aiming with A-pillar mounts, while compact 3-inch pods fit either position and remain easier to adjust.
Trail Visibility
For mixed trail and street driving, A-pillar mounts often provide better visibility because their higher, outboard position reduces headlight overlap on rutted roads and improves peripheral coverage at turns. You’ll notice the advantage when the road edge disappears into uneven terrain. Use your beam placement to reveal hazards without relying on speed.
- Aim pods toward roadside ditches, keeping the pattern low enough for normal road angles.
- At tight turns, A-pillar lights can extend coverage along your forward sight line.
- Hood-hinge lights illuminate ditch edges well, but may wash across pavement at speed.
- On vibration-prone trails, rigid corrosion-resistant hinge brackets can remain stable; check hood clearance.
Choose the mount that keeps your beam on the shoulder and gives you sight of trail edges.
Street Glare
A-pillar ditch lights usually reduce street glare compared with hood-hinge mounts, since their lower, more outboard position lets you aim compact pods toward trail edges without sending as much light into other drivers’ eyes.
On public roads, that position keeps light near your vehicle’s side line, helping you see ditches and maintain visibility around turns. At tight intersections or bends, A-pillar pods can illuminate ground near your front tires while reducing direct glare toward approaching drivers.
Hood-hinge mounts may cast a wider, higher beam during street driving, increasing reflected glare. If you drive on trails and public roads, A-pillar placement often offers a safer compromise. Keep auxiliary lights off when traffic could be exposed to them, and follow local road rules for their use.
Beam Control
Beam control depends on where each mount places the pods and how you aim them.
- A-pillar mounts sit higher and farther outboard, helping you capture roadside ditch edges quickly on trails and streets.
- On trails, aim A-pillar pods just outside the front tire patch to see around bends and spot ruts.
- Hood-hinge mounts keep light near the centerline, reducing oncoming glare when aimed correctly. They ease downward, outward adjustment to limit hood bounce and driver eye-line glare.
- Park level, then set the cutoff for your speed: slightly higher for faster street driving, lower for tight trails. Recheck aim after changes.
Beam Pattern Recommendations
Choose the beam pattern to match the mount’s position: A-pillar lights generally suit a wide, outward sweep that illuminates ditches and trail edges beside the front tires, while hood-hinge lights work well aimed more forward to improve visibility ahead and still fill in the periphery.
If your pods use a combo or narrow spot beam, place them so the tightest hotspot points slightly outward from center; this keeps you from over-lighting ground directly ahead of the bumper. Use the bracket’s adjustment to set the upper cutoff, preventing glare to oncoming traffic while crossing the trail edge at a useful distance.
Before drilling or tightening, test the beam on a dark surface at night. Fine-tune until light reaches the ditch zone without washing out the road surface.
Conclusion
Choose A-pillar mounts when you need broad side coverage and a proven, stable position; choose hood-hinge mounts when their bolt pattern suits your vehicle and you can control hood glare, wiring, and bracket flex.
Aim lights to limit reflections and avoid dazzling other drivers, then verify the beam on a safe, dark test route. Check fasteners and wiring after installation. Match the beam pattern to your trails, and prioritize street legality, secure mounting, and clear sightlines.