How to Install a License Plate Light Bar Mount (No Drilling Needed)
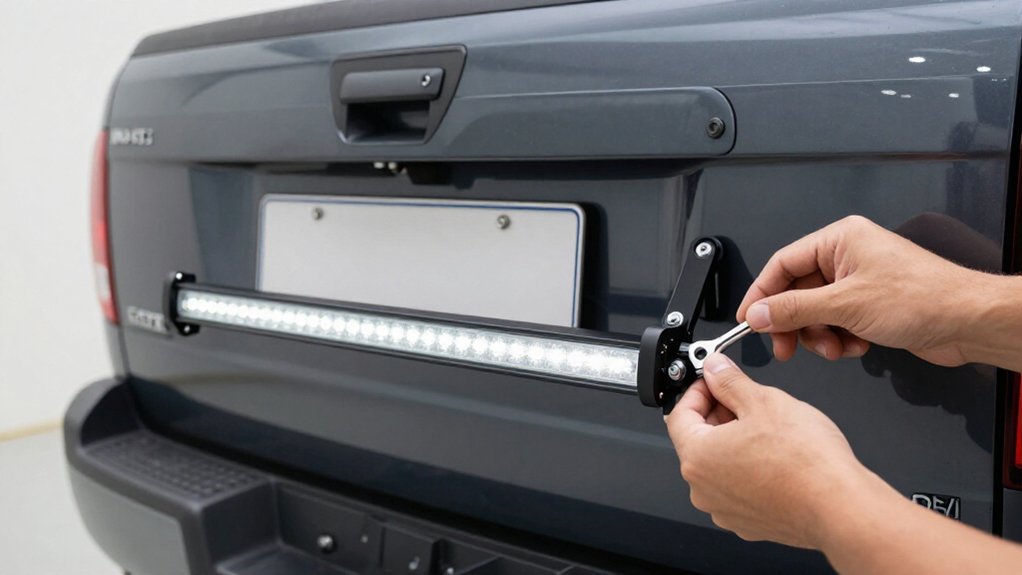
You can install a no-drill light bar by fitting compatible L-brackets through grille openings.
Check that brackets seat without bending mesh or touching the bumper, then secure the stubs with washers and screws.
Mask painted surfaces, attach the bar to the brackets, and tighten locknuts.
Route and secure wiring, keeping the fuse dry.
Clean the lens with microfiber, check hood clearance, and aim the beam at a wall.
Continue for connector protection and alignment tips.
License Plate Mount Fit Check
Before installing the mount, check that your grille has diamond- or oval-shaped mesh openings large enough to accept the L-shaped brackets and let them lift into position without interference. From the front, confirm access to each insertion point without forcing or bending the mesh.
Look behind the grille for clear space; the bracket stubs and plate holder mustn’t touch the bumper or mounting structure. Check both stub locations and verify they align with the holder’s mounting points.
Before tightening, test-fit the brackets and lift them into seated positions. If access is blocked, mesh flexes, or either stub contacts surrounding parts, stop and reassess the fit. Don’t force the brackets or proceed if the setup could shift, damage the grille, or obstruct the plate.
Mounting Hardware Compatibility
Choose a mount compatible with your grille’s diamond- or oval-shaped openings so the L-shaped brackets can insert without drilling. Check that the mesh has enough clearance for the bracket to sit fully before you secure the stub with its large washer. Confirm the stub and plate-holder hardware fit your bumper depth; the plate shouldn’t sit too close.
- Bolt the holder securely to the installed stubs, checking that the fasteners engage fully.
- If a stub is too short, use the included nuts to extend the holder slightly outward and preserve spacing.
- Reinstall your plate; add a frame if it needs extra support.
Before driving, check that the holder and plate stay secure. Make sure the bracket won’t interfere with grille function.
Step 1: Mask the Painted Bumper
Mask the painted bumper before positioning the brackets to prevent scratches during installation. Wash the area with soap and water, then wipe it with isopropyl alcohol so painter’s tape can bond securely. Let the surface dry before applying tape.
Cover the bumper where the L-shaped brackets and stubs will sit, and mask any visible paint beside the grille mesh opening. This protects the finish from hardware and tool contact while you insert the brackets and tighten the stubs. Lay the tape edges neatly, pressing them down firmly, especially along the grille-to-bumper seam, to limit residue and accidental paint transfer. Keep the masked area in place throughout installation.
Afterward, confirm the holder clears the bumper using included nuts and adjustment, then remove the tape carefully.
Step 2: Protect the License Plate Finish
With the bumper protected, clean the grille opening and nearby surfaces so the holder sits flush and doesn’t rub the paint.
Before you secure the setup, dry-fit the stubs and license plate holder. Check that the plate clears the bumper and won’t flex or touch it while you drive. If the gap is too tight, use the kit’s nuts to space the holder slightly outward; repeated vibration can scuff paint and wear the plate’s finish.
Keep the no-drill mesh brackets snugly aligned in the grille opening, and make sure the plate stays supported rather than shifting against the bumper. Once the holder is bolted in place, reinstall the plate. If you’re concerned about bending, add a license plate frame for extra support during driving.
Step 3: Attach Bar to Bracket
Position the L-shaped brackets in the grille mesh so they sit level, then lift each bracket and secure its stub with the large washer and screw, using the supplied tool to set the height. Check that each bracket stays seated in the mesh and doesn’t press against the bumper.
Align the light bar with the stub locations and use the mounting points on top of each bracket. If a stub leaves too little bumper clearance, add the included nuts to extend the mount slightly outward. Then tighten the bar hardware firmly without forcing the brackets out of level.
Gently tug the installed bar to confirm it doesn’t shift. Recheck each screw and washer before driving; loose hardware can allow vibration and movement. Check clearance.
Step 4: Route Wiring Behind Grille
Once the bar is mounted, route its wiring through the grille openings so the harness sits behind the mesh, protected from dirt and road debris. Use bracket and stub points to guide the wire through diamond or oval mesh, clear of the L-shaped bracket during insertion and tightening. Run the harness through gaps behind the grille toward the vehicle’s existing wiring area.
Leave enough slack for normal grille and bumper movement; don’t let the wire pull on the light. Secure it at several points with zip ties or tape, keeping it away from sharp mesh edges that could cause vibration-driven chafing. Briefly power the lights; confirm the harness stays behind the grille, clear of moving or hot parts, before tightening the plate and stubs securely in place.
Step 5: Check Hood Clearance at Full Tilt
Before securing the mount, check hood clearance at full tilt. Position the mount and brackets where the stubs will sit, then raise the hood to its maximum height. Watch the light bar, standoffs, and plate holder throughout the hood’s travel. Keep a gap between each component and the hood or its underside; don’t rely on clearance with the hood partly open.
Check that the stubs and plate-holder position don’t push the bar toward the bumper and reduce clearance at full height. If the stubs seem too short and the holder sits too close to the bumper, use the included nuts to extend it outward, then repeat the test.
Proceed only when nothing contacts or shifts and the mount remains aligned within the grille mesh opening.
Step 6: Tighten Anti-Vibration Locknuts
Secure the included anti-vibration locknuts with the correct-size tool, tightening them evenly so both stubs stay aligned and the bracket remains fully seated in the grille mesh. Repeat the same tightening process on the second stub, matching the first so the holder and light bar remain level. Don’t force a nut past firm contact; keep the bracket seated while you work, and stop if the hardware binds or the mesh shifts. Use steady pressure, and keep fingers clear of pinch points.
If the holder sits too close to the bumper because the stubs are short, add the included nuts to move it slightly outward. Then retighten both locknuts evenly. Before installing the plate, gently tug the holder and light bar. They should feel secure, with no movement. If anything shifts, reseat the bracket and tighten the locknuts again.
Verify Nighttime Beam Aim
After the mount is tight and stays put when gently tugged, check the beam after dark. Park on a flat surface facing a wall or garage door. Turn on the headlights and license plate light bar, then confirm the bar centers light over the plate area.
Compare the beam’s height with the plate’s top edge; it shouldn’t spill into the trunk or hit the bumper.
Check that both sides look even, without a strong left or right skew. This matters especially with a two-stub mount or an adjustable outward position. If the holder sits too close to the bumper, use the included nuts or extensions to adjust its angle until the beam clears the bumper line.
Tighten bolts, then check the aim again. If the mount shifts or the beam moves, correct it before driving.
Preventing Moisture in Connectors
To prevent corrosion and intermittent grounding, connect the wiring only when the connector and contact surfaces are completely dry. Apply dielectric grease inside each connector before mating the plug halves; it creates a moisture barrier and helps limit terminal oxidation. Once connected, cover every exposed joint with adhesive-lined heat-shrink tubing to block water wicking in from the harness.
| Check | Action |
|---|---|
| Cable route | Point cable downward; add a drip loop. |
| Inline fuse | Keep it secured and sealed in a dry, protected area. |
Before powering the light, inspect the seal and confirm the connector is fully seated.
Don’t connect wet wiring or leave the fuse holder exposed: vibration can worsen a moisture-related failure. Follow the kit instructions, and isolate power while correcting any damaged or loose connection.
Clean Lens With Microfiber
With the light bar off, wipe the entire license-plate lens using a clean microfiber cloth and gentle, straight strokes to avoid scratching the plastic. If grime remains, lightly dampen a clean section of the cloth with water, then wipe the lens again to lift residue without leaving lint.
Use the dry side to finish, checking the surface from several angles so you can spot and remove streaks that might cloud the light output. Avoid paper towels and abrasive cleaners; they can leave micro-scratches that reduce brightness. Let the lens fully dry before turning the light bar on so you don’t trap moisture under the cover.
Keep the cloth free of grit, and don’t press hard; gentle contact cleans effectively and protects the lens during installation.
Conclusion
Before you drive, confirm the bracket sits securely without touching painted surfaces or obscuring your plate. Check every fastener and connector, then aim the light bar on a dark surface so its beam doesn’t blind other drivers.
Seal exposed connections, keep wiring clear of hot or moving parts, and test the lights after installation. Recheck the locknuts after your first trip, and clean the lens with a microfiber cloth to maintain clear output at night.