Light Bar Mounting Positions Explained: Roof, Bumper, Grille and Rack
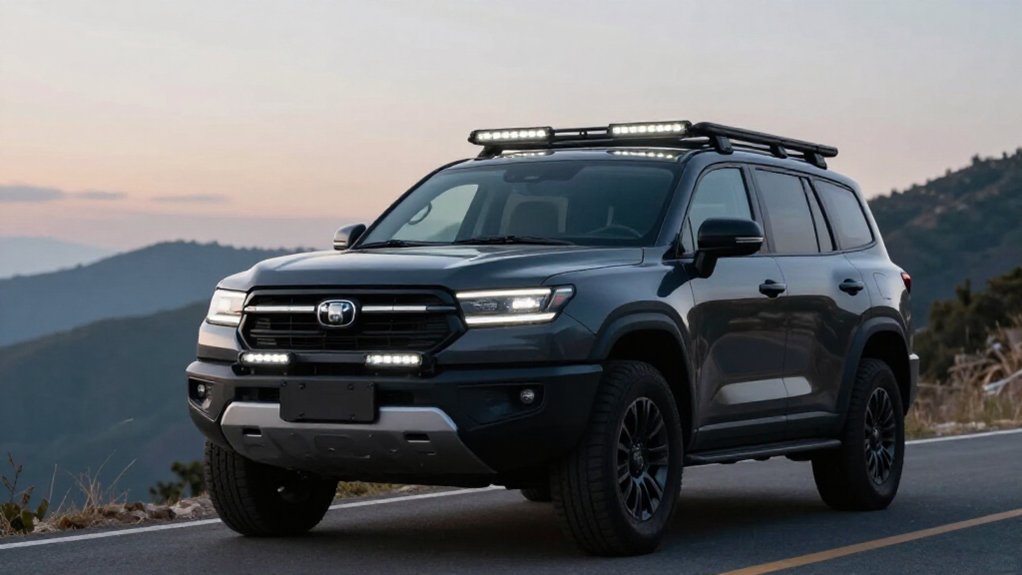
Choose a roof-mounted bar when you need longer, wider reach over brush, but expect more wind noise, drag, and possible windshield backscatter.
A bumper bar lights rocks, ruts, and tire-level obstacles on slow trails, though it’s exposed to damage.
A hidden grille bar suits close spotting and daily driving with a stock look, but offers less reach.
Aim any bar slightly downward, check bracket fit and clearance, and secure hardware.
Your driving conditions, rack setup, and local light laws can help refine the choice.
Roof, Grille, Bumper Tradeoffs
Where you mount a light bar determines what you can see and what you’ll sacrifice. A roof-mounted bar gives you the longest throw because its height clears brush and dust. Expect more wind noise and drag; a wind fairing can reduce both. Check local rules; requirements vary.
A grille or hidden bar preserves a stock appearance and stays cleaner off. Its lower position limits reach and vertical spread, so don’t expect roof-level performance.
A bumper bar serves trails by lighting ground close to your truck, but mud, brush, and rocks can damage it. Choose based on your route: roof for distance, grille for discretion, bumper for crawling. Verify fitment and legality, and secure wiring and mounts against vibration.
Windshield Glare and Light Spill
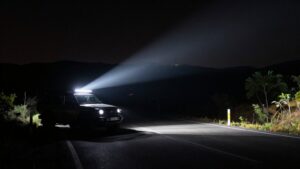
At night, a light bar can make the view ahead feel brighter without improving visibility if its beam reflects off dust, mist, or heavy snow into your line of sight.
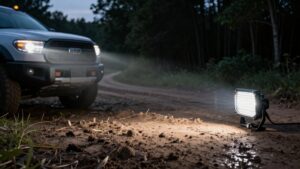
Roof mounts launch light from higher above your eye line, often illuminating more suspended particles and sending backscatter toward the windshield. Bumper or hidden-grille lights sit lower, which can reduce glare into the cab. Regardless of position, aim the bar slightly downward; a small upward tilt throws light toward the sky and glass instead of the trail.
Too much high or wide spill can brighten nearby ground and wash out useful detail, especially when wind carries dust across your path. Check alignment after installation and retighten mounts if vibration shifts them. Test in conditions, then reassess glare when visibility worsens. Keep the windshield clean and avoid driving through a beam that reflects directly back at you. Recheck after loading gear or changing mount height.
Beam Patterns and Road Speed
Match the light bar’s beam pattern and mounting height to your speed: roof-mounted bars project farther ahead, giving you more time to react on high-speed runs, while bumper-mounted bars better illuminate rocks, ruts, and obstacles near the tires on slow technical trails.
| Position | Best use |
|---|---|
| Roof/rack | Long reach; faster runs |
| Bumper | Near-field detail; slow trails |
| Grille/hidden | Close spotting; daily driving |
A high launch point also carries light over brush and dust, but airborne particles can throw glare back toward you, especially at higher beam angles.
As speed rises, keep the beam aimed to preserve trail-edge visibility without washing out your view. Choose lower, tighter illumination when you’re moving slowly; don’t rely on long throw to reveal hazards beside your tires in poor visibility conditions.
Mounting Bracket Styles
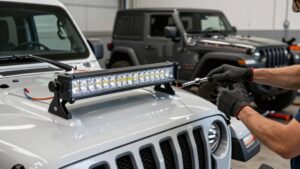
You can adapt standard L-shaped brackets for several mounting positions, but vehicle-specific brackets typically align better and may avoid drilling body panels. Choose rack-to-bracket hardware for roof mounts or fascia-compatible brackets for hidden grille installs.
On steel bumpers, use hardware rated for trail vibration and apply thread-lock to help prevent loosening.
Bracket Types
Choosing the right bracket style affects fit, aiming, and resistance to vibration. L-shaped universal brackets come with Tacoma light bar kits and can adapt to roof racks, grille areas, or bumpers. Expect to spend time aligning and aiming the bar; uneven placement can produce glare or poor road coverage.
Roof-rack brackets attach to the rack structure, not merely the body, helping keep the light stable at speed and its aim consistent. Bumper brackets follow the front opening or face and need solid, vibration-ready hardware for trail use. Grille or hidden-mount brackets place the bar behind or within the factory fascia opening. Set their spacing carefully so the lens sits correctly and remains protected. Before driving, tighten fasteners to specification and recheck them after use.
Vehicle-Specific Fit
A vehicle-specific Tacoma light bar kit uses brackets shaped for the grille, roof rack, or bumper, helping the bar sit securely and align with the opening.
For a grille install, Tacoma-specific geometry can place the bar behind the factory fascia, including the gap above the lower air intake on 2016–2023 models. This keeps the lamp positioned within the intended opening rather than crowding surrounding trim.
On a roof rack, a rack-matched bracket helps maintain a stable fit under vibration, unlike a generic L-bracket whose final alignment may be less precise.
An aftermarket steel bumper may provide Tacoma-specific mounting points that support the bar and simplify fit compared with universal bracket layouts.
Check clearance and aim before driving to protect visibility and avoid oncoming glare.
Mounting Hardware
Once a vehicle-specific fit is confirmed, bracket style determines how securely the light bar stays in place.
Factory kits include L-shaped brackets that you can adapt to locations. Vehicle-specific hardware aligns the bar better and can reduce or eliminate drilling into body panels.
Roof-rack mounts use dedicated hardware that attaches to the rack, placing the bar for beam launch. Check vibration resistance and keep fasteners clear of water runoff paths.
Behind a grille, brackets protect the bar, but airflow and clearances can complicate alignment. Bumper or flush mounts must withstand trail impacts. Tighten fasteners to specification, use thread-locking compound where required, and choose vibration-resistant hardware.
Whatever position you choose, make sure the mount stays rigid and maintains clearance. Secure attachment prevents shifting or cracking under vibration.
Vehicle and Rack Compatibility
Check that your light bar’s brackets match your vehicle and mounting location, since incompatible hardware can cause poor fit or aim. Use crossbars or vehicle-specific mounts that clamp securely to reduce vibration and wind noise.
Confirm the bar clears the grille, airflow paths, and wiring before installation.
Vehicle Fitment
Because mounting hardware is vehicle- and rack-specific, match the kit to your Tacoma’s crossbar spacing and thickness, bumper style, and intended mounting position. For roof placement, verify that the supplied clamps fit those dimensions and hold the bar above the cab without contacting the roof or blocking access to doors.
For a 2016, 2023 Tacoma grille installation, choose brackets that position the bar above the lower air intake and behind the factory fascia; confirm clearance before tightening.
At the bumper, match brackets to your stock or aftermarket design. Steel aftermarket bumpers generally offer a rigid base and simpler alignment, but verify every fastener engages its intended point.
Use vehicle-specific brackets when available; they can align with factory hard points and reduce drilling. Follow torque specs, route wiring clear of heat and sharp edges, and check each mount for movement before driving.
Rack Compatibility
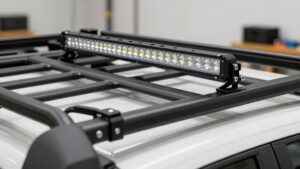
A roof rack must support the light bar’s weight and match its length, series, and bracket bolt pattern. Check your rack’s load rating and confirm the specific rack-to-bar brackets fit its bolt pattern. Many systems use vehicle-specific direct-to-rack brackets, which avoid drilling and hold the bar firmly against vibration. Verify that your rack supports the bar’s series and length; don’t assume similar models share hardware.
Because a roof-mounted bar sits high, it can extend beam distance and widen horizontal spread. Consider airflow, too: without a fairing, the bar may create noticeable highway wind noise. Some kits include an adjustable fairing to redirect air. Route wiring from the rack to the battery or relay away from sharp edges and moving parts, and allow for rack flex on rough terrain. Recheck fasteners and wiring after installation, before and after your first rough-terrain driving trip.
Mount Clearance
Mount clearance keeps the light bar secure and prevents contact with the vehicle. On a roof rack, position the bar above the cab and clear of the roofline. Confirm brackets tighten without contacting gutters, sunroofs, or roof seams.
Check rack spacing and load rating against bracket width; use flat mounting surface to prevent twisting and vibration-loosened fasteners.
For grille or hidden mounts, leave room behind the fascia for the housing and wiring, away from the radiator shroud, AC lines, and bumper components. At the bumper, check tire and suspension movement, plus skid plates and air dams, so angles won’t strike the lens.
On a rack or cage, match clamp size to tube diameter, clear bends, seat brackets, and preserve a lens gap from brush. Recheck clearance after tightening.
Trail and Worksite Scenarios
Choose the light bar mount to match your speed, terrain, and task: a front-bumper or flush mount illuminates rocks near the tires with minimal glare on slow, technical trails, but sits more exposed to brush and debris. For faster dirt roads, a roof or rack mount clears dust and brush, extending beam reach and horizontal coverage.
| Scenario | Mount | Trade-off |
|---|---|---|
| Technical trails | Bumper/flush | Low glare, exposed |
| Open roads | Roof/rack | Long, wide beam |
Daily driving favors a hidden grille bar for near-stock styling, but its low position sacrifices output and throw. For recovery, direct grille or chase-rack light toward the work area. Roof bars extend reach, yet can add noise and drag; an adjustable fairing redirects airflow. Secure mounts, aim beams, and use lights without blinding other drivers.
Alternator Load and Battery Drain
When your light bar runs, its 5–20+ amps add to the truck’s electrical load, and low-RPM idling can leave the alternator short of power.
If the alternator can’t supply the added watts, system voltage may sag and your battery can discharge faster, particularly when you’re crawling, winching, or stopped on a night trail. Highway driving usually poses less risk because the alternator typically maintains charging voltage.
A relay and fused harness protect your switch and factory wiring from overheating, but they don’t reduce the bar’s current draw. Check the bar’s wattage and estimate current by dividing watts by 12 volts; compare that figure with your alternator’s capacity and avoid overloading auxiliary circuits. If voltage drops or your battery weakens, switch off the bar when practical.
Mounting Hardware Corrosion
On roof, bumper, or grille mounts, salt spray, wet grime, and vibration can corrode or loosen hardware. Use stainless M6/M8 bolts and lock nuts, or grade-appropriate zinc-plated bolts with corrosion-resistant washers at every mount point.
- Apply a thin layer of anti-seize or marine grease to threads and beneath bolt heads, limiting seized fasteners and galvanic corrosion.
- Seal exposed mounting holes with rust-inhibiting primer and paint. Use rubber grommets or heat-shrink at wiring pass-throughs to block moisture.
- Add blue medium-strength thread-locker, or the manufacturer-specified type, to resist trail vibration. Periodically re-torque fasteners to keep the mount tight and watertight.
- On roof-rack brackets, grille cages, or standoffs, coat metal-to-metal contact surfaces with dielectric grease or anti-corrosion film.
Inspect often; replace damaged fasteners before mount security suffers.
Check Local Light Laws
Secure hardware keeps a light bar in place, but local vehicle codes determine where you can mount it and how you may use it on public roads. Rules vary by state, so check your vehicle code for auxiliary-light placement, covers, approved switches, beam aim, color, and permitted use.
Roof bars may need covers or must remain off on public roads; requirements differ. A grille or hidden bar behind the factory fascia may qualify as a fog or auxiliary driving light, depending on local wording. Windshield and A-pillar, or ditch-light, mounts may face limits near the windshield line.
Search your state name with “auxiliary driving lights light bar,” then confirm cover, switch, and aiming rules with an official source. Verify seasonal restrictions before driving, too.
Conclusion
Choose your mounting position by matching beam pattern and road speed, not appearance. A roof bar can reach farther, but may create windshield glare; grille or bumper mounts keep light lower, while racks add fitment and load checks.
Secure brackets, protect wiring from corrosion, and verify alternator capacity to limit battery drain. Before driving, aim beams to avoid dazzling others, test them in conditions, and check local lighting laws. You’ll get useful illumination without compromising safety.