How to Mount a Light Bar Without Drilling: Clamp and Bracket Options
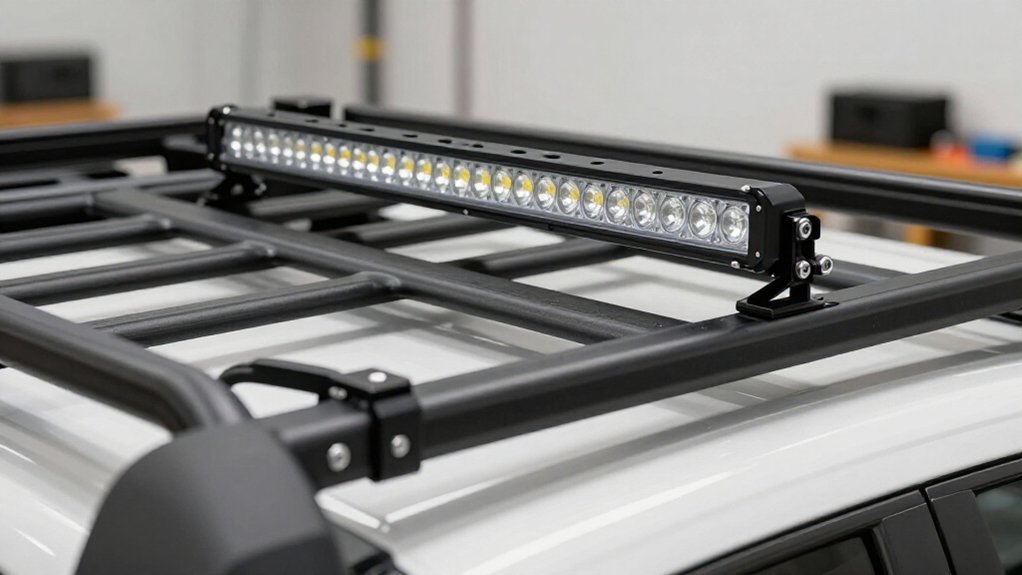
To mount a light bar without drilling, choose clamps or brackets that match your rail’s shape and thickness; verify the usable opening before buying. Avoid thin panels that can flex.
Clean and protect contact zones, then center the bar and space brackets evenly.
Tighten gradually to the manufacturer’s torque, using removable threadlocker only on fastener threads. Route secured wiring away from heat and moving parts.
Check seals, test the switch, and recheck for slippage. More checks follow.
Clamp Fitment Limits
Before installing a clamp mount, check that its opening matches the mounting surface’s thickness and shape; roof-rack rails and grille supports may require different clamps. Most kits fit only a specified width range, so compare the clamp’s usable opening with the rail or support before you buy. After fitting, confirm the clamp contacts the surface at several solid points; loose or uneven contact can let the bar bounce, twist, or shift.
Don’t attach it to thin or flexible panels, which can deform, reduce load capacity, and gradually misalign the light. Leave clearance for end caps and wiring, too, so vehicle flex won’t pinch or drag the harness. Tighten each clamp evenly to the specified torque, then recheck after a short drive as hardware settles.
Gather Tools and Protective Gear
Gather the tools and protective gear before fitting a no-drill light-bar mount. Check your kit and vehicle mounting points first; clamps must suit the surface thickness and fit roof-rack bars or grille/bumper edges without misalignment.
- Use a ratchet/driver set with correct metric or SAE sockets; add a wrench and kit-recommended threadlocker.
- Wear gloves and safety glasses while handling brackets, fasteners, or wiring.
- Keep plastic pry tools, zip ties, split loom, and foam or rubber strips ready for careful routing and vibration control.
Confirm each tool fits its fastener before starting work. Secure wiring with ties and loom, and place dampening strips at clamp contacts to limit abrasion and rattling.
Don’t use undersized clamps or exceed the kit’s tightening guidance.
Step 1: Mask Roof Contact Zones
With your tools and protective gear ready, identify the clamp contact zones along the drip rail, roof-rack rails, or factory mounting points.
Clean each contact surface with isopropyl alcohol and let it dry. Cut adhesive-backed clear paint-protection film or closed-cell foam tape to cover the underside of each clamp foot. You can also use a thin automotive rubberized mounting pad. This barrier keeps metal from rubbing bare paint under vibration and helps limit moisture intrusion.
Position the light bar, mark each clamp’s footprint, then apply the film or pad. Before final torque, make sure it lies flat and wrinkle-free.
After tightening, inspect each zone: the barrier should compress evenly, with no gaps or exposed paint. That helps reduce corrosion and keeps the mount non-scratching.
Step 2: Check Roof-Rack Clearance
Check clearance by test-fitting the light bar at its intended height and angle, confirming it clears the roofline, rails, and any rack accessories without putting uneven pressure on the crossbars.
Check vertical clearance under suspension movement: bounce the vehicle or verify its lift or rollback distance, ensuring the bar won’t strike the cab or windshield area. Inspect the rack for end caps, clamps, and factory hardware that could obstruct bracket placement or prevent bolts from tightening.
Also confirm there’s room beneath the rack to route wiring along the rails; keep cables clear of covers that could pinch them and away from moving parts. If anything contacts the bar, wiring, or mounting hardware, revise the position or choose a compatible clamp or bracket before driving.
Step 3: Align Clamp Brackets Evenly
Before tightening the clamps, center the light bar on its mounting surface and measure from its centerline to each bracket to confirm equal spacing. Use a level or straightedge across the brackets’ top faces to check that they’re parallel. Mark points through the holes, or mark each clamp base edge, then compare sides for symmetry. Shift the bar or brackets until the marks align.
Snug bolts in an alternating pattern; work on one bracket, then the other. Recheck the level and spacing afterward; clamps can walk as you tighten. If either side has shifted, loosen enough to reposition it and repeat the checks. Once aligned, gently tug the bar. Confirm that neither bracket moves and that the gaps remain equal on both sides before you proceed carefully.
Step 4: Torque Clamp Bolts to Spec
Once the brackets are aligned, tighten the clamp-to-mount bolts to the vehicle manufacturer’s specified torque using a calibrated torque wrench. Check the manual for the value; don’t guess or substitute a generic figure. Confirm clamp hardware and backing plates fit correctly, leaving enough thread to reach spec without bottoming out or deforming the bracket.
Tighten fasteners in an even sequence, such as a cross pattern, so pressure distributes uniformly and the bar won’t shift under load. If instructions require threadlocker, apply the specified type—typically medium-strength—and torque after its cure time or follow product directions.
After your first short drive, recheck torque; check again in a week as clamps and brackets settle. Stop if hardware deforms or won’t hold spec under normal use.
Step 5: Aim Beam Before Tightening
With the bar loosely secured, switch it on and aim the beam against a flat wall 10–25 ft (3–8 m) away. Park on level ground, keep the vehicle stationary, and avoid looking directly into the LEDs. From the driver’s seat, set the bar’s height to your target, level with or slightly below the horizon.
Mark the wall’s centerline, then adjust the mounts left, right, up, or down until the hotspot aligns and the beam doesn’t project excessive glare above the bar’s centerline. When the pattern looks right, tighten the clamp bolts or bracket fasteners gradually, alternating sides in small increments so the bar won’t shift. Briefly switch it on after torque to confirm alignment, then gently tug the bar to check mount stability.
Step 6: Apply Threadlocker to Fasteners
Apply a medium-strength, removable threadlocker, such as blue, to the light bar fastener threads to help resist vibration. Before applying it, clean the bolt threads and mating surfaces; wipe away oil and dirt so the product can cure against clean metal. Use threadlocker only on the bolt threads, not on the clamp’s sliding contact surfaces. Those surfaces must stay clean so the bracket can clamp securely without interference.
Install the fasteners and tighten them to the manufacturer’s recommended torque. Don’t guess or overtighten, since either can compromise the mount. Allow the threadlocker to cure fully, commonly 24 hours, before driving on rough terrain. After your first short drive, recheck fastener tightness. Cold weather or initial seating can reduce clamp torque, even when you’ve applied threadlocker.
Test Switch and Wiring
Before tightening the bolts, test-fit the light bar on the clamps and confirm the beam angle. Use a multimeter to verify power at the switch input, and check that the harness polarity matches the light’s requirements.
Disconnect power before making or changing connections, and insulate exposed terminals to prevent shorts. Route wires clear of moving parts, sharp edges, and hot surfaces. Secure the harness with zip ties or protective tubing to limit chafing.
Connect the switch, restore power, and cycle the light on and off. Confirm steady operation; watch for flicker under vibration. After wiring, tug the bar, then recheck that each electrical connection remains snug and moisture insulated. Seal connectors as needed, and keep the harness supported so vibration won’t strain the terminals.
Diagnose Clamp Slippage
If the clamp mount slips, start by checking the contact surface: mud, loose paint, and rust scale reduce friction. Clean and flatten the mounting area before tightening. Confirm the clamp fits both the bar and vehicle surface; an undersized clamp can rock under vibration and loosen gradually. Check bracket-to-light-bar contact points for alignment and even spacing, since an angle concentrates force on one side.
| Check | Action |
|---|---|
| Surface | Clean and flatten |
| Clamp fit | Match bar and mount |
| Contact | Align bracket evenly |
| Fasteners | Retorque; add rated locking aid |
After tightening, tug the light and watch the clamp gap or position mark. Recheck at 24 hours and after your drive; settling can resemble movement.
If it shifts, stop driving and correct the fit before using the light.
Inspect Seals for Leaks
Inspect every rubber seal or gasket strip before mounting the light bar. Look for cracks, tears, or flattened sections that could let water reach the vehicle. Confirm the seal lies evenly across the clamp or bracket’s full contact area, with no gaps between metal and painted or plastic surfaces. If you’re using factory mounting points, such as roof-rack channels or grille brackets, check that O-rings or weather seals remain intact and properly seated.
After tightening, inspect for seal squeeze-out or shifting; either can indicate poor seating and allow leaks over time. To test, use a gentle rinse or brief, low-pressure hose spray. Then check around the mount and inside the vehicle for moisture. Dry wet areas and reseal or reposition the mount before driving.
Conclusion
You can mount a light bar without drilling when your clamps fit the rack or approved mounting points and keep the bar clear of the roof. Before driving, confirm the brackets are even, fasteners are secured with threadlocker, wiring stays protected, and the switch works.
Recheck for clamp movement, loose hardware, or leaks after installation and your first trip. If the fit is uncertain or the roof shows damage, stop and use a compatible mount or get professional help.