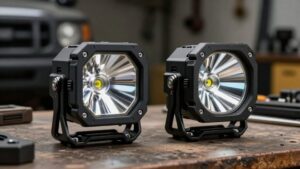
How to Choose the Right Beam Pattern for Your Off-Road Lights
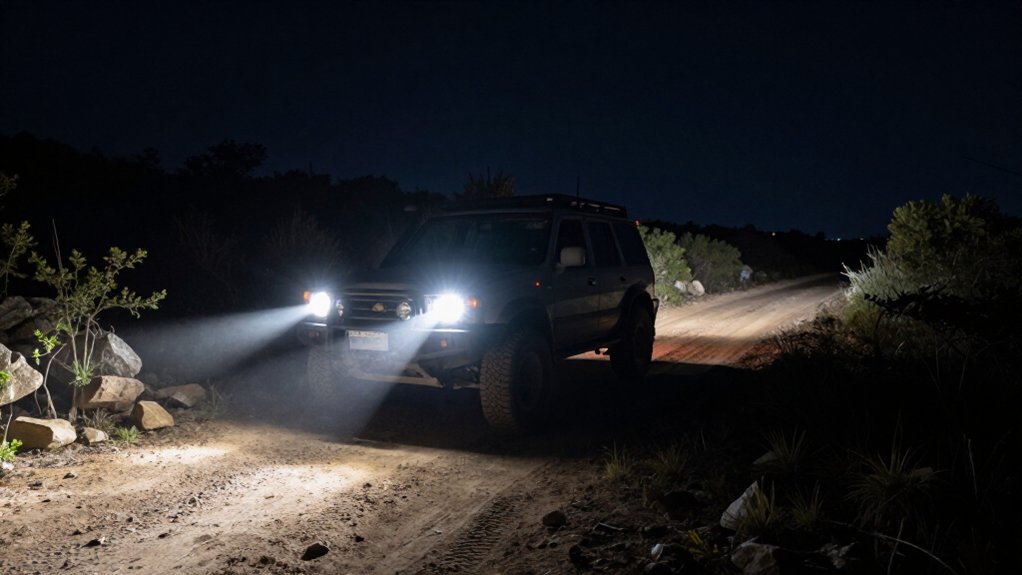
Choose a spot beam when you need long-distance reach; pair its narrow ~9° pattern with wider coverage to keep hazards visible.
For slow, tight terrain, use flood or work lights, while a combo beam balances reach and side coverage across mixed ground.
In dust, rain, snow, or fog, favor a flattened, low-mounted pattern and aim lights slightly downward to limit glare and backscatter.
Match beam, mounting, and aim to conditions; the guidance below explains how.
Beam Pattern Quick Pick
How far and how wide do you need to see? Choose a Spot beam (about 9°) when distance matters: its narrow pattern projects farther down the trail. Pick a Driving/Combo beam (about 42° plus spot) when you want one lamp to cover nearby space and preserve a focused center for reach.
For a broad, comfortable horizontal spread, use Wide Driving (about 42° flattened); its shape can remain useful in dust, snow, rain, or fog. Don’t rely on spot beams alone at low speeds: you’ll lose near and side visibility. In fog or airborne dust, consider a low-mounted cutoff fog pattern built to SAE J583. It can reduce glare while keeping the beam usable. Check mounting height and aim before driving.
Match Beam to Terrain
Once you’ve chosen a beam pattern, match it to your terrain and speed. On slow trails or rock-crawls, use flood or Work/Scene beams, or a combo pattern. Their ground coverage helps you spot obstacles ahead of your vehicle.
At higher speeds in deserts or open terrain, pair a spot—about 9 degrees—with a wider driving or combo beam. The spot reaches farther, while near-field coverage helps you avoid outrunning your illumination.
For dust, snow, rain, or fog, choose a flattened cornering beam; its shape limits upward bounce. If conditions are frequent, consider a low-mounted fog-cutoff beam to reduce light reflecting toward you. For mixed use, choose a driving/combo pattern that balances lateral spread with distance instead of relying on a flood or spot alone.
Glare and Road Courtesy
To reduce glare and protect other drivers, aim auxiliary lights so their beams stay below the effective horizontal cutoff and don’t shine into oncoming eyes. On public roads, use only SAE/DOT-compliant lights, or fit appropriate covers or shields; off-road patterns can create hazardous glare.
| Condition | Practical choice |
|---|---|
| Fog, dust, snow | Low-mounted fog pattern; amber can reduce perceived glare |
| General visibility | White light remains standard |
| Approaching traffic | Switch off auxiliary lights |
Keep output and aim matched to speed and terrain; a long-throw beam can overshoot near intersections and distract or blind traffic. Layer lighting, check alignment after installation, and recheck it.
When conditions worsen, slow down rather than raising lamps, and return to compliant settings before entering public roads.
Spot, Flood, or Combo Beam
A spot beam’s narrow pattern reaches farther down open trails, while a flood beam lights nearby obstacles for safer control at low speeds.
A combo beam balances central reach with side coverage, reducing the need to switch patterns across mixed terrain. Choose your setup for terrain and speed: use flood or combo on technical trails, and add spot for distance when you’re moving faster.
Spot Beam Range
On open terrain, a narrow spot beam, typically around 9°, concentrates light down the trail so you can spot wildlife, markers, and hazards at higher speeds. That focused pattern gives you useful illumination farther ahead than a wide beam, helping you read distant rocks and trail markers before you reach them.
At speed, that extra preview time can help you choose a line and slow before a hazard, but it doesn’t make driving faster automatically safe.
Judge range by beam performance, not lumen claims alone: optics shape usable lux and candela throw, and aim determines where light lands. Aim your lamps down the route, recheck after installation or load changes, and keep speed within the distance you can clearly see and stop in time.
Flood Beam Coverage
Flood beams spread light across the ground just ahead, helping you spot nearby rocks, roots, and other obstacles on slow, tight trails or in dense foliage. Their wide pattern prioritizes near-field visibility, giving you a clearer view of the area immediately around your vehicle when you crawl through confined terrain. That coverage helps you judge wheel placement and react to hazards close to the bumper, where a narrow spot beam may leave gaps.
However, don’t rely on flood alone at higher speeds on open terrain; its shorter throw can leave distant hazards unseen. Match your speed to visible distance, and aim the lights to illuminate the ground without glare or obscuring useful trail contrast. Check coverage from your driving position before entering technical terrain.
Combo Beam Versatility
When trails shift between open stretches and tight obstacles, a combo beam gives you a practical balance of reach and coverage in one light. Its narrow spot component—about 9 degrees—projects light farther down the trail, while a roughly 42-degree driving pattern fills the center and near field with horizontal coverage.
You can see farther without losing awareness of rocks, ruts, or trail edges near your vehicle. That overlap creates smoother illumination than a long, narrow beam alone, and you won’t need to switch lights as terrain changes. On mixed routes, this setup supports forward depth and surrounding fill. Keep your speed within the distance you can reliably see, and avoid aiming the beam into other drivers’ line of sight; glare can reduce their visibility and compromise safety.
Choosing Your Beam Pattern
Choose your beam pattern based on terrain and speed: a narrow 9-degree spot beam reaches farther on open runs, a wide 42-degree flood beam lights nearby obstacles on slow technical trails, and a combo beam balances distance with side coverage when conditions vary.
Choose a spot for faster open runs; its narrow beam reveals distant markers or wildlife but illuminates less nearby terrain. Choose flood lighting on slow, technical trails: its broad, flattened field exposes close obstacles and supports visibility in dust, rain, snow, or fog.
For mixed routes, a combo optic pairs a focused center with side fill, helping you read near and far without swapping lights. If one light must cover varied conditions, select a driving/combination pattern blending 42-degree spread with a 9-degree spot component.
Mounting Position and Beam Aim
Choose roof-mounted lights for higher, longer-range coverage and bumper-mounted lights for lower, near-field coverage suited to fog-style beams. Aim each beam level, using your headlights as a reference, to cover the trail without glare, hotspots, or wasted light on your bumper or the ground.
Recheck alignment after installation and during maintenance, since vibration can shift aim and reduce visibility in dust, snow, or rain.
Roof-Mounted Light Placement
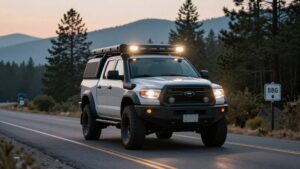
Mount roof lights high enough to clear the windshield and roofline, then aim them slightly downward to keep the beam on the trail and reduce glare for other drivers. For a Driving/Combo setup, center the optic on the trail centerline. Verify coverage spans near field and mid-range without side gaps.
If you use a Spot (9°) optic, aim it straight ahead so its narrow beam reaches far downrange instead of splashing around the vehicle. With a Wide Cornering (42°) beam, keep the pattern horizontal: level the light and fine-tune aim for usable width in corners, dust, rain, or snow without excessive glare. Before you lock the mounts, test at night. Adjust carefully until the brightest hotspot stays centered on your path and upper spill remains controlled.
Bumper-Mounted Light Placement
Bumper lights sit low and centered to illuminate trail hazards without throwing dust into your line of sight.
Mount them as low and centered as your bumper allows. Set the top edge of the beam near hood-to-far-trail height; this controls the hotspot and helps keep glare out of your eyes. With a driving or combo pattern, align its center axis with the vehicle’s straight-ahead line.
Don’t tilt it excessively upward, since that wastes throw and can send light toward approaching drivers. For a bumper-mounted spot pattern, aim it slightly downward to extend distance while retaining visibility close to the vehicle. Park on level ground after installation, then use a tape measure or marked reference to recheck the aim.
Repeat checks after rough trips, since vibration can shift the cutoff or hotspot and compromise safe visibility.
Aim for Beam Coverage
Once bumper placement is set, aim each beam for the coverage you need: too high can cause glare and backscatter, while too low limits down-trail reach.
Aim driving/combo lights so their near-field coverage blends into forward throw, with the brightest center just above straight ahead. For cornering in dust, rain, or snow, mount a wide-driving light level and aim it to keep its horizontal hotspot across your turn path.
If you add a 9-degree spot for distance, set it slightly higher and forward than the combo beam; this extends reach without sacrificing nearby coverage. Secure light mounts, then check alignment on level ground. Recheck after suspension changes, since vibration or altered ride height can shift aim and change where the beam lands.
Avoid Glare and Hotspots
To keep glare and hotspots off other drivers, aim lights slightly downward and choose a lens pattern suited to the trail; center each light and use a consistent vertical tilt so its brightest area doesn’t form a concentrated patch. Use spot beams for distance; choose combo or driving patterns for near-to-mid coverage.
Mount higher only if a flattened horizontal pattern, such as a 42° driving beam, keeps the beam level and reduces cutoff glare. Test on level ground before driving, confirming the brightest area stays on the trail rather than rising toward approaching drivers. Recheck aim after impacts or vibration; small shifts can create hotspots or shine into traffic. Secure mounts and repeat this check regularly.
Verify Voltage and Wiring
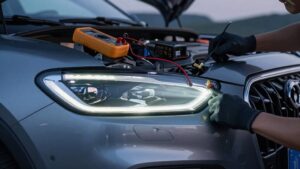
Before ordering, confirm the light’s rated voltage matches your vehicle’s 12V or 24V system; a mismatch can cause failure or reduced output. A proper wiring harness pairs a relay with wire sized for the light’s current draw. This limits voltage drop that can weaken beam performance.
Verify the ground connection is solid, and keep terminals tight and corrosion-resistant; poor grounding or loose connectors can dim lights despite high lumen ratings. Route wiring away from abrasion and heat, secure it against vibration, and use sealed connectors plus IP67-or-higher housings where practical. After installation, test voltage at the light while it’s on.
Watch for heat buildup or flickering, which may signal faulty wiring or an under-rated switch or connector. Disconnect power before correcting any wiring fault.
Lens Maintenance and Replacement
Clean your off-road light lenses regularly to remove dust and grime, which scatter light and reduce trail visibility even when LED output hasn’t changed. Before each demanding trip, inspect the lens and seals for cracks, chips, or haze; even minor damage can admit moisture and gradually reduce performance.
Check that mounting hardware remains tight and the lens stays aligned. Vibration can shift the assembly, creating hotspots, uneven beam spread, and accelerated lens wear.
If you spot internal condensation or water intrusion, replace the lens or optic promptly; shock and thermal cycling can compromise seals and gaskets. Choose the correct replacement parts, matching the original lens design and beam pattern, such as driving/combo or spot. This preserves the intended beam shape and predictable trail coverage.
Beware of Misleading Beam Claims
When comparing off-road lights, don’t rely on advertised lumens alone: optics determine useful illumination, including lux on the ground and candela aimed downrange.
Check the pattern, not the label:
- A “spot” should use a narrow lens—about 9°—to deliver tight, longer throw; a broad beam won’t reveal distant hazards as claimed.
- A bright “flood” can still fail if glare overwhelms you or near-field coverage leaves close obstacles hidden.
- “Driving” or “combo” should balance roughly 42° of near spread with center reach, avoiding blind zones and weak distance visibility.
For “fog,” ask for a low, sharp cutoff, as in SAE J583 concepts, to reduce backscatter in dust, snow, or fog; low mounting alone isn’t enough. Check measurements, then aim lights to support safe trail driving.
Check Local Beam Regulations
Beam performance is only part of the decision; check your local and state rules before using auxiliary lights on public roads. Requirements vary: many jurisdictions demand SAE/DOT certification or approved covers and prohibit unauthorized beams. If your off-road lights lack compliance, switch them off or fit approved shields on-road to prevent illegal operation and glare.
- Match markings to the installed pattern—driving, fog, or spot. Authorities may judge optical purpose and certification, not brightness alone.
- Check whether your area permits amber lights for fog, dust, or snow; white driving beams usually serve road use.
- Before buying, confirm street-legal compatibility, including availability of SAE-rated covers, so you can meet local requirements.
Verify rules for routes you ride, then aim and operate compliant lights.
Conclusion
Choose the beam pattern that matches your terrain and driving speed: spot beams extend reach, flood beams widen coverage, and combo beams balance both. Aim lights to avoid glare, verify voltage and wiring before use, and keep lenses clean.
Don’t trust claims without checking beam performance, and confirm local regulations before installation. A careful setup helps you see hazards sooner without putting other drivers at risk. Recheck aim regularly.
Off-Road Lighting Amp Draw & Wire Gauge Calculator
Find how many amps your LED light bar, pods and rock lights draw on 12 V or 24 V, then check wire gauge and voltage drop for your run.
Spot vs Flood Beam Width Calculator
Enter two beam angles from a spec sheet and compare how wide each beam is at 50, 100, 200 ft or a custom distance.