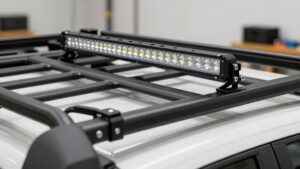
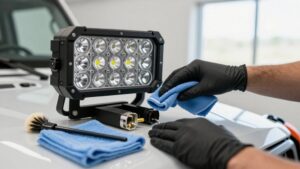
How to Mount a Light Bar on a Roof Rack Securely and Quietly
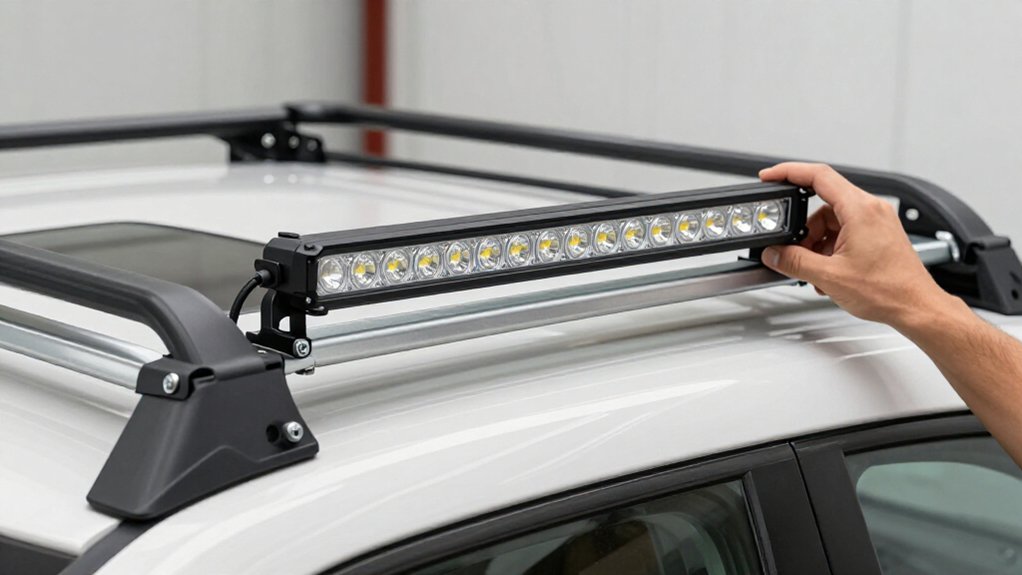
Measure usable crossbar width and roof clearance before choosing a position.
Clean contact points and protect paint with film or thin pads, then clamp brackets squarely onto crossbars.
With ignition off, disconnect the battery’s negative terminal before wiring.
Center and level the bar, tighten bolts evenly to specified torque, and add rubber washers without removing metal washers.
Secure wiring in loom against rattling.
Reconnect only after fusing and insulating connections.
More steps can prevent future rattles.
Expected Result, Difficulty, and Time Required
Once mounted, your light bar should feel solid, with no bracket wiggle and wiring fastened so it can’t rattle against the rack.
Use rubber vibration isolators or included compliant pads, marine-grade stainless hardware, and lock washers to resist loosening from wind and road corrugations. Clamp-style mounts on existing crossbars usually make installation easy to medium. Drilling new rack holes raises difficulty because you’ll need correct torque and waterproof sealant at each hole.
Allow about one to two hours for clamp-on mounting with existing wiring paths. Drilling, routing through access points, and waterproofing and strain-relieving every connection can take three to five hours.
Finish with a performance check after mounting: confirm alignment and test both beam settings, then ensure the beam doesn’t move, following local laws and kit instructions.
Measure Roof Rack Clearance
Before choosing a mounting position, measure the rack’s usable crossbar width and the vehicle’s highest roofline clearance, including rails, accessories, and antenna. Then test-fit the bar at its planned height before tightening anything. Check these points:
- Measure usable width against the light bar’s length and bracket footprint.
- Confirm mounts sit fully on your crossbars, raised rails, or fixed points without forced alignment.
- Check housing clearance from uprights, wind deflectors, and foldable rack parts.
- Leave a small gap around the housing and wiring so nothing rubs or vibrates against metal.
- Keep at least a few millimeters between bar ends, brackets, and rack edges to prevent contact during road vibration.
Recheck installed height and antenna clearance, allowing for rack flex to prevent strikes while driving safely.
Step 1: Protect the Vehicle’s Paint
Clean the rack’s contact points with isopropyl alcohol or wax remover so the brackets clamp evenly without grinding dirt into the paint. If you use clamps, place clear paint-protection film or thin rubber pads beneath each bracket foot. They prevent micro-scratches and chips.
Avoid drilling unless your rack requires it; if you must drill, seal every hole with waterproof marine sealant to prevent rust. Choose marine-grade stainless hardware, and apply an anti-corrosion barrier or anti-seize to the underside of fasteners. This limits galvanic corrosion.
Tighten brackets securely, but don’t overtighten them; excessive pressure can deform the rack or finish. After your first few rides, recheck tightness, then inspect it periodically. A loose mount may rub and wear the paint, so correct movement.
Step 2: Disconnect the Vehicle Battery
To prevent accidental shorts or blown fuses, disconnect the battery’s negative terminal first before handling any light-bar wiring. Turn the ignition key off and remove it from the vehicle. Wait several minutes after disconnecting to let capacitors in the electronics discharge. Use a multimeter to confirm the headlight or high-beam circuit is de-energized before you connect relay and switch wires.
Keep the battery disconnected while you route and mount the light-bar hardware; this prevents accidental power-up as you adjust the installation. Before reconnecting, secure every wire, install the proper fuse, and cover connections with heat-shrink tubing or insulation. Check that no bare conductor can touch metal. Reconnect the battery only after the wiring is fully secured, fused, and insulated; then attach the negative terminal.
Step 3: Clamp Brackets Onto Crossbars
With the battery disconnected and the light bar ready to mount, measure your crossbars’ height and width and choose brackets rated for their shape and thickness.
Center the bar on the rack with equal side gaps. Seat clamp pads squarely; they shouldn’t slip or press unevenly. Use the kit’s specified lock washers or vibration hardware. Tighten clamps gradually in a cross pattern, keeping the bar level and untwisted.
Follow the manufacturer’s torque specification; overtightening can distort crossbars, impair contact, or cause road noise. With your vehicle parked safely, push and pull the bar and clamps. If they move, loosen, reseat the pads, and retighten; don’t force a poor fit. Recheck tightness after your first drive and after a week of vibration or off-road use.
Step 4: Bolt Bar Onto Brackets
Align the light bar over the brackets so it sits centered and level, then fasten it with the manufacturer’s bolts and washers. Choose marine-grade stainless hardware where the kit permits, and add lock washers or specified thread-lock to resist vibration on rough roads. If the brackets offer several mounting points or height slots, set your preferred beam angle before securing the assembly.
Recheck that the bar remains aligned and won’t aim too low when the rack flexes over bumps.
After fastening, inspect each bracket for proper seating and check that nothing touches the roof or blocks rack access. Push the bar firmly by hand; it shouldn’t shift beyond a barely perceptible amount. If it moves, correct the fit before proceeding to wiring, as directed.
Step 5: Tighten Bolts Evenly
Tighten the light-bar and bracket bolts gradually in an alternating pattern, left to right, then front to back, so the bar seats flat without twisting. Use a torque wrench and follow the light-bar maker’s specification or the bracket kit’s stated value; don’t guess or tighten by feel. Overtightening can crack brackets or strip threads. Loose fasteners may let the assembly shift.
After your first snug-up, check that brackets sit square against the rack and the bar shows no wobble. Make a second alternating pass at the specified torque, keeping the bar aligned. Don’t force a bolt that binds; stop and inspect its threads before continuing. Recheck the fasteners after your short drive, or within a few hours of off-road use, since vibration can settle hardware.
Step 6: Install Anti-Rattle Rubber Washers
To damp vibration on corrugated roads, place a 2–3 mm anti-rattle rubber washer on each bolt shank under the bolt head or bracket, while keeping the manufacturer’s metal washers in place to spread the load and protect the bracket.
Place each washer between bracket and rack where your kit allows. Tighten the bolts snugly, but don’t overtighten; the rubber should compress slightly without flattening or squeezing out.
Keep the supplied metal washers in the stack, since rubber damping doesn’t replace their load-spreading role. If your kit calls for them, use stainless fasteners with lock nuts or thread-lock to retain the assembly. Afterward, gently try to wiggle the bar by hand; confirm you feel no metal-on-metal movement. Recheck bolt tightness after your first short drive.
Verify Beam Alignment
Before aiming the beam, center the light bar on the rack crossbars and measure from both ends to confirm it’s symmetric. Even a small shift can skew the pattern. Park on level ground, facing a wall about 25–33 feet away. Switch on the bar and adjust its hotspot to sit roughly 2–5 inches below the high-beam line at that distance, reducing glare for other drivers.
Mark the wall’s centerline, then fine-tune the bar until its brightest area aligns with the mark instead of drifting left or right. Tighten the brackets evenly, apply final torque, and check the beam again; uneven tightening can move the aim.
After installation, test on a dark road and compare the beam against a consistent landmark. Recheck after the first few miles, when the rack or brackets may settle.
Diagnose Post-Installation Flickering
If your roof-mounted light bar flickers, switch it off and check for loose connections at the relay, in-line fuse, switch output, and power and ground terminals; roof-rack vibration can loosen them.
| Sign | Test | Likely cause |
|---|---|---|
| Flicker | Measure voltage | Supply drop |
| Dim output | Check ground resistance | Poor ground |
| Moist connector | Inspect sealed joints | Corrosion |
| Beam change | Check fuse, relay, splices | High resistance |
Use a multimeter during flicker: voltage at the bar should stay near battery voltage, typically 12.0–14.4 volts running.
Confirm positive reaches the bar’s + input and negative reaches chassis ground; reseat partly seated plugs. If flicker tracks beam changes or high current draw, suspect an undersized fuse or relay, arcing, or poor splices. Repair damaged joints and restore waterproof protection before testing securely.
Inspect Mounting Hardware Monthly
Monthly hardware checks help keep your roof-mounted light bar secure, especially after rough, corrugated-road driving. Once a month, use the correct wrench or socket to confirm each mounting bolt and bracket fastener is snug. Grip the housing; any wiggle means you should tighten and recheck the mount. Check that lock washers and nyloc nuts remain installed and haven’t backed off.
Inspect bracket contact points and drilled holes for rust or corrosion, which can signal water ingress and weaken fastening. Trace the wiring: secure the harness with zip ties or loom, and keep wires from rubbing against rack edges. Vibration can fatigue connections. Finish by switching the bar off and on, then checking brightness; intermittent power may point to a loose terminal or ground.
Conclusion
With careful measuring, paint protection, and secure clamps, you’ll safely and confidently mount your light bar without damaging your vehicle or creating excess noise. Disconnect the battery before wiring, then fit rubber washers and aim the beam without dazzling other drivers.
Test for flickering before driving, and recheck the hardware after your first trip. Inspect every month, tightening loose fasteners as needed. If the rack or wiring feels uncertain, stop and consult a qualified installer before use.