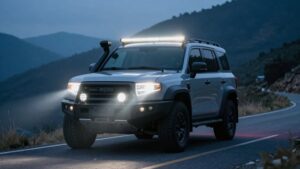
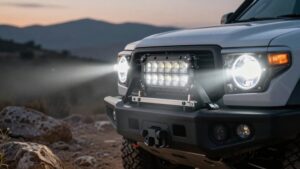
F-150 Light Bar Mounting Options: Bumper, Grille, Roof and Bed Rack
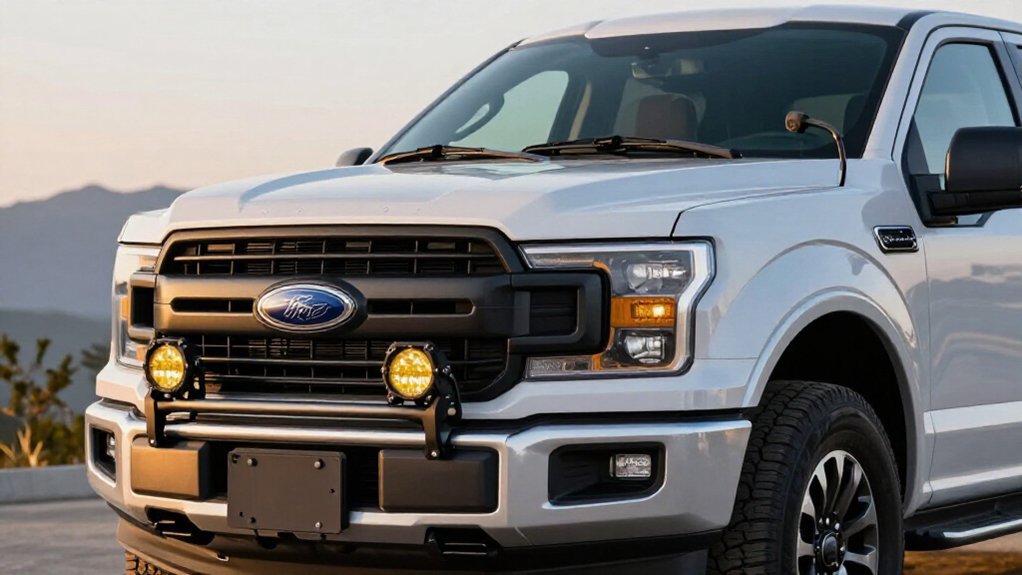
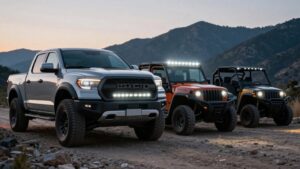
Choose your F-150’s light-bar location by beam coverage, fitment, and clearance. A bumper mount protects hardware and aims light forward; grille kits follow factory lines with a low-profile fit.
Roof brackets raise the beam for longer reach, while bed-rack lights sit higher and can widen forward coverage.
Choose slimline bars for tight spaces or full-width bars for broader spread. Match spot, flood, or combo beams to terrain.
Check fitment details before you install your setup.
Mounting Location Basics
Choose a mounting location based on the light bar’s beam angle, exposure, and fit on your F-150.
Your choice affects forward visibility, protection, and where the beam reaches. A bumper mount keeps hardware and wiring tucked and protected while aiming LEDs forward. A grille or upper-grille kit can align the bar with factory lines and limit changes to panels.
For roof placement, use vehicle-specific brackets, especially with a radius bar; they secure it without cutting the body. A bed rack puts lights higher and farther back, which may widen the forward pattern depending on placement.
Before installation, check that the position won’t obstruct lamps, sensors, or your view. Secure fasteners, route wiring away from heat and moving parts, and verify beam aim before driving.
Ford F-150 Fitment Notes
Confirm your F-150’s year and trim before ordering a light bar mount; grille and bumper kits often fit only specific configurations. Check special equipment: a front camera may require an upper-grille setup designed for trucks without one.
| Mount family | Verify | Fitment concern |
|---|---|---|
| Grille | Year, trim, camera | Kit-specific |
| Bumper | Location, hardware | Bar shape |
| Hood hinge | Part number, years | Alignment |
| A-pillar/roof | Model, beam layout | Wiring, placement |
Match the bracket family to your model and beam layout so wiring and placement follow the kit design. For hood-hinge LED brackets, verify the part number and approved year range; 2015-2017 and 2018-2023 groups differ. Don’t force misaligned hardware or obstruct cameras.
Before driving, tighten fasteners to specifications, secure wiring away from heat and moving parts, and confirm lights don’t block sensors or your view.
Slimline Versus Full-Width Bars
When you choose a slimline bar, you’ll get a low-profile fit for tight grille or bumper spaces and more targeted coverage. A full-width bar needs a broader mounting surface but can spread more light across the roadway.
Match beam coverage and output to your mounting space, and aim the bar carefully to avoid blinding other drivers.
Beam Width and Coverage
Match beam width to what you need to see: slimline bars concentrate light farther ahead, while full-width bars spread it across more of the road. For bumper or grille placement, a narrower pattern can reduce glare and keep trail targets ahead in view. Choose a wider pattern when you need to monitor road edges.
Roof or hood/hinge brackets raise the light source, helping a broad beam map more evenly onto the ground; aim it carefully to avoid dazzling other drivers. At a hidden upper grille, decide whether you need distance spotting or area illumination. A longer housing doesn’t guarantee wider coverage: compare beam patterns and total lens area, including kits that use several pods instead of one bar.
Check the manufacturer’s beam data, then test alignment in a safe, controlled setting.
Slimline Bar Advantages
If you want auxiliary light without a prominent housing, a slimline bar’s narrow profile can preserve a cleaner, more factory-like look on your F-150 at the grille, bumper, or roof. Its compact shape can fit behind grille openings or beneath brackets, helping you limit clearance conflicts and preserve sightlines.
A straight, single-row design adds multiple auxiliary light points with a low-profile appearance. Two-bar kits can widen coverage without a full-width housing. Measure the opening, check bracket and wiring clearance, and aim lamps carefully. Secure mounts and confirm the beam won’t interfere with factory lighting or cause glare for other drivers. Choose this style when discreet mounting matters more than a continuous span across the panel, and verify airflow after installation for safe nighttime operation.
Full-Width Bar Benefits
A full-width LED bar spreads light across a broader swath of trail or road than a typical slimline bar, giving you more visibility footprint from one mounting point. That wider spread can help you detect edges, obstacles, and route changes without several lamps.
A 50-inch-class curved, double-row bar can provide broad, even illumination. Choose it when you want greater coverage from one installation; roof-mounted full-width bars are often selected for consistent long-range light.
Slimline bars remain useful where a narrow, focused beam and lower-profile appearance matter, such as grille or bumper applications. You can pair smaller bars across mounting points for flexibility.
Select beam pattern and aim for your route; auxiliary lighting supports, but doesn’t replace, safe speed, clean lenses, or attentive driving.
Mounting Space Requirements
Because grille and bumper openings often restrict available width, slimline bars are usually easier to fit around factory trim and grille structure.
Before ordering, check the mounting footprint: bumper, grille, roof, or bed rack. Slimline designs suit narrow upper-grille and lower-bumper zones because they leave more room around components.
Full-width bars need planning for length and standoff clearance; confirm they won’t conflict with hood or roof lines or adjacent hardware.
For roof brackets designed around a specific size, verify both the bar’s width and the bracket’s geometry so it sits within the designed area. Reserve wider configurations for roof or rack mounts with adequate clearance. Don’t assume a bar length guarantees fit; measure the space and account for mounting hardware before installation.
A careful fit check helps you avoid contact with bodywork and ensures the mount can secure the bar as intended.
Light Output and Visibility
How much road you can see depends on both bar design and mounting position. A single-row slimline bar, such as a 6-inch option, keeps a low visual profile while adding useful forward illumination. In a grille or bumper location, it can concentrate light without dominating the grille line, making it practical when you want added visibility with minimal bulk.
For broader coverage, a full-width curved double-row bar, such as a 50-inch kit, spreads light farther across the road ahead. Its greater length generally illuminates more pavement and shoulder than compact slim bars or pod-style lights. Compare beam coverage and mounting position together: grille or bumper placement can provide targeted intensity, while your chosen bar design determines how widely light reaches. Match the pattern to the distance and area you need to see, and use auxiliary lighting responsibly.
F-150 Fitment Considerations
For an F-150, choose a light bar around the exact mounting location, bumper, upper grille, hidden grille, or roof, since available kit sizes vary by position and model year. Slimline bars such as six-inch single-row models fit tight grille and hidden-grille spaces more easily and help preserve a factory look. A six-inch option can balance useful coverage with less visual bulk than a wider setup.
Full-width bars such as 20-inch or 52-inch radius models spread output more broadly, but you must check clearance at the bumper, grille, or roof. Confirm brackets won’t obstruct cameras, sensors, or trim, and verify roofline space before tightening mounts. Roof contours often suit slimline bars, while a full-width bar needs precise bracket placement.
Match the kit to your specific location and F-150 model year; applications from 2018–2020 list different sizes by installation point. Before driving, recheck fasteners and test visibility without blocking factory equipment before regular use.
Beam Patterns by Terrain
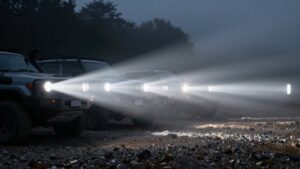
Match your beam pattern to the terrain: flood beams illuminate nearby trails and washouts, while spot beams help you read distant ground on straight roads. Choose a combo beam when your route shifts between close obstacles and the horizon to reduce dark gaps.
On open terrain, use a wide pattern for broad coverage, and adjust for dust, fog, or rain to preserve usable contrast without impairing other drivers’ visibility.
Flood Beams for Trails
When trails turn rocky or tree-lined, flood beams spread light broadly at moderate distances, helping you spot ruts, uneven ground, and obstacles near entrances and turns.
A bumper or grille mount puts that lower, wide pattern across the path directly ahead. As you follow curves and ruts, its broad coverage helps you read nearby changes without relying on narrow illumination. On a roof bracket, flood lighting sits above hood height, so you can see trail edges and brush sooner when uneven ground limits your view.
A bed rack adds a higher vertical angle, helping fill dark gaps between the ground and mid-distance as the trail dips or rises. Choose a broad flood spread for rocky or tree-lined routes; aim each bar carefully to avoid glare and preserve contrast. Check alignment after loading gear, and keep speed low enough to stop within the illuminated area. Reserve narrower patterns for greater reach.
Spot Beams for Distance
Flood beams help reveal nearby trail edges; spot beams concentrate light into a narrow hot spot for greater reach on dark, open roads. For distance-focused driving, choose spot-pattern light bars or cubes to extend your view across highways and long dirt roads. On an F-150 bumper or grille mount, aim lights forward and slightly down.
Place the brightest area on the road ahead and help limit glare toward oncoming traffic. Roof mounts can increase throw over uneven terrain because their higher position gives the beam a clearer line ahead. Recheck aim whenever you change mount height so the beam center suits your driving distance. On routes with trees or curves, narrow coverage may leave nearby hazards less visible, so adjust your speed and scan carefully.
Combo Beams for Versatility
For highway-to-dirt routes, combo beams pair narrow light for spotting farther with wider coverage that helps you react to nearby edges and obstacles.
On a grille or bumper, choose a kit matched to your truck and route. For 2018-2020 F-150 applications, Z325711-KIT fits Lariat/Limited with two 3-inch pods; Z415711-KIT serves XLT/Lariat with two 6-inch straight slim bars. These bundled combinations provide close and mid-range visibility without requiring you to add a beam type.
Aim the lights to avoid glare for oncoming drivers and keep the field useful on uneven surfaces. On a 2018-2020 Raptor rear bumper, Z385662-KIT uses two 6-inch single-row slim bars for consistent traction visibility while reversing or maneuvering. Match output and placement to conditions, and verify fitment and aiming before travel.
Wide Beams for Open Terrain
Combo beams balance near and far coverage, while open terrain often calls for a wider flood pattern. When you cross fields or desert flats at higher speeds, choose a flood beam to spread light across lanes and terrain instead of concentrating it downrange. Its broader reach can reduce dark gaps between illuminated areas, but it doesn’t replace speed control or attentive driving.
A roof-mounted bar, including a 52-inch setup on an F-150 or Raptor, sits higher and can cover ground ahead and to the sides. Bumper or grille cubes and slim bars sit lower, favoring close-to-midrange visibility as you turn, scan uneven ground, or approach obstacles. For open environments, choose flood over spot; reserve narrow spot patterns for distance-focused driving. Aim lights to avoid glare.
Bracket Compatibility Checks
Before buying, match the bracket’s exact part number to your F-150’s generation, trim, and intended mounting location. Model-year ranges matter: 2015-2017 and 2018-2023 hood-hinge brackets aren’t automatically interchangeable. For example, compare Z365731 and Z365711 against your truck’s year before ordering.
Confirm the bracket also suits your light type and count. Some ZROADZ hood-hinge models hold two 3-inch LED pods; don’t assume another kit configuration uses the same bracket. For grille or bumper mounts, verify both the fitment years and trim. The Z325711-KIT, for instance, targets 2018-2020 Lariat and Limited front bumpers and includes mounts for two 3-inch pods.
For roof brackets, check the specified bar size and profile; some fit 52-inch radius bars. Use exact part numbers across locations, and don’t infer fitment from broad year spans.
Bed-Rack Wiring Access
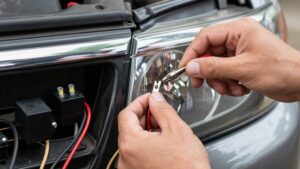
Route the bed-rack light bar’s power and ground wires along the rack’s underside, then into the truck, where the rack shields them from road debris and weather. Use inline connections and weather-sealed connectors such as waterproof butt splices or Deutsch-style housings to keep junctions protected from moisture in the bed area.
If you’re adding an in-cab switch, route its wire forward through an existing grommet or body void. Keep the harness clear of pinch points near the bed-to-cab hinge and tailgate mechanisms. Connect the bar to a fused power source sized for its current draw; a dedicated fuse near the battery or auxiliary fuse box provides protection.
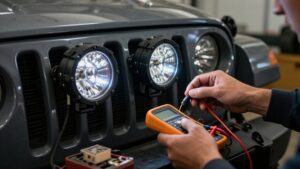
Attach ground to a dedicated bare-metal point near the rack mount. Before tightening everything, verify polarity and voltage at the light bar with a meter. Secure the wiring so it can’t chafe, stretch, or contact moving hardware. Inspect connections and fuse rating before testing.
Parking Sensor Clearance
Will the light bar’s brackets clear the factory parking sensors? Before you mount a bumper or grille light bar, check bracket clearance around the sensor tabs and locations; layouts can vary by trim and model year. For upper-grille or hidden-grille kits, keep each sensor cutout open so detection isn’t blocked or misaligned.
Measure sensor-to-bracket spacing on bumper-mounted lights, including center LED pods, and test-fit before tightening. A bracket that shifts under vibration can trigger sensor faults. Roof-mounted radius bars typically leave parking sensors unaffected, but verify front-end fitment and keep sensor mounting surfaces unobstructed.
After mounting and wiring, test the sensors and confirm they respond before driving. If warnings appear, inspect for bracket contact or changed placement near the sensor zones and correct the interference.
Corrosion-Resistant Mounting Hardware
Once the brackets clear the parking sensors, choose corrosion-resistant hardware to protect each light bar mounting point from rust.
Select stainless bolts and springs, or zinc/nickel-plated fasteners, for bumper, grille, and roof mounts. Use the specified grade and length at each location, including bed racks; fully engaged threads resist pullout and limit water entry into exposed metal.
- Replace worn hardware; loose interfaces can accelerate galvanic corrosion between dissimilar metals.
- Add automotive-rated anti-seize to threads when the mount maker recommends it.
- Fit weather-resistant washers or spacers to keep moisture from collecting at joints.
- Seal bolt penetrations where appropriate, following the light or rack manufacturer’s instructions.
- Tighten fasteners to the specified torque, then inspect them periodically for movement or rust.
Avoid mixing metals without suitable isolation. Before tightening, verify each bracket sits flat and doesn’t pinch wiring or obstruct service access. Recheck hardware after initial use and after harsh weather.
If you remove the bar, inspect threads and replace damaged parts rather than reusing them. Proper material selection and sealed interfaces help preserve clamp force, reduce seized fasteners, and support reliable lighting without compromising the mount.
Conclusion
Choose a mounting location that suits your F-150, driving terrain, and equipment. Confirm brackets match your model and trim, then check sensor clearance and beam aim before drilling or tightening hardware. A slimline bar may fit tight spaces, while a full-width bar can deliver broader coverage.
Use corrosion-resistant fasteners, protect wiring, and plan bed-rack access before installation. Test lights and secure every connection before you drive; don’t let visibility compromise safe, legal operation on roads.