Roof vs Bumper Light Bar: Glare, Wind Noise and Reach Compared
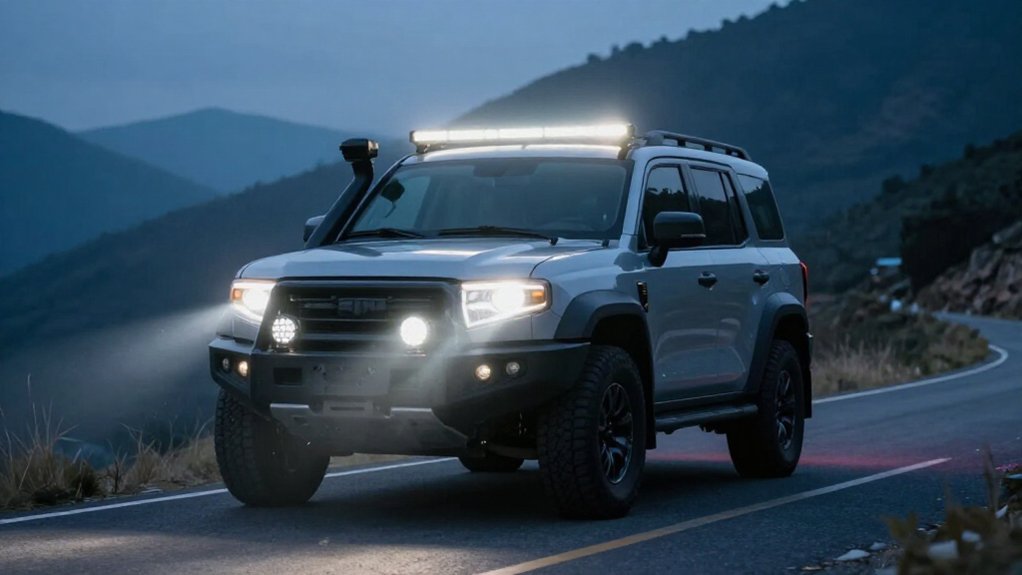
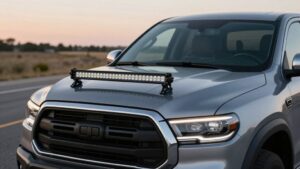
Choose a roof-mounted light bar when you need longer reach over dips and snowbanks; its height reveals hazards sooner but can increase wind noise and snow glare.
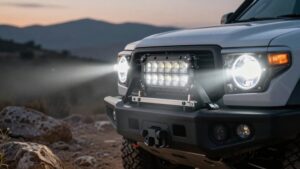
A bumper-mounted bar usually keeps airflow and near-field reflections lower, though it won’t reach as far.
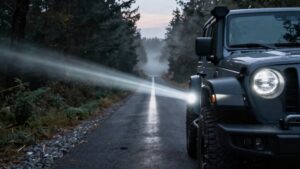
Aim either setup after installation, directing light outward and slightly off-center to limit hood glare and dust backscatter.
Test contrast on reflective snow before driving.
Your mounting and wiring choices matter next.
Glare, Noise, Beam Reach
Although a roof-mounted light bar can project farther over dips and obstacles, its height can send reflected light off the hood or windshield and back toward you if it’s aimed poorly.
A roof bar’s height also exposes it to highway airflow; solid fins or rear structure can produce noticeable wind noise.
A lower bumper bar usually limits near-field glare and keeps illumination controlled, but won’t project as far over terrain. After either installation, re-aim the beam: small angle changes can alter reach and backscatter, so verify the pattern from the driver’s seat before relying on it at speed.
| Placement | Reach | Trade-off |
|---|---|---|
| Roof | Farther reach | Reflection risk |
| Bumper | Near control | Reduced glare |
| Roof | Airflow exposure | Wind noise |
| Bumper | Lower profile | Less noise |
Mounting Bracket and Wiring Details
Whichever location you choose, secure the light bar with vehicle-specific or well-matched universal brackets; the bar itself won’t mount safely.
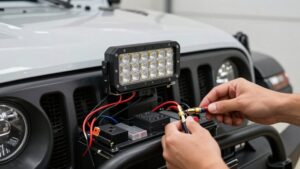
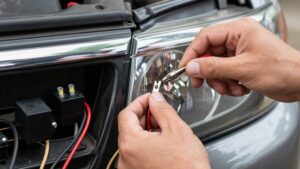
For wiring, run a fused power lead directly from the battery or a power distribution block. Route it clear of moving parts, heat sources, and sharp edges. A roof installation needs extra harness slack and weatherproofing along headliner and A-pillar paths; avoid pinching cable beneath trim.
Use a relay switched by a dash switch, so high LED current doesn’t pass through switch wiring. Seal roof or bumper connections with waterproof connectors and dielectric grease, then add strain relief. Check fit and torque before driving, then inspect afterward.
Before powering the bar, verify the fuse and relay ratings match the manufacturer’s specifications, and secure the harness against vibration and abrasion.
Dust Backscatter on Trails
After securing the bar and wiring, consider how its position affects visibility in trail dust.
Dust backscatter occurs when light reflects off airborne particles and returns toward your eyes. The trail can look washed out despite bright lamps. Lower-mounted bumper lights often reduce this effect because less near-foreground dust lies in their return path.
Roof-mounted bars can worsen it: their height increases overlap between beams passing through dust and light returning from the hood or windshield.
Aim matters. If you’re pointing lamps too far forward, or centering the beam for road reach rather than outward and side-forward coverage, you’re more likely to see glare in dust. For trail visibility, aim outward and side-forward, using a pattern that lights edges without forward punch into dust.
Garage Clearance Impact
Before choosing a roof-mounted light bar, check whether your garage has enough clearance for its added height.
A roof-mounted bar sits at your vehicle’s highest point, increasing its total height. Measure from the mounting surface to the light bar’s highest point, then compare that measurement with your garage door opening. Don’t drive beneath a partially open door unless you’ve confirmed safe clearance.
A bumper-mounted bar sits lower and usually preserves more overhead headroom, making tight garage storage easier. If clearance is limited, a roof bar may require removal or a change to your driving or storage routine. Its higher external placement can also increase wind noise on the road, so those constraints may make a bumper bar the practical starting choice. Check carefully first.
Roof-Rack Load Limits
Garage clearance isn’t the only constraint: check your roof rack’s load rating before installing a light bar. Consult your owner’s manual for the rack’s maximum static load, then include the bar, brackets, wiring slack, and any roof cargo in your total.
Don’t treat that figure as permission for rough-road use: vibration and pothole impacts create dynamic loads that can exceed the rack’s conditions. Mount the bar to structural members, using the rack’s designed mounting surface and crossbar spacing; thin panels can’t carry concentrated stress.
A forward load shifts weight distribution and increases strain on rack attachments during braking and cornering. After installation, verify fastener torque and inspect the rack, especially after your first few rides. Recheck periodically; loosened mounts reduce your safety margin.
Corrosion on Mounting Hardware
Because light-bar mounts face water, road salt, and off-road mud, corrosion can develop quickly where moisture gets trapped between brackets and hardware. You should inspect these joints because corrosion can undermine the mount, and vibration can loosen bolts, allowing more water to enter. Use stainless-steel or properly coated fasteners, such as zinc-plated hardware. Apply anti-seize or anti-corrosion compound between dissimilar metals to limit galvanic attack.
- Check and re-torque mounting bolts periodically; use the specified torque.
- Seal exposed threads and mounting holes with corrosion-resistant or compatible thread sealant.
- Remove surface rust from brackets or bolt heads, clean to bare metal, and re-coat.
- Replace hardware that’s deeply corroded or damaged before it compromises support.
After servicing, verify the bar sits and the bracket shows no movement.
Alternator Load and Battery Drain
A high-output light bar adds a substantial electrical load, often drawing about 10–25 amps in a 12-volt setup, so check that your alternator can supply the current under your operating conditions.
Alternator output falls at idle and under heavy electrical demand. If your bar approaches its rated draw while idling, battery voltage may sag, dimming the lights. When the alternator can’t keep up, the battery supplies the deficit, accelerating drain and shortening its cycle life.
Use correctly sized wiring, a fused battery feed, and a relay to limit voltage drop; poor wiring won’t make the alternator compensate safely. With the engine off, a 20-amp bar can deplete a 50-Ah battery in a few hours, allowing for losses and starter reserve.
Installation Cost Comparison
You’ll usually pay more labor for a roof bar because its higher mount, longer wiring run, and precise aiming require extra work to control glare. A bumper bar typically costs less to install, but both setups need dedicated mounts and secure wiring.
Adding both bars raises costs further through extra controls, alignment, and roof-mount reinforcement.
Roof vs. Bumper Labor
In most installations, a bumper light bar costs less to install than a roof bar: common brackets and accessible wiring routes reduce labor, and the lower mounting position is quicker to aim for controlled forward illumination. Your labor estimate should include mounting, sealing, alignment, and operational checks, not just the time spent attaching the bar.
- A roof installation needs brackets and careful sealing around every roof penetration to limit leak risk.
- Technicians may route wiring farther, adding labor; compare estimates without pricing hardware separately.
- Roof aiming takes fine adjustments to control windshield and hood reflections and check beam reach.
- Bumper brackets often simplify mounting, while lower placement speeds alignment for close-range illumination.
Ask the installer to verify aim safely before road use at night.
Wiring and Hardware Costs
Bumper-mounted light bars usually cost less to wire and install because the front mounting point is accessible and needs no roof-specific brackets or cable routing.
For a roof bar, budget for brackets, longer cable runs, and protection against abrasion and weather. Wind-noise-friendly mounts and aiming hardware can add costs beyond the light itself.
If you add ditch lights to a bumper bar, wiring costs rise mainly from extra switches, relays, and fused feeds, not LED fixtures. Match wire gauge, relays, and fuses to current draw; higher-output models may require heavier-gauge wire and higher-capacity components in either location. Don’t undersize conductors or protection to save money: follow manufacturer specifications, fuse close to the battery, and secure wiring away from heat, moving parts, and sharp edges.
Snowbank and Wildlife Detection
A roof-mounted bar’s higher reach can reveal snowbanks and plowed-drift edges sooner, giving you more time to stop or steer. Ditch lights fill the near shoulder and trail margins, helping you detect wildlife movement close to your vehicle.
Aim both beam patterns to limit snow glare, and combine side coverage with forward reach to see hazards sooner.
Spotting Snowbanks Earlier
How far ahead can you identify a hazard? A roof-mounted light bar sits higher than a bumper bar, and its beam can reach farther along open approaches and straight trail sections. Greater reach reveals snowbank edges, drift lines, and frozen ruts sooner. Aim the beam slightly off-center to expose trail margins without sacrificing forward reach.
Snowbanks may conceal animals near transitions where the trail drops or widens, so longer-distance visibility matters more than close flood coverage.
- Compare beam throw with your headlight range; target gaps beyond it.
- Scan snowbank edges before they rise abruptly into view.
- Re-aim after installation to limit hood and driver glare.
- Check contrast on reflective snow before relying on the setup.
This gives you time to slow and steer.
Detecting Wildlife Movement
Where might wildlife emerge before it enters your headlight beam? Snowbanks and roadside ditches can conceal animals until they move beside your tires. You’ll need lighting that covers the side-forward zone, where lateral motion may appear before your main beams reveal it. Aim A-pillar or ditch lights outward, not straight ahead, to expose movement along drifts and cutbanks.
In winter low visibility, choose wide, near-field illumination to distinguish ears, tails, or body silhouettes against bright snow. Slow down in open crossing corridors, and scan snowbank edges at night; animals can emerge abruptly from behind a drift.
After mounting or re-aiming lights, test at driving speed and watch the snowbank line for motion. Fine-tune aim to remove blind areas where wildlife could enter your path.
Choosing Beam Reach
For snowbank and wildlife detection, choose a beam that reaches down the trail while spreading far enough to reveal movement beyond the hood. Roof-mounted lights sit higher, so a controlled upward aim can carry illumination farther downrange, helping you spot animals or dark shapes near open trail edges sooner.
But an overly high or straight beam can reflect from your hood or windshield, washing out contrast against snow.
Choose a combo or spot-combo pattern: it preserves long reach while giving you enough side-forward width to read terrain beside the vehicle.
- Aim to reveal snowbank horizons and approaching silhouettes clearly.
- Check near-field ground drop and ruts at corners.
- Inspect mid-field texture changes beyond the hood.
- Re-aim at night; prioritize visibility over brightness alone.
Stone Strike Vulnerability
When trail debris flies, a light bar’s exposure depends on its mounting position and the vehicle’s tire-spray pattern.
A roof-mounted bar sits higher, but ruts and washboard sections can launch stones upward into its lens. A bumper-mounted bar usually faces side-forward debris, especially where tire spray reaches protruding lamps. Either position can leave optics exposed; a direct strike may crack the lens and permanently scatter light, cutting usable beam intensity.
Choose a rugged housing rated for trail use, with an impact-resistant lens or guard, and add a protective grille where available. After a hard hit, inspect the lens for cracks, check brackets for looseness, and verify aim before each trail run. Even a micro-crack or slight shift can create hotspots, glare, or a dimmer beam.
Conclusion
Choose your light-bar position by matching beam reach to your routes and managing trade-offs. A roof bar reaches farther but can increase glare, wind noise, dust backscatter, garage-clearance issues, and roof-rack loads.
A bumper bar reduces those height-related effects, yet may expose LEDs to stone strikes and snowbank damage. Compare bracket fit, wiring cost, alternator load, and battery drain before installation.
Aim beams carefully, secure wiring, and test visibility without blinding other drivers. Drive safely, always.