Ford Bronco Aftermarket Lighting Options: Bars, Pods, Rocks and More
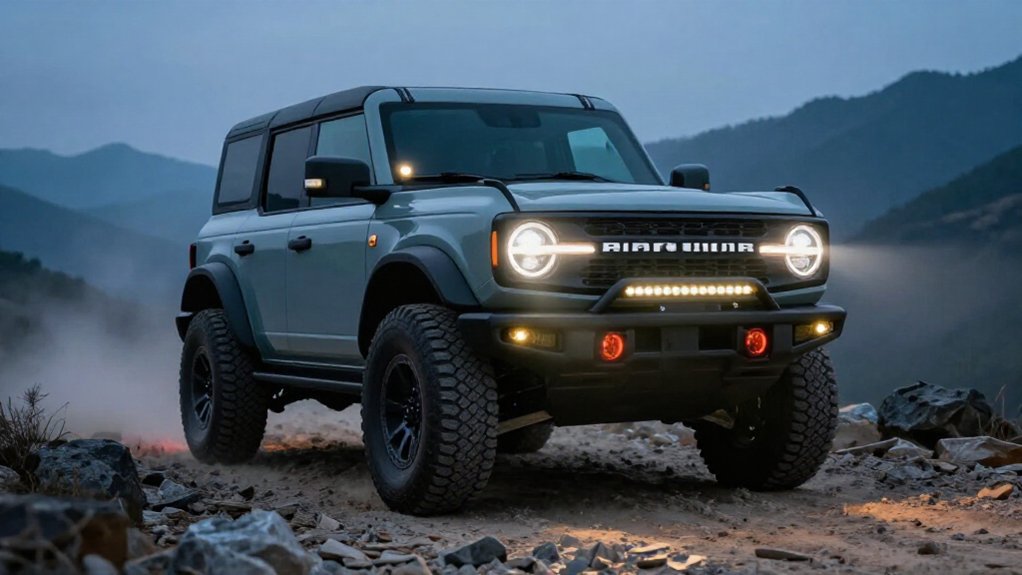
You can outfit your Ford Bronco with roof or bumper light bars for distant trail reach, A-pillar pods for edges, and underbody rock lights to expose rocks and ruts.
Choose spot beams for long-range projection, flood patterns for wide near-field coverage, or combine both; amber lenses can improve contrast in dust and poor weather.
Aim lamps carefully, use sealed housings, and wire auxiliary lights through rated circuits.
Continue for details on mounting, wiring, and kit selection.
Bronco Lighting Mounting Locations
Your Bronco’s lighting location determines where the beam reaches and how securely the lights mount.
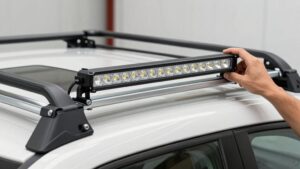
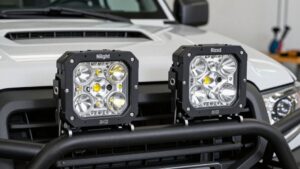
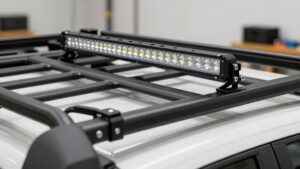
Bumper and grille-area brackets give you a forward-facing mounting platform, while roof racks and roof brackets support multiple pods or light heads. Choose hardware rated for your Bronco and the lights’ weight; a vehicle-specific bracket can improve fit and reduce unwanted movement.
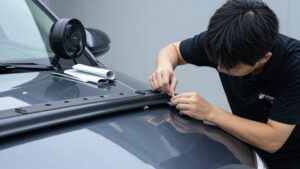
For side-spreading ditch lights, A-pillar or cowl-style brackets let you adjust aim toward trail edges and nearby hazards. Their low-profile design also keeps the installation visually restrained.
Underbody rock lights direct illumination toward the ground, helping you identify ruts and rocks as you maneuver.
Before installation, verify bracket compatibility, fastener security, wiring clearance, and adjustability. Position each light so its beam serves your intended purpose without glare.
Where Bronco Lights Fit
On a Bronco, light placement should match the beam to the task: LED bars project farther down dark trails, while A-pillar ditch lights and compact pods fill in nearby and peripheral areas. Use bumper or roof bars for forward reach; mount ditch pods on the A-pillars to expose trail edges and nearby hazards at low speeds.
Rock lights beneath the chassis reveal rocks, ruts, and approach-path changes that a forward bar can miss. For wet-weather contrast, choose fog-style auxiliaries with fog or driving optics.
| Application | Placement | Function |
|---|---|---|
| Trail reach | Roof/bumper bar | Distant forward view |
| Trail edges | A-pillar pods | Nearby hazards |
| Undercarriage | Rock lights | Rocks and ruts |
Layering bars and pods with switched relay wiring lets you tailor the package to commuting and trail use.
Beam Patterns and Light Color
Choose a spot beam when you need long-range reach, a flood beam for near-field coverage, or a combo pattern to balance both. Amber light can improve contrast in dust and poor visibility, while white light delivers clear illumination in open conditions. Your Bronco’s optics, mounting height, and aim determine how effectively each setup performs.
Spot Beam Reach
How far you can see depends on the beam pattern: a spot beam concentrates light into a narrow, long-range path, helping you pick out obstacles farther down a dark trail or highway. Mount a high-output spot pod or bar accurately; poor aim wastes reach and can distract oncoming drivers. White LEDs suit long-range use, delivering crisp contrast on distant terrain, while amber can feel less harsh and reduce perceived glare in poor weather.
Check tested beam distance, not lumen claims alone: optics, lens design, and mounting height determine usable reach. Driving lights may balance distance with peripheral visibility, with claims around 350–450 meters; fog lamps often reach about 75 meters. Choose a spot when hazards far ahead matter most, and aim it responsibly and safely.
Flood Beam Coverage
When tight Bronco trails demand close-range visibility, flood beams spread light across the ground and to either side, revealing ruts, rocks, and nearby obstacles that a spot beam may miss. Choose flood-pattern pods for low-speed technical sections: their wide, near-field output helps you read hazards beside the tires without relying on long-distance projection. Driving lamps can reach roughly 350–450 meters in some applications, but flood optics trade that throw for lateral coverage.
If you often travel through fog, rain, or dust, amber lenses may reduce glare and improve perceived contrast compared with pure white light. Aim flood lamps low and carefully; mis-aiming them can increase glare from dust, wet surfaces, and reflectors. Check your beam from the driver’s seat before heading out at night, carefully.
Combo Beam Versatility
A combo setup pairs a long-range driving light bar with nearby-visibility LED pods, giving you distance down the trail and coverage for rocks and ruts near the tires. Match the bar’s Spot/Driving optic to routes where you need a farther-reaching beam; choose Wide/Flood pods when you want more lateral coverage and must pick out obstacles at lower speeds.
On technical trails, that spread helps reveal the edges of rocks and ruts without relying on a single intense forward pattern. Consider color and fog optics too: SAE fog lights can provide controlled low-surface illumination, while driving beams push light farther ahead. Check each lamp’s optics and aim rather than shopping by lumen count alone; beam control determines whether your Bronco gets coverage at both distances.
Amber Light for Dust
For dusty trails, amber auxiliary lights can improve contrast by scattering less light than blue-heavy white LEDs, while remaining less glaring to other drivers.
Choose a fog-style beam with a wide spread and low cutoff to light near-field ground and dust-cloud edges, rather than sending a narrow beam down the glare line. Pair it with a driving-focused pod for distance visibility; the fog beam adds near-ground guidance when dust cuts range.
Amber lenses suit road-and-trail Bronco setups when you need contrast without as much glare for oncoming drivers. Mount pods and test their aim on the trail. If you angle an amber beam too high, scattered light can brighten at eye level, reducing visibility. Keep the cutoff low and coverage even across your path.
White Light Clarity
On a Bronco, white-light clarity depends more on beam control than brightness alone: a long-range driving beam reaches farther, while a wide fog beam fills in the near-field road or trail. Look for optics that match the beam to the job: driving patterns can project roughly 350–450 meters, while fog optics spread a low, controlled beam with about 75 meters of effective reach.
That broad, low cutoff boosts contrast in rain, snow, or mist and limits reflected glare. Aim auxiliary lamps carefully to reduce eye fatigue and avoid dazzling other drivers. Choose neutral or cool white rather than an overly blue tint; truer color rendering helps you identify details, and SAE-aimed fog or driving options provide usable on-road contrast. Pair bars with nearby-coverage pods.
Matching Beams to Terrain
Beam choice should match terrain and speed: a spot or driving pattern projects roughly 350–450 meters downrange for faster travel, while flood pods spread light laterally to reveal hazards on slow, technical trails.
You’ll get coverage by pairing a long-range bar or spot-driving lamps with near-field flood pods; the overlapping zones reduce eye fatigue and improve situational awareness. In fog, rain, or snow, choose a low-cutoff fog beam to light ground near your Bronco while limiting glare. Amber-tinted fog lenses can soften harshness for on-road use versus standard white output.
Treat distances as model- and optic-dependent: Hella-style fog lamps reach about 75 meters, while driving lights may reach 350–450 meters. Select patterns for your route, and aim lamps carefully to avoid wasting output or dazzling drivers.
Matching Lights to Driving Conditions
Match highway beam patterns to road speed with a properly aimed spot beam, and switch to fog-style, amber lighting when rain or fog increases glare. On trails, pair a long-range light bar with wide-beam LED pods to balance forward reach with close-range hazard and rock-crawling visibility.
At typical off-road speeds, controlled, well-aimed illumination often guides you better than maximum theoretical reach.
Highway Beam Patterns
Choose a Driving (Spot/Driving) beam for faster highway travel after dark; common designs project usable light roughly 350–450 meters down the road. That reach helps you identify lane changes, hazards, and road geometry sooner, but output depends on lamp placement, optics, and correct aiming.
Pair a long-range light bar with near-field fog or wide pods when you’ll need both distance and foreground coverage. Aim each pattern to avoid dark gaps and excessive glare; a poorly aligned beam can waste output and distract other drivers.
In rain, fog, or snow, use a fog beam with its low, controlled cutoff to improve contrast and limit backscatter; typical reference reach is about 75 meters. Match the beam to speed, visibility, and local lighting requirements carefully.
Trail Lighting Needs
On trails, your lighting setup should balance distance with a clear view of the ground and surrounding hazards. Pair a long-range light bar with near-field LED pods to cover both distant obstacles and ruts or washouts just ahead of your bumper.
Choose driving beams when you’re moving faster; their reach often falls around 350–450 meters. At lower speeds, wide or flood patterns expose hazards beside the trail, while A-pillar ditch lights help you judge tight turns. Rock lights show underbody terrain; grille or forward lamps extend your view down the route.
Use controlled beam spread to limit glare and eye fatigue without losing lateral light for wildlife or trail edges. Aim each zone to overlap the next, so you don’t leave a dark gap between the approach beam and near-field coverage when the trail pitches or bends beneath the Bronco ahead.
Weather-Ready Illumination
Weather-ready Bronco lighting starts with matching beam patterns to conditions: use a driving or spot-focused beam for long-distance visibility on clear roads, and wide or flood beams to reveal nearby obstacles and trail edges at low speeds. Add fog-capable lamps for poor weather; they cut through fog, rain, and snow, improving contrast where standard driving beams can create glare.
A hybrid layout pairs a long-range light bar with nearby LED pods or cubes, preserving reach while covering ground and obstacles.
Choose rugged, sealed housings, often rated around IP69K in quality off-road LED products, and clean lenses routinely; grime can worsen glare and reduce output. Strong thermal management helps your lights’ brightness stay stable during extended duty cycles in cold nights, hot desert climbs, or rainy storms.
Rock Crawling Visibility
Rock crawling demands near-field illumination that reveals rocks, ruts, and tire-placement hazards at low speeds. Equip your Bronco with LED pods aimed toward the ground to light the area ahead and beside the tires, helping you place each wheel precisely. Wide or flood optics keep close-range coverage useful while limiting harsh glare on technical trails.
For a setup, pair a driving-beam light bar with pod-style spot or pencil optics: the bar projects farther up the trail, while pods illuminate the line beneath your tires. Mount pods on the A-pillars, cowl, bumper, or rock-area brackets to adjust coverage around uneven surfaces and side obstacles. Choose rugged, sealed housings with ingress protection, such as IP69K-rated designs, to withstand water, dust, and vibration during slow, demanding crawls.
Wiring Auxiliary Lights Safely
To power auxiliary lights reliably, use a relay-based harness that draws fused power directly from the battery, leaving the switch to trigger the relay. That setup lets your lamps receive full voltage. Size the inline fuse and wire gauge to the manufacturer’s recommendations, placing the fuse close to the battery to limit short-circuit and overheating risks with multiple lamps.
Ground the harness at a clean, bare-metal chassis point; don’t daisy-chain grounds, which can increase voltage drop and cause flicker. Route wiring through the engine bay using grommets, clamps, and weatherproof connectors to guard insulation against vibration and moisture and contacts against corrosion.
Aim beams and choose spot, flood, or fog optics; follow the light maker’s installation guidance so you won’t create unsafe glare or lighting behavior.
Keeping Rock Lights Clean
After wiring and aiming your Bronco’s rock lights, keep their lenses clean to preserve an even ground glow.
Clean them regularly with mild soap and water, using a soft microfiber cloth or non-abrasive brush. Road dust and mud can scatter output and dim the beam, so wipe lenses after rain, snow, or off-road trips whenever brightness drops.
Let the lights cool first, then rinse thoroughly to clear grit from lens and reflector edges, where trapped grime can hold moisture. If your units are rated for wet use, don’t direct a high-pressure washer at their housings; forceful spray can drive water into seals and seams.
As you clean, inspect mounting brackets, screws, and wiring boots. Vibration and debris may loosen hardware or cause intermittent output.
Factory Auxiliary Switch Limits
Factory auxiliary switches simplify Bronco lighting installs, but their available outputs limit how many circuits you can control independently. Plan your light-bar, pod, and ditch-light combinations around the number of OEM switch outputs, not just the fixtures you can mount. Each channel gives you a separate control function, so running fog or ditch lights apart from driving lights requires enough available channels.
The switches make accessory integration straightforward, but they aren’t intended to power high-draw loads directly. For multiple driving LEDs or other substantial loads, use a relay harness: the factory switch triggers the relay, while a fused battery feed supplies the lamps. If you exceed the factory channel count, add switch locations and wiring, retaining OEM outputs as low-current relay or control triggers.
Best-Value Bronco Lighting Kits
For the best value, pair a long-range LED bar for down-trail visibility with compact pods aimed at close-range ditch and side coverage. Choose optics for terrain and speed: a Driving Beam improves down-road visibility at higher speeds, while Wide/Flood beams suit low-speed technical trails. Better beam control can deliver useful coverage without chasing maximum lumen output.
Mount lights at familiar Bronco points: bumper, grille, A-pillars, roof rack, or ditch-light brackets to reduce fabrication and aiming time.
- Choose SAE-aimed, road-legal-friendly lamps for calmer on-road use; SAE fogs can take amber lenses when conditions call.
- Reserve aggressive off-road beams for trail use.
- Use a relay-switch harness with auxiliary switches, letting you add pods later with minimal rework while managing voltage drop and heat for your setup.
Conclusion
Choose the lights around your routes and mounting points, not just headline output. A compact bar can improve long-range visibility, while pods and rock lights fill near-field gaps on trails.
Match beam patterns and color to conditions, then verify brackets, wiring, fuse capacity, and factory auxiliary-switch limits before installation. Seal connections and keep rock lights clean to protect performance. With a well-matched kit, you’ll gain useful illumination without adding unnecessary complexity or compromising your Bronco.