How to Waterproof a Light Bar: Seals, Connectors and Vent Care
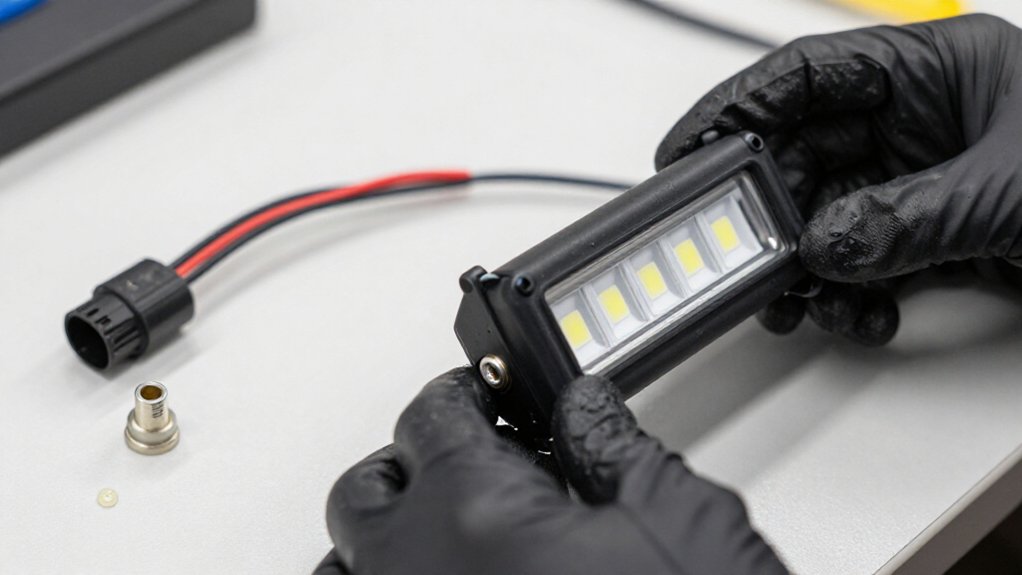
Disconnect power before servicing your light bar.
Remove the lens and housing, clean and dry mating surfaces, then apply dielectric silicone or a gasket-plus-sealant at both seams.
Tighten corrosion-resistant screws evenly until the gasket seats; don’t crush it.
Clean connectors with isopropyl alcohol, dry fully, and apply thin, non-conductive dielectric grease, keeping it off bare conductors.
Check grommets and vents for damage or blockage; persistent fogging warrants circuit inspection.
The following checks help maintain protection.
Waterproofing Light Bar Seals
Light-bar waterproofing depends on sealing every housing seam, not just the exterior. When you service a bar, seal both the lens-to-housing interface and the front-to-back housing joint with a gasket-style seal and compatible sealant. This blocks water from wicking through mating surfaces.
For re-waterproofing, focus added sealant at these junctions; coating only the outside won’t restore failed internal interfaces.
For reliable clamping, use corrosion-resistant hardware and tighten it evenly. Screws spaced about every half inch can maintain uniform compression and support IP69/IP69K-style performance, but don’t assume hardware alone proves certification. For best results, disassemble the bar and apply sealant to the lens and both housing halves’ mating surfaces. Don’t rely on liquid sealant alone: poor component-level assembly can leave leak paths and compromise reliability.
Connector Cleaning Supplies
Before resealing the housing seams, clean the connector pins, housing, and mating surfaces with isopropyl alcohol (IPA) and lint-free wipes to remove grease, residue, and moisture-trapping debris. Disconnect power first, and use IPA only as appropriate for your connector materials; keep liquid away from energized circuits.
- Wipe pins and housing gently; don’t bend contacts or leave fibers.
- Carefully remove old silicone or sealant excess so the replacement gasket or sealant can form a continuous barrier.
- Let every part air-dry fully, with no visible droplets, before reassembly.
Use only the dielectric silicone specified for LED strip or light-bar sealing; household silicone isn’t a safe substitute for electronics. Inspect contact faces for residue, then align the connector and seat its seal evenly without forcing the joint.
Vent Inspection Schedule
Check the light bar’s vent after installation, then inspect it every 6–12 months for dust, paint, or moisture residue that could restrict airflow and compromise sealing.
Also inspect after routine wash or pressure-wash seasons; repeated water exposure can push contaminants toward sealing surfaces. Watch for lens fogging or uneven condensation, which can signal a blocked or damaged vent path. After resealing, verify airflow before reinstalling the bar.
| Checkpoint | Action |
|---|---|
| Schedule | Inspect every 6–12 months and after wash seasons. |
| Warning | Fogging or uneven condensation signals vent damage or blockage. |
| Service | Stop use if fogging persists after resealing; service or replace the bar. |
A compromised vent-and-seal system can reduce waterproof performance, including IP69/IP69K integrity. Don’t operate the bar until you’ve corrected persistent vent faults promptly when detected.
Apply Dielectric Grease to Connectors
Clean and dry the connector surfaces, then choose a silicone-safe, non-conductive dielectric grease. Apply a thin, even coat to the pins and seals, keeping it off exposed LED contacts and bare conductors so the connector mates fully.
Reconnect it, confirm the fit, and orient the connection to prevent water from pooling.
Clean Connector Surfaces
For a reliable seal, wipe dust, corrosion, and old sealant from the connector contacts and mating surfaces. Use a clean, lint-free cloth before applying grease. Keep the connector disconnected from power while you work, and don’t scrape plated surfaces with an abrasive tool.
Apply a thin, even film of dielectric grease to the pins or inside face; this reduces insertion friction and limits moisture and oxygen at the contact interface. Don’t pack the cavity with grease, since excess can prevent full seating. Bring the halves together, then press until the latch engages. Check that the connector sits and its seal remains closed.
A fit keeps the grease in place as a moisture barrier instead of forcing it out. Recheck the connection before restoring power.
Choose Silicone Dielectric Grease
Once the connector surfaces are clean, choose dielectric silicone grease, not household silicone, to help block moisture and reduce corrosion at the metal contacts.
Because it’s nonconductive, use the grease as an insulating moisture barrier, not as a conductive repair or a substitute for sealing connector ends. Place it on mating surfaces to help keep water from exposed metal; it won’t fix damaged seals or loose terminals.
Whenever you open a connector, restore grease at the mating surfaces before reconnecting it. After mating, fit the specified heat-shrink or waterproof boot over the joint for mechanical protection.
Disconnect power before handling wiring; follow manufacturer compatibility and temperature guidance. If water entered, dry and inspect contacts, replacing corroded parts rather than trapping moisture beneath the boot as you complete the repair.
Apply a Thin Layer
With power disconnected, spread a thin film of dielectric grease over the connector’s mating surfaces and exposed contacts; don’t pack the connector, since excess grease can collect debris and prevent proper seating.
A light coating helps block water and limit oxidation at the electrical interface, supporting a reliable connection. Use grease with sealed-style wire splices or connectors, but don’t treat it as a substitute for a connector rated for the environment or for correct heat-shrinking and insulation.
After application, push the halves together firmly until fully seated; don’t force a misaligned fit. If you find corrosion or degraded components, clean the contacts and reapply grease before reassembly. Then route the harness away from standing water, keeping wiring supported and clear of heat, sharp edges, and moving parts. Restore power only after you’ve completed the connection and checked that it’s secure. Keep the coating even, with no pools around the connector body or nearby joints or cavities.
Protect Seals and Pins
Dry and clean the connector area before applying a thin layer of dielectric grease to the pins and mating surfaces. Use dielectric grease, not regular silicone or general-purpose sealant. Dielectric grease is formulated to protect electrical contacts from moisture and corrosion; unsuitable compounds may interfere with the connection or create an electrical fault. Apply only a thin, even film around the pins and contact area.
The connector must be free of moisture, dirt, and residue so the grease can form a continuous barrier rather than trapping contaminants.
Once the protective film is in place, use the specified gasket, sealant, or heat-shrink method to weatherproof the connector exterior. Keep grease away from surfaces your sealing product must bond to, and follow its manufacturer’s preparation instructions.
Reconnect and Inspect
Before reassembly, inspect every connector for looseness, bent pins, or cracked insulation. Damaged insulation can expose conductors to moisture and cause faults. Work with power disconnected first.
Apply dielectric grease only to connector interfaces, never across LED boards or exposed circuitry. Spread a thin, even coat over contacts and mating surfaces. This helps repel moisture and resist corrosion while filling micro-gaps; a thick layer can obstruct proper mating.
Align each plug and press it firmly into place until the connection closes fully. If the connector has an O-ring, check that it seats evenly, and keep all wiring clear of the joint to prevent pinching.
Verify the connection is properly seated before resealing the housing. This helps maintain waterproof performance.
Winter Road-Salt Protection
After winter drives, rinse salt deposits from your light bar and inspect the lens-to-housing and housing-to-housing seals for intrusion. Protect compromised seams with a gasket and suitable sealant, and verify that stainless fasteners remain tight to preserve the waterproof seal.
After winter, check vents and closures for blockage or damage so trapped moisture won’t accelerate corrosion.
Rinse Salt Deposits
Winter road salt can creep into the lens-to-housing perimeter and sealed housing seams, weakening the waterproof barrier over time. Rinse salt deposits from your light bar with clean water before you inspect or reseal it. Use gentle flow; a pressure washer or spray can drive brine into gaps. Direct the rinse along the lens-to-housing perimeter and any sealed front or rear housing seams, where salt accumulation can compromise the barrier.
Then wipe the unit with a clean cloth and let it dry completely. Don’t trap brine beneath the lens or gaskets, and don’t apply sealant over damp or salty residue; either can reduce sealing performance. Check screw points and the connector area for corrosion, and clean corrosion before continuing. Re-waterproof only when salt is removed and every surface is dry. Follow the light bar manufacturer’s instructions and isolate power before handling the unit.
Protect Seals and Connectors
To keep winter road salt out, seal the lens-to-housing and front-to-back mating seams with dielectric silicone or a gasket-plus-sealant system; don’t rely on excess liquid sealant alone. Use stainless-steel screws, such as 3/16-inch fasteners spaced about every half inch, to limit corrosion paths that can weaken the joint.
Before installation, clean and dry mating surfaces, then apply sealant consistently without covering pressure-equalization features. Tighten screws evenly so they compress the gasket rather than distort the housing.
Inspect wire-entry points and connector interfaces; salt water can track into the bar there even when its body appears intact. Reseat or reseal damaged interfaces with compatible materials, and secure cable glands without pinching wires.
If service requires opening the bar, renew sealant on both mating surfaces, including the lens gasket area, and verify uniform compression. Disconnect power before servicing, and follow the manufacturer’s torque and cure-time instructions to maintain a reliable, safe seal through winter exposure.
Check Vents After Winter
With the mating seams protected, inspect the light bar’s vent ports, if equipped, for road salt, sludge, or paint overspray that could trap moisture.
After winter, check each port and membrane. Look for tears, distortion, or blockage; a damaged membrane can exchange humid air and cause condensation even when the seals appear intact. Inspect fasteners and for corrosion.
Salt damage can weaken gasket interfaces and open leak paths.
If you find a fogged lens or condensation, clean the vent area and verify membrane function before resealing or reinstalling the bar. Don’t probe membranes with tools or use air; follow the cleaning guidance. After cleaning, restore seals at lens-to-housing and housing-to-housing joints around vent interfaces, and confirm waterproof integrity before returning the light bar to service.
Clear Lens After Rain
After rain, inspect the clear lens-to-housing seam for gaps, and check for fogging, trapped droplets, or corrosion around fasteners—all signs the lens seal may have failed. Don’t treat an exterior bead as a repair: low-quality re-sealing often fails when the mating surfaces remain unsealed. If you open the bar, disconnect its power source first, then clean and dry the lens and housing.
Re-seat the gasket, if fitted, and apply compatible sealant along the full lens-to-housing mating area. Keep the pressure-equalization vent clear and confirm it functions; trapped pressure or blocked venting can promote condensation after wet weather. Follow the sealant maker’s cure time before rain exposure or washing. Uncured silicone can wick water into the seam. If moisture returns, stop using the bar until you identify and correct the leak; don’t rely on added exterior sealant. Inspect again after curing, and keep the light off if water is visible inside.
Corroded Internal Circuit Board
If moisture returns after the lens seal is repaired, inspect the circuit board for corrosion before powering the light bar. Disconnect its power source and keep it off; energizing a wet or damaged board can cause short circuits.
Look for residue, discoloration, or damaged traces near screw points, connectors, and gaps where sealant or a gasket failed to form a barrier. Water may have entered through poor lens-to-housing or housing-to-housing seals, even without rain exposure. Budget assembler bars may have weak seals or faulty assembly; inspect the perimeter.
Remove moisture and assess corrosion; replace affected circuitry rather than assuming a new seal restores reliability. Clean and dry mating surfaces, then rebuild the internal barrier with a gasket, compatible sealant, and stainless hardware. Verify the enclosure is sealed before reconnecting power.
Prevent Over-Tightening Mounting Bolts
Tighten mounting bolts only until the light bar is stable and the gasket seats; excess force can deform the gasket or lens-to-housing interface and create leak paths. Use the mounting hardware to snug the bar, not to force extra compression. If your model uses Aurora-style waterproofing, follow the manufacturer’s torque specification; its 3/16-inch stainless screws aren’t designed for added gasket crush.
- Tighten in a cross pattern, making even turns on each side.
- Stop when the gasket seats and the bar no longer shifts; don’t keep turning.
- Excess force can squeeze sealant out, thin the seal, and weaken the waterproof boundary at housing mating surfaces, compromising IP69/IP69K-style protection. Work with the vehicle secured and power off; use a torque tool when the manufacturer specifies a value.
Inspect Cable Grommets
Inspect each cable grommet before sealing or reassembling the light bar to make sure it sits fully in its housing, with no gaps or pinched edges. Check the rubber for cracks, deformation, or hardening caused by heat or UV exposure; degraded material can’t maintain a water barrier. Confirm the cable-entry hole matches the grommet size. You need a firm compression fit, not a loose fit that lets the cable move.
Look for uneven flange contact, visible seams, or water-stain residue, which can indicate incomplete seating. Reseat the grommet before applying sealant or reassembling the housing. If the cable passes through sealant, inspect around the cable and the housing-to-grommet interface. Ensure the sealant forms a continuous bead without voids or channels. Disconnect power before handling wiring.
Conclusion
Keep your light bar sealed, clean, and ventilated to prevent moisture damage and electrical faults. Inspect seals, vents, cable grommets, and connectors regularly; apply dielectric grease only to clean connector surfaces, and rinse away winter road salt.
After rain, check the lens for trapped water and watch for signs of internal corrosion. Tighten mounting bolts securely without over-tightening. Before servicing wiring, disconnect power and follow the manufacturer’s instructions. If water reaches the circuit board, stop using the light bar until it’s repaired.
LED Light Bar & Whip Light Remote Control App Finder
Filter 24 verified iOS and Android apps that control LED light bars, whip lights, rock lights and underglow by brand, light type and features.