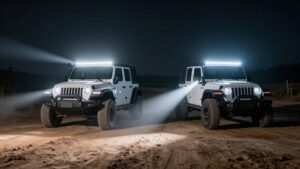
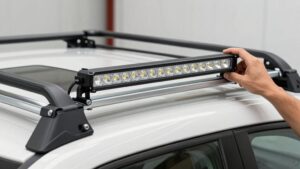
4Runner Ditch Lights vs Light Bar: Which Upgrade Gives More Light?
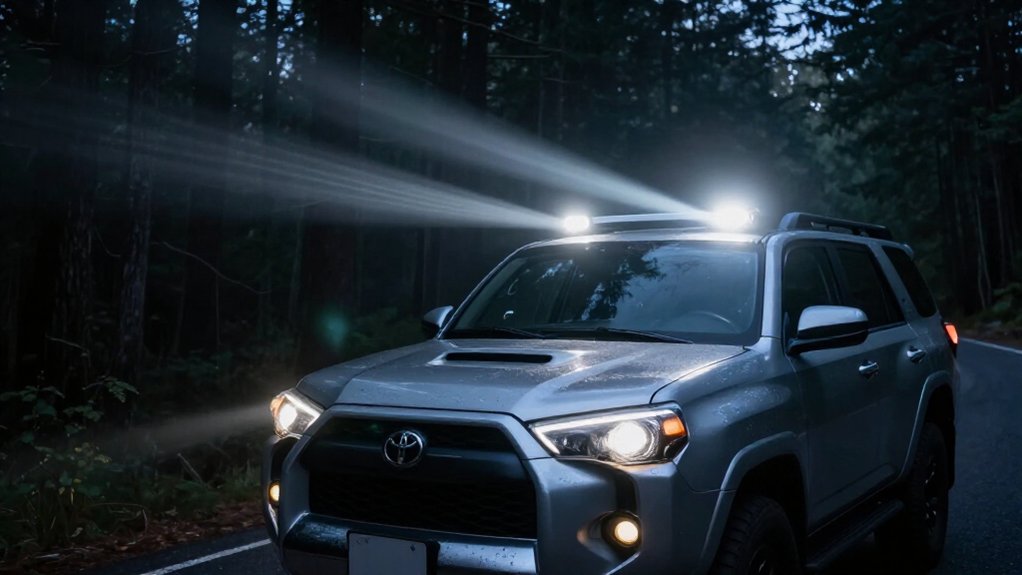
A light bar gives your 4Runner more downrange visibility, while ditch lights reveal hazards beside the front tires.
Choose a combo or spot bar for open trails, where extra reach gives you more time to react; use wide-flood ditch lights for slow, tight terrain.
Aim ditch lights low and outward to expose ruts and drop-offs without glare.
Neither setup replaces cautious speed or stopping distance. Keep going to compare placement, wiring, durability, and budget trade-offs before choosing.
4Runner Beam Coverage Patterns
On a 4Runner, ditch-light beam pattern determines whether you see more beside the rig or farther down the trail. Choose coverage to match speed and terrain, not simply maximum output. Flood beams reveal nearby shoulders, ruts, and ditches, but lose reach. Spot beams help you read edge obstacles farther ahead, while narrowing near-field visibility. Combo beams balance both needs.
| Pattern | Coverage | Safety trade-off |
|---|---|---|
| Flood | Wide, short | Exposes near shoulders |
| Spot | Narrow, long | Less corner visibility |
| Combo | Wide plus reach | Balances crawl and distance |
For a light bar, spot patterns extend downrange on faster sections; flood or combination patterns help you detect foreground changes. Aim ditch lights for controlled, side-focused overlap along the trail edge, then verify tire-line hazards before moving at night.
Hood-Mounted Ditch Light Placement
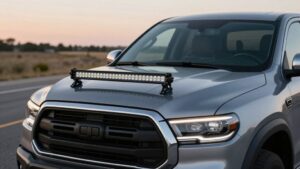
Mounted near the cowl or hood edge, ditch lights fill the foreground corners with light on ruts, ditches, and rocks near the front tires. These are areas factory headlights can miss.
Hood-mounted pods sit higher than A-pillar lights, so small aiming errors matter. If you tilt them upward, beams can strike the hood, creating glare and washing out terrain detail. Choose directional pods with fine adjustment, then set each beam low and outward. This angle illuminates trail edges for technical crawling while limiting reflections toward your eyes.
Their compact position near the vehicle’s visual corner line can help you judge adjacent obstacles at low speed. In dust or fog, maintain outward aim to limit backscatter toward the cabin and preserve readable contrast near the hoodline there.
Nighttime Trail Visibility Feedback
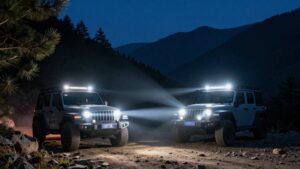
Aim hood-cowl ditch lights low and outward to reveal ruts, washouts, and drop-offs beside the tires that stock headlights often miss. On slow, technical switchbacks, this near-field coverage helps you choose a line by exposing berm edges, stumps, and hazards near the front corners before you commit. In dust or fog, the outward flood pattern can limit backscatter toward you compared with higher, forward-directed beams, though you should still reduce speed when contrast drops.
A combo- or spot-pattern light bar extends reach, helping you detect terrain changes and obstacles farther down forest roads. Ditch lights and a bar cover distinct zones: immediate side and foreground threats, plus the lane ahead. Together, they deliver a visibility gain; neither replaces cautious speed, scanning, or stopping distance.
Auxiliary Light Switching Controls
How you switch auxiliary lights matters as much as where you mount them: use a relay harness powered directly from the battery, with only a low-amperage trigger going to an in-cabin switch module such as Switch-Pros or sPOD. Don’t route high-current power through factory switches; relays should carry lamp current, with correctly rated fuses near the battery.
Assign ditch lights and the bar separate channels, so you can use side-flood coverage on tight trails or add forward reach when needed. Check local rules: auxiliary lamps generally must stay off on public roads, and some areas require covers. A dedicated cabin control helps you shut them off promptly.
After installation, aim the lamps and test each channel for correct voltage, flicker-free, consistent activation. If switching fails, inspect wiring and grounds; secure connections.
Windshield Pillar Mount Clearance
Separate switching channels let you control ditch lights independently, but the A-pillar brackets still need room to move and stay clear of nearby components.
Before selecting brackets, inspect windshield trim, wiper sweep, and roofline electronics. Mount position should keep optics tucked near the hood line, reducing windshield reflection compared with roof mounts; still, verify each beam clears the glass through its full adjustment range.
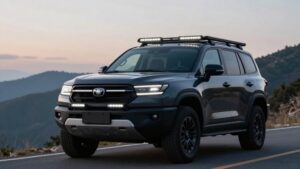
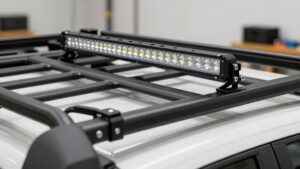
If you run a Prinsu-style rack, its added height may change the side or upper coverage you need. Check that brackets avoid roof accessories and wiring runs. Route harnesses with enough slack for full steering lock and suspension travel, when the body lifts, so they won’t pull at the pillars. Factory-bolt bracket kits can avoid drilling there and keep routing predictable overall.
Light Output at Distance
Although ditch lights help you spot nearby ruts and trail edges, a light bar with a combo or spot beam typically carries usable light farther down the trail. Your light bar’s longer housing and tighter combo or spot pattern can preserve contrast at range; wide ditch-light floods brighten foreground but may obscure distant detail.
Ditch lights reveal bottoms, ruts, and obstacles beside your front corners at slow speeds. Choose beam shape over brightness: a focused spot or controlled combo reaches farther than a broad flood. A roof or upper windshield mount can help your bar clear small rises; lower pillar lights favor nearby terrain.
Dust, fog, and rain can sharply reduce distance through backscatter. Aim forward and slow down if hazards aren’t visible within your stopping distance.
Wiring and Power Draw
Because a full light bar usually draws more current than a pair of LED ditch lights, size its wiring and fuse for the higher load. A 20 to 40-inch bar may pull several amps more than two pods, so check its rated current before choosing wire gauge, relay, and fuse.
Use a fused relay harness or a Switch-Pros/sPOD circuit to supply either setup; don’t run high-load lamps directly through a lighted dash switch.
Make short power runs and secure clean grounds; poor connections and undersized wire cause voltage drop, which can dim the beam even when the LEDs are capable of greater output. Plan for the light bar’s maximum draw first, then size every component to its specifications and protect the circuit with the manufacturer-recommended fuse.
Weather Resistance and Lifespan
Check for sealed IP67-or-better housings and marine-grade connectors to keep dust and water out during trail use and washing.
For longer service life, choose impact-resistant lenses, corrosion-resistant mounts, effective heat dissipation, and wiring rated for the lights’ current draw. These features help prevent early failure when you rely on your lighting after dark.
Water and Dust Protection
When water crossings and mud spray are part of your driving, choose ditch lights or a light bar with an IP67-or-higher rating to protect the LEDs and drivers from water and dust. Check the rating applies to the complete housing, not just the LEDs; sealed gaskets and a designed breathing system help keep moisture and fine grit from migrating inside. Choose impact-resistant lenses, such as polycarbonate or tempered glass, to resist grit abrasion and preserve optical performance.
Then verify heatsinking and airflow can manage heat in dusty conditions; junction temperatures support reliable operation. Mount vibration-damped brackets to limit lens micro-cracks and seal stress over ruts and washboard. For a light bar, confirm wiring, relays, and harness connections remain sealed for continuous-duty use.
Expected Service Life
A strong IP67 seal protects ditch lights and light bars from dust and temporary immersion, but service life also depends on heat management, mounting, and wiring. Both options face mud, dust, and road spray, so weak seals can let moisture or grit damage components.
Choose proven trail-grade lights with corrosion-resistant housings, durable lenses, and stainless or coated fasteners. Brands such as Baja Designs, Morimoto, and Cali Raised LED offer examples.
For ditch lights, rigid, powder-coated brackets secured to factory bolt points reduce vibration and wiring strain; flexible mounts can accelerate failure.
Quality light bars typically manage heat through larger aluminum housings and effective thermal paths. Cheaper units may degrade during prolonged, high-output use.
Protect the electrical system with a relay harness, waterproof connectors, and correctly gauged wiring to limit voltage drops and intermittent failures. Inspect mounts, seals, and connections routinely.
Rock Crawling vs. Fast Trails
When you crawl over rocks, aim ditch lights at tire-edge ruts and washouts to reveal nearby hazards your headlights miss. On faster trails, a forward-facing light bar extends your view downrange, giving you more time to spot obstacles and react.
Match the beam pattern to your speed and terrain, or combine both lights for near-field detail and distance coverage.
Rock Crawling Visibility
At crawling speed, ditch lights with wide flood or cornering patterns make it easier to judge the terrain beside your 4Runner, illuminating ruts, drop-offs, and rocks near the front tires that a forward light bar can miss. Mounted lower on the A-pillar or hood cowl, they cast side wash across the front-corner zones, helping you read trail edges and place each tire at walking pace. Aim the beams outward at tire level; this reveals obstacles beside the bumper and hood line without relying on distant illumination.
On tight climbs and turns, controlled, broad output preserves rock texture and contrast. A powerful long-throw spot beam can reflect off dust or nearby surfaces, creating glare that hides detail. Check alignment before driving, keep the lights secure, and use them with your headlamps so you can assess the immediate line without mistaking shadows for clear ground. Pause to confirm wheel placement before committing to an obstacle, especially where a narrow drop-off borders the route.
Fast Trail Coverage
Once you pick up speed on a fast trail, a properly aimed combo or spot light bar usually gives you more usable downrange visibility, and more time to react, than ditch lights. That reach helps you identify hazards sooner and judge your line before you arrive.
A combo beam balances lateral coverage with distance; choose a spot pattern if your sightlines routinely extend farther. Ditch lights generally illuminate nearby edges and ditches, not the trail ahead at speed. Their broad side spill can reveal obstacles beside your front corners, but it won’t replace forward reach. At crawl pace, that close detail can help you read ruts and drop-offs during tight turns. Keep your speed within the distance your headlights and auxiliary beams can reveal.
Match Lights to Terrain
Match the beam to your terrain: wide ditch lights usually give you more useful detail beside the tires during slow, tight rock crawls, while a forward light bar helps you spot hazards sooner on fast, open trails. On tight turns, aim flood or wide-cornering pods slightly outward and down to reveal ruts, branches, and front-corner drop-offs before a tire reaches them. That near-field view can prevent a costly slip.
For open forest roads or desert runs, a combo or spot-forward bar extends sightlines over rises and dips, giving you more time to react; side-filling ditch beams can’t replace that reach.
- Crawl slowly; illuminate tire-side hazards.
- Keep speed down when visibility falls.
- Choose reach before entering open sections.
- Mixed routes need balanced beams.
Verify aim, wiring, and glare.
Matching Lights to Your Budget
Start with the light you need, not the highest output you can afford: a quality pair of wide-flood ditch lights often delivers the best value on slow, technical trails by illuminating the ditches and ruts beside your front tires.
If your budget is tight, choose true wide-flood beams and aim them to wash trail edges; they fill near-side gaps. With more to spend, a 10 to 20-inch combo bar extends forward reach, but its load may require a relay harness and heavier wiring.
For mid-range value, pair a moderate bar with ditch lights: the bar reaches downrange while corner beams expose ruts near the hood. Reserve funds for brackets, weatherproof switch-and-relay control, and aiming time. Poor aim or undersized wiring wastes output and can leave hazards unseen.
Conclusion
Choose the pattern that fits your routes: ditch lights expose trail edges and obstacles beside your hood, while a light bar throws broader forward coverage. On slow trails, use ditch lights to spot rocks and ruts; at speed, a bar can reveal more terrain ahead.
Confirm pillar clearance, weather sealing, wiring capacity, and switch access before installation. Aim each beam carefully, and don’t drive beyond what you can see. Test it on familiar ground.