What Gauge Wire for Rock Lights? Sizing for 4, 8 and 12 Pod Kits
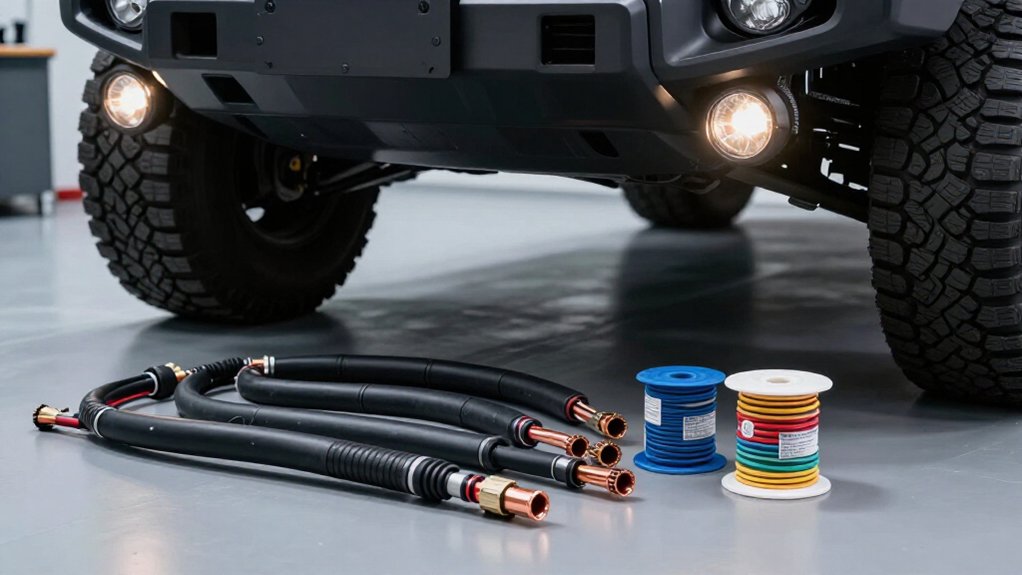
Choose rock-light wire by the kit’s manufacturer-rated current and cable-run length, not pod quantity alone. For four pods, follow the maker’s specified single-circuit layout; for eight, size the shared source-to-controller feed for total current; for twelve, use a rated main fuse or fused branch circuits.
Add each pod’s circuit current, account for voltage sag, and ensure the fuse guards the wire. Your routing, grounding, and insulation ratings matter too; the details below clarify choices.
Gauge by Pod Count
Wire gauge depends on each pod’s current draw, the number of pods on each circuit, and the wire-run length, not pod count alone. Before choosing a gauge, add currents of pods sharing each circuit, using manufacturer specifications rather than estimates. Then select conductors rated for that load and installation conditions, including insulation temperature, bundling, and exposure.
Longer runs increase voltage drop, so you may need a heavier gauge to maintain reliable pod output and limit heat. Check the circuit’s fuse: it must protect the wire, and the wire must safely carry expected maximum current. If you divide pods among fused branches, size each branch for its own combined load; don’t size from the kit total alone. Always confirm ratings and routing before energizing the system.
4-, 8-, and 12-Pod Wire Sizes
Because pod count alone doesn’t determine current, size each circuit for its actual load and cable length. For four pods, follow the maker’s single-circuit layout. With eight, size the shared source-to-controller feed for total draw, particularly on long routes.
Treat twelve as higher-current; use a suitable main fuse or branch-fuse groups.
| Kit | Wiring decision |
|---|---|
| 4 pods | Follow specified single circuit |
| 8 pods | Increase feed capacity as needed |
| 12 pods | Consider heavier feed and branch fuses |
Longer routes add resistance and may dim pods; undersized wire heats more. If your layout needs extra cable, step up one or more AWG sizes from the minimum for a four-pod run. Never raise a fuse rating unless the wire and kit support it, and the circuit’s rated current remains within limits.
Rock Light Wire Gauge Basics
For rock lights, choose wire by the kit’s total current and the run length. First, add the amperage of every pod operating on the same circuit. Then select a wire gauge that safely carries that load while limiting voltage drop over the full wire run.
With AWG sizing, a smaller number indicates a thicker wire: 14 AWG is larger than 16 AWG. Thicker wire generally carries more current with less resistance, which helps maintain voltage at the LEDs.
Account for the distance from the power source to the lights, because longer runs increase resistance and voltage drop. Use the shortest practical route, and don’t add unnecessary slack or detours. Wire that’s too thin can overheat under load, melt its insulation, and create a fire risk. Verify your circuit’s current before installation.
Copper Versus Aluminum Conductors
Copper’s lower resistance than aluminum of the same gauge helps limit voltage drop and heat on your rock-light runs.
If you choose aluminum, use a larger wire size to match copper’s current-carrying capacity, and select connectors rated for that conductor. Whichever you use, size the fuse for the circuit’s total current.
Conductivity and Resistance
Copper has lower resistivity than aluminum, so copper wire of the same AWG typically runs cooler and loses less voltage. That difference matters when you power rock lights through long runs from the battery to the controller and onward to each pod. Every conductor resists current flow; higher resistance creates more voltage drop, which can reduce LED brightness.
It also converts more electrical power into heat within the wiring.
To achieve similar current-carrying performance, aluminum needs a larger cross-sectional area than copper. Don’t assume the same AWG will perform equally with both materials. Select a wire gauge rated for the circuit’s total pod current and expected cable length, regardless of conductor type. Undersized wiring can overheat, so verify the load and run before installation. Maintain secure connections and follow the wire manufacturer’s specifications.
Copper Wire Advantages
Compared with aluminum, copper has lower resistivity, so it loses less voltage over long rock-light runs and helps keep pods bright. For a given current capacity, copper typically uses a smaller cross-sectional area than aluminum, making routing easier through tight vehicle harness paths. Its flexibility also makes bends and terminations easier to manage, and crimping a sound connector can help prevent loose joints that may build heat.
Under off-road vibration, copper can maintain more consistent contact resistance over time, supporting dependable lighting. For 4-, 8-, and 12-pod circuits, select the conductor size for the actual load and run length; don’t rely on material alone. Match the fuse to the wire’s ampacity and protect every powered branch appropriately. Copper runs cooler at equal loads.
Aluminum Wire Tradeoffs
Although aluminum wire is lighter and often less expensive, its resistivity is about 1.6 times higher than copper’s, so it creates more voltage drop and heat at the same current and length. In a 4-, 8-, or 12-pod rock-light circuit, that added drop can dim LEDs, while excess heat can stress wiring. You’ll generally need more conductor cross-sectional area to limit these effects.
Aluminum also forms an oxide layer that can compromise electrical contact. Use lugs and connectors specifically rated for aluminum, and apply the specified anti-oxidation compound; unsuitable hardware can loosen or overheat. In wet, off-road conditions, seal connections carefully and inspect them periodically. Copper is usually the simpler choice for these kits.
Aluminum can work safely when you size the conductor appropriately and protect every termination against moisture, oxidation, and heat.
Gauge Equivalence
When matching current-carrying capacity in a 12V rock-light circuit, aluminum typically needs a conductor about one AWG size larger than copper. That difference reflects aluminum’s higher resistivity: at equal gauge and length, it produces more voltage drop than copper. In your low-voltage lighting run, that drop can slightly reduce pod brightness and increase the current your controller must supply.
The one-size rule is a practical comparison, not a substitute for ampacity and temperature-rise ratings; verify the conductor’s rating for the expected circuit current. If you size a fuse using the 80% rule, such as total load divided by 0.8, confirm that your selected conductor can carry that resulting current without excessive heating or voltage drop. Aluminum demands rated aluminum lugs or connectors. A poor termination can overheat even when the wire’s gauge appears adequate, so connection quality matters as much as the stated size.
Choosing the Right Conductor
Choose copper for most rock-light harnesses: its lower resistance limits voltage drop, helping pods maintain consistent brightness, and it runs cooler at a given current. Those advantages matter beneath your vehicle, where vibration and water can stress wiring and connections.
If you choose aluminum, don’t use the same AWG size as the copper equivalent without checking requirements. You’ll generally need a larger conductor to achieve comparable ampacity and voltage-drop performance.
Aluminum also requires compatible terminals and lugs, installed and tightened correctly; poor connections can overheat. Copper is more forgiving in many automotive splices, but you should still make secure, weather-resistant connections.
For 4-, 8-, or 12-pod kits, select copper wire for the circuit’s expected total current, run length, and fuse rating. Verify both ampacity and voltage drop; don’t rely on pod count alone.
Long-Run Voltage Drop
Long cable runs add resistance, so the voltage at your rock-light pods can drop below the system’s nominal 12 volts under load. The longer your route and the thinner your wire (a higher AWG number), the greater the drop. Under load, reduced voltage can dim pods or make their brightness and color output uneven.
For example, a nominal 36-volt supply might deliver only 34 volts at a distant load; the same principle applies to a 12-volt circuit. If you add pods, recalculate total current and cable length. Keep routing short and choose a conductor gauge rated for the circuit’s current and run length. Use appropriately rated branch fuses to protect each circuit group. Verify voltage at the pods while they’re operating; don’t rely on unloaded readings.
A shared ground can bottleneck a rock-light circuit because it carries the return current from every pod. In a 4-, 8-, or 12-pod kit, each added pod increases current through that common conductor. If the ground wire is undersized or long, its resistance causes voltage drop and I²R heating. Pods may run dim or uneven, and the wire can overheat even when.
Size the shared ground for the sum of all pod currents, not one pod’s draw. With RGBW lights, account for worst-case total return current across channels, since channel use can vary. Keep the ground path short and use a heavier-gauge conductor; separate branch grounds can also reduce shared-path loading where practical. Verify connections are secure and the wire’s rating suits the installation.
Fuse-To-Branch Wire Transitions
Because the fuse-to-branch feed carries the combined load, size it for the full current of every pod on that branch, then use smaller wire only after the split.
Place the inline fuse close to the battery or main relay, then run properly sized wire to the distribution point. Add all pod current on that branch before choosing feed gauge; don’t size it for one pod.
Choose a fuse about 1.25 times total current under the 80% rule, protecting downstream wiring without nuisance trips. For long feeds, increase AWG as needed to limit voltage drop. With RGBW, treat each color channel as a separate current path, with fusing and branch wiring per channel or group, not one common unfused run.
Confirm fuse and wire ratings fully suit the load.
Loose Connections and Corrosion
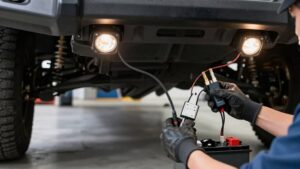
Keep every rock-light connection fully seated at the controller, pods, and fuse holder, because loose contacts add resistance, generate heat, and speed corrosion. Secure the fuse holder near the power source so vibration can’t loosen its contacts and cause intermittent failures. Protect exposed junctions against moisture, a common cause of galvanic corrosion in wet, salty conditions.
- Seal exposed connections with waterproof heat-shrink crimp connectors or apply dielectric grease to limit water intrusion.
- Route harnesses clear of sharp metal and suspension movement; repeated flexing can break seals and expose copper.
- After muddy trips, inspect junctions for browning, green or white oxidation, or a hot-connector smell. Any sign warrants cleaning, re-crimping, and resealing before you use the lights again.
Don’t ignore a loose or corroded contact: it can worsen under load and compromise reliable lighting. Recheck plugs and fuse-holder seating during routine wiring inspections.
Insulation Temperature Ratings
Choose automotive-grade wire with insulation rated for at least 105°C, especially when routing rock lights near engine or exhaust heat. Your underbody route also faces abrasion, oil, and chemicals, so choose cross-linked PE or automotive PVC insulation designed for those exposures.
- Near a hot exhaust, keep the harness clear of contact and use rated protection where needed.
- In bundled or long runs, check the wire’s temperature rating for reduced airflow and accumulated heat.
- For wet trails, pair water-shedding insulation with sealed junctions to limit moisture wicking during temperature cycling.
Don’t use indoor cable: its insulation may soften or crack under automotive heat, increasing resistance and creating a failure risk. Verify the manufacturer’s temperature specification at installation; the rating must suit your route and operating conditions.
Conclusion
Choose wire gauge based on total current, run length, and conductor material, not pod count alone. For most kits, 16 AWG suits short, low-current branches; use thicker copper wire when current or distance increases. Size shared grounds and every fuse-to-branch section for the load they carry.
Protect connections from moisture, and match insulation temperature ratings to your installation. Before powering the lights, verify the manufacturer’s specifications, fuse rating, and voltage drop; don’t rely on a gauge estimate alone.