How to Make a UTV Street Legal: Lights, Mirrors, Horn and Paperwork
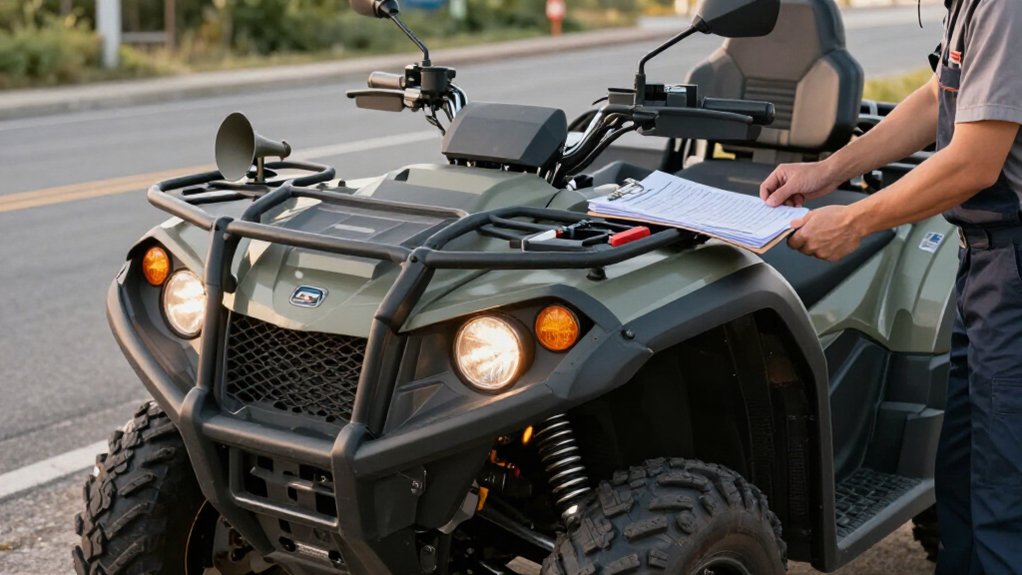
To make your UTV street legal, check your state’s rules before buying parts; some states restrict on-road use.
Install working high- and low-beam headlights, taillights, brake lights, compliant front and rear turn signals, a horn, a plate light if required, and two well-aimed mirrors.
Secure the headlight on a rigid bracket, weatherproof wiring, and verify flash rate and every lamp.
Gather title or ownership documents, meet DMV requirements, then arrange insurance and registration.
Use the checks below.
Street-Legal UTV Requirements
Before you ride your UTV on public roads, check your state’s equipment rules. Install working headlights with high- and low-beam settings, plus taillights and brake lights that signal stops. Add front and rear turn signals, with a dash indicator or illuminated switch. Fit a horn loud enough to hear from a distance.
For rearward visibility, mount at least one rearview mirror and two functional mirrors, including a driver-side mirror and a passenger-side or wide-angle mirror. Secure a license plate at the rear and add plate lighting where required.
Provide seat belts or equivalent multi-point harnesses for every occupied seat. Use DOT-compliant radial tires if required, and inspect lenses, wiring connections, and light mounts. Keep lenses unobstructed, connections weatherproof, and mounts secure against rattling.
State-Specific Compliance Check
Once your UTV has the required equipment, check your state’s street-legal rules: some states, including Montana, South Dakota, Wyoming, Arizona, Utah, and Idaho, allow straightforward DMV registration, while others limit travel to designated routes or prohibit on-road use.
Before you apply, confirm the checklist and paperwork sequence; requirements can vary by county.
- Verify high/low headlights, tail/brake lights, front and rear turn signals, horn, rearview mirror, and plate light.
- Check extras: DOT-stamped radial tires, windshield/wiper, seat belts, speedometer, or emissions test.
- Gather title or ownership proof and insurance; complete any required inspection in the stated order.
- If your state bars registration, use reciprocity only with valid plates and insurance, and meet destination-state equipment rules.
Confirm details with DMV before riding to avoid citations or impoundment.
Step 1: Mounting a Clean Headlight Bracket
Choose a rigid metal bracket location that keeps the headlight level, leaves the lens unobstructed, and clears the tires, fenders, and grille through full steering and suspension travel. Use a rigid metal mount and the manufacturer’s hardware pattern; don’t substitute zip ties. Tighten locking fasteners with thread-lock so vibration won’t loosen the lamp or shift its beam.
Keep adjustment screws accessible, and route wiring through protective grommets or loom to prevent chafing; make sure the lens stays weather-sealed. After installation, check the bracket and lamp for play by hand. Take a short ride, then recheck stability and aim the beam again; a loose mount can rattle and fail inspection even when the light works. Verify the bracket remains square after tightening all fasteners securely.
Step 2: Gather Required Documents
With the headlight mounted securely, start your paperwork with proof of ownership: a clean original title, manufacturer’s certificate of origin, or, for some used purchases, a bill of sale plus any required title-chain documents.
Next, check your state DMV’s application requirements for street registration and plates. Your state may require a safety or equipment inspection before you apply, or after you submit the application, so confirm the sequence and bring the UTV when instructed.
Arrange liability insurance for road use before plate issuance; you’ll generally need proof of coverage to complete registration.
If direct registration isn’t available, an out-of-state route may involve entity and ownership records, such as a Montana holding-company purchase or transfer. Make sure those documents establish the correct owner and title for the state issuing plates.
Keep your registration, plates, title-chain records, and insurance together in the vehicle. During a stop, officers may check that your tags and paperwork are valid and consistent at stops.
Step 3: Install Turn Signals
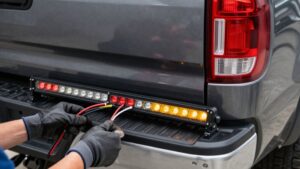
Install DOT-compliant front and rear turn signals with amber lenses in front and amber or red lenses in the rear. Wire each side so it flashes at the correct rate, and use a factory-style flasher relay or compatible module. Confirm the dash indicator or illuminated switch activates when you signal.
Secure lamps with metal brackets or locking fasteners; zip ties alone can let them loosen and rattle. Seal every electrical connection with weatherproof, dielectric connectors. Route wires away from hot exhaust components and moving parts; secure the harness.
Before you begin plate or registration steps, test left and right signals, check rear visibility from angles, and verify the lens faces correctly. Correct loose mounts, poor connections, or wiring faults before riding on public roads.
Step 4: Install DOT-Approved Mirrors
For a street-legal UTV, fit at least two DOT-approved mirrors, such as a driver-side mirror and a passenger-side mirror or a wide-angle rearview mirror.
Choose mirrors rated for your UTV and check local requirements. Mount them to rigid frame points with supplied hardware or compatible brackets. Tighten fasteners, then check for wobble or rattling; loose mounts can compromise visibility or fail inspection.
For roll-cage or visor mounts, use purpose-built brackets that keep mirrors clear of the windshield and eye-protection line. From your normal seated position, confirm you can see behind you without leaning, including around the vehicle during turns and lane changes. With the engine running, move the suspension and verify the mounts stay secure and you can adjust the mirrors from your seat.
Step 5: Aim Mirrors and Horn Properly
Once the mirrors are securely mounted, aim both sides so you can see along your flanks and part of the lane behind you without turning your head. Keep each mirror’s view wide enough to cover nearby traffic while preserving your normal view of the road through the windshield. If your setup includes a driver-side mirror, add a functional passenger-side or wide-angle rearview mirror to provide the required two working mirrors. Check sight lines from your usual driving position.
Test the horn before every compliance drive. Make sure you can reach its switch quickly from the steering wheel or controls and hear a clear alert at a reasonable distance. Before applying for plates, confirm mirrors and horn work, wiring is weatherproof, and nothing rattles.
Step 6: Tighten Bracket Fasteners
Because vibration can loosen lighting hardware, use the required mounting hardware and approved metal brackets—not zip ties—and tighten every fastener securely. Check each light and turn-signal bracket for movement, and use a locking method such as threadlocker suited to the bolt size and operating temperatures. This helps keep bolts from backing out on rough pavement.
After your first short ride, re-torque the bracket bolts; new hardware can settle under load. A 20–30-minute ride is a practical interval. Recheck the fasteners periodically, especially after rough driving or maintenance.
Make sure each lens sits snugly and points correctly, with nothing blocking its visibility. Loose mounts or mis-aimed lights and indicators can fail inspection or draw enforcement attention, even if the bulbs work.
Seal connections against weather, and secure wiring with strain relief so vibration won’t pull leads loose.
Check Signal Flash Rate
Check your turn signals’ flash rate before mounting them; many standards call for about 60–120 flashes per minute, though requirements vary by state. Test each side with a stopwatch: switch on the left indicator and count flashes for 15 seconds, then multiply by four. Confirm the lamps flash—not just the dashboard icon—and check that all bulbs in the circuit keep the same cadence.
If timing runs too fast or slow, check for an incompatible LED flasher, a poor ground, or a burned-out or incorrect-wattage bulb; fit the specified flasher and load setup. After adjustments, retest when warm, then again at idle with the headlights on. Voltage drop can change timing, so verify the signals still meet your state’s standard before installation.
Diagnose a Blown Signal Fuse
If your UTV’s turn signals stop working, or only one side does, inspect the fuse labeled “turn signals” or “indicator” in the fuse box. Use a multimeter or 12V test light to test it. Voltage on both sides means it’s good; voltage on one side suggests an open fuse or contact issue.
| Test result | Likely cause | Next step |
|---|---|---|
| Voltage both sides | Fuse is good | Check switch or flasher |
| Voltage one side | Fuse is open | Replace with same rating |
| No voltage either side | Feed or contact issue | Check connection |
Replace a blown fuse with the exact amperage, such as 10A or 15A; never upsize. Inspect front and rear lamp connectors for loose, corroded, or water-damaged pins; a grounded harness can blow the fuse again. A bad flasher or switch can mimic failure.
After repairs, cycle signals and confirm both lamps and the dash indicator work. If the fuse trips again, diagnose the short before driving.
Recheck Wiring After Washes
After every wash, inspect each light and turn-signal connection for loose weatherproof plugs, corrosion, or moisture inside the housings. Water can reach terminals during rinsing, and vibration may then interrupt a weakened circuit.
Immediately test low and high beams, brake lights, front and rear signals, and the horn; shorts may appear only when loaded. Check ground wires and fasteners on tail and dash modules, too.
Wet grime can conceal a loose ring terminal, leading to flicker or failure. Confirm the plate light stays on and aimed properly, and its lens neither fogs nor leaks after pressure washing.
Near wheels or suspension travel, make sure looms remain sealed and strain-relieved; flex can reopen a formerly watertight route. Repair defects before driving on public roads again.
Conclusion
Before you ride your UTV on public roads, confirm your state’s equipment and registration rules; requirements vary. Secure the headlight bracket, tighten every fastener, and test headlights, turn signals, mirrors, and horn.
Check signal flash rate and replace a blown fuse before troubleshooting further. Recheck wiring after washes, then carry your required documents and proof of insurance. If anything fails, fix it before you ride. A careful final inspection helps you stay compliant and visible.