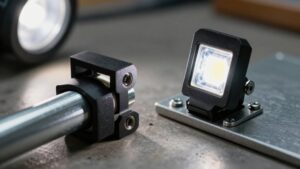
Flush Mount vs Surface Mount Pod Lights: Look, Install and Durability
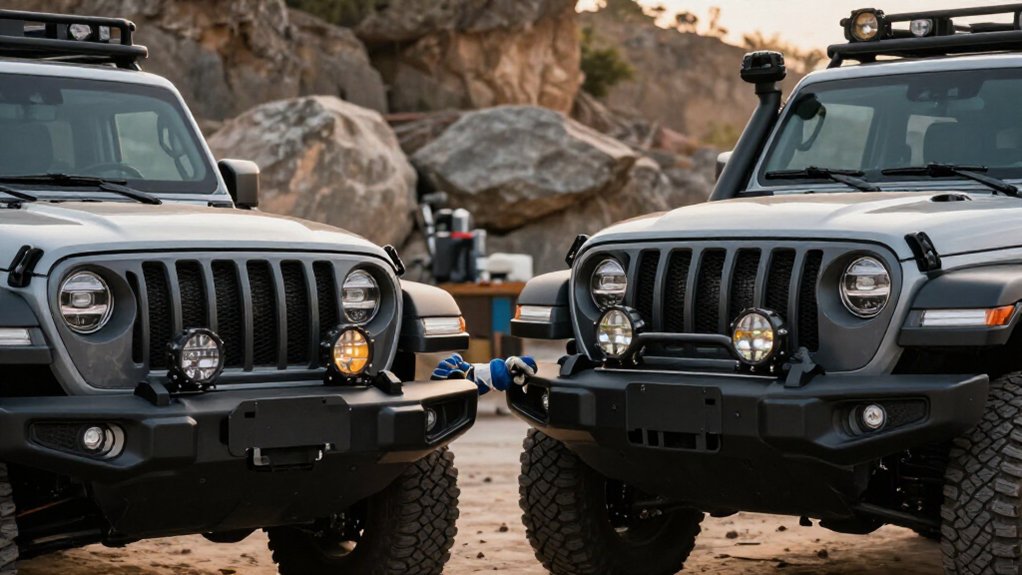
Choose flush-mount pods when you want a clean, protected profile and can cut the panel accurately; choose surface mounts when you need simpler installation and easier connector access.
Flush units sit behind a sealed flange, resist impacts better, but require precise cutout depth, reinforcement, and pre-set aiming.
Surface pods avoid body recesses yet protrude into rocks and brush.
Either style needs sealed wiring, controlled heat, clean lenses, and beam aim; sections below explain the tradeoffs.
Cutout Size and Mounting Depth
Before cutting a panel for a flush-mount pod, check the specified cutout size and mounting depth: the opening must match the light’s flange dimensions and tolerance, while the space behind it must fit the housing, heat sink, and wiring pigtails.
| Check | Flush versus surface |
|---|---|
| Cutout | Match flange diameter, shape, and tolerance |
| Depth | Reserve cavity for housing, heat sink, and pigtails |
| Clearance | Include wiring grommet and seal or gasket thickness |
| Risk | Flush cuts allow less adjustment; surface units need no body recess |
You’ll generally need a deeper recess than with a surface mount, whose body sits atop the skin. Verify both dimensions in the datasheet before cutting or routing wires; a poor fit can compromise seating and expose wiring to damage. Don’t guess or sealing.
How Each Housing Mounts
Once you’ve confirmed the cutout and depth, consider how each housing attaches: a flush-mount pod sits in the panel behind a flange and gasket, with its lens nearly even with the surface, while a surface-mount pod bolts onto the exterior on a bracket or base. Before cutting, set the flush pod’s aim; installation fixes its angle.
Route wiring through a grommeted, sealed pass-through to protect the cavity. A surface pod needs no panel cut: bolt its base in place and route wiring along the panel or through a protected opening. You’ll get easier service access and more post-install alignment. However, the protruding housing faces greater rock and branch exposure. Position it clear of contact, and protect exposed wiring from abrasion. Choose according to panel access.
Trail Vibration Resistance
On rough trails, flush-mounted pods generally resist vibration better than surface-mounted pods because their recessed, tight-fitting connection has less leverage for impacts to loosen it. That shorter moment arm reduces bending when rocks or brush strike the light.
A properly fitted flange and gasket limit micro-movement, helping keep the lens plate secure through repeated jolts.
Harness Connector Access
Harness connector access differs by mounting style: surface-mount brackets usually leave more room to reach service slack, while flush-mount installs can trap the plug behind the panel.
Surface mounts keep connectors reachable for trail repairs. For flush mounts, route leads to a reachable grommet or pass-through, then place a sealed inline connector or disconnect coupler inside the panel cavity so you can unplug the pod without removing it or cutting wires.
Fit a grommet wherever the harness crosses sheet metal or bumper skin, and keep the connector clear of pinch points to limit vibration damage and abrasion. If pigtail is IP-rated, position its mating connection in a dry, protected zone, not at a low point where water can pool. Check access before final fastening.
Panel Material and Reinforcement
After confirming connector access, check the panel material before cutting: a flush-mount pod needs consistent thickness around its opening to support the flange and fasteners without flexing, cracking, or unevenly compressing the gasket.
Compared with a surface-mount pod, this cutout makes panel strength more critical because it removes supporting material. On steel bumpers, reinforce thin sections with a backing plate or internal ribs to resist vibration and off-road impacts, which can loosen the sealed perimeter.
For aluminum or fiberglass, use an internal doubler or marine-grade backing; overtightening can warp or compress these panels. Check thickness around the full opening so the gasket or trim ring seals evenly. If the cutout opens into a cavity, add a braced frame to spread load beyond screw holes.
Replacement-Part Availability
Check replacement-part availability before choosing a mount style: surface-mount pods usually swap faster, while flush-mount replacements may require removing trim rings and accessing the light from behind the cutout. That difference matters when you carry spares or need a trail-side repair; isolate power before loosening wiring or hardware.
- Match flush-mount pod diameter and flange; a mismatch can mean recutting and resealing the opening.
- Check surface brackets and bolt patterns; compatible housings are generally easier to source across systems.
- Confirm whether the maker sells a complete pod, gasket kit, and wiring pigtail.
- Sealed connectors or potted junctions may limit flush-unit repairs to full replacement, not an LED module.
Verify model-specific stock, and keep the seal and harness parts available nearby.
Heat Buildup in Enclosed Pockets
Because a flush-mount pod sits in a recessed pocket, its LED module and driver may get less airflow than a surface-mounted unit, allowing heat to build up.
You’ll face greater risk when the pocket is shallow or the cutout restricts ventilation. Dust or mud on the housing’s backside can insulate it further.
Excess temperature can lower LED output over time and shorten driver and diode life; both perform best near their specified thermal range.
Use the flange gasket specified by the maker and preserve the manufacturer’s required heatsink clearance so convection and thermal conduction remain effective. If you’re seeing discoloration around the cutout, dimming after repeated runs, or an unusual heat odor, stop using the light and inspect installation and thermal conditions before continued operation.
Lens Cleaning and Mud Buildup
Flush-mounted pods expose their lenses to direct spray, while protruding surface mounts can trap mud along edges and smear it across the lens. After off-road use, let the lens cool, dry-sweep grit, then wipe it with mild cleaner to protect clarity and beam output.
Don’t aim high-pressure water into housing seams, and keep lenses clear so reduced visibility doesn’t compromise safety.
Wipe-Down Accessibility
When mud coats the bumper, flush-mounted pods are usually easier to wipe clean than surface-mounted lights because they lack a protruding bracket that collects debris. Their near-flush position leaves less exposed hardware to work around, while recessed lens faces can still hold grime at the perimeter.
After muddy runs, wipe from the lens center outward with microfiber, reaching the outer seal line without dragging grit across the coating. That routine helps preserve clarity and keeps light output dependable when you need it on dark trails.
- Use light pressure on frosted covers; abrasives can cause haze.
- Check the seal perimeter for residue after each pass.
- Compare surface mounts: brackets may require extra wiping.
- Clean before driving to protect nighttime visibility.
Recheck illumination before your next drive.
Mud-Trapping Edges
A flush pod’s recessed lens can trap wet grit in the gap between the lens and panel, so a quick wipe may leave a film that dims the beam; a surface-mounted light is less prone to this perimeter buildup but exposes more hardware.
In wet, dirty conditions, mud, clay dust, and road spray, the recess tends to hold material instead of shedding it. Poor sealing can let grit and water work behind the flange, where grime may cake around the lens.
Choose a pod with a sealed lens and smooth trim ring, then clean the perimeter routinely. Use a soft cloth and suitable cleaner, and inspect the seal for damage before each trip. Restore clear output before driving at night or in poor visibility.
Dusty Trail Visibility
Both pod styles retain the same flood or spot beam, but their mounting position changes exposure to dust and grit. Surface-mount lights are easier to re-aim above the densest haze, while recessed flush mounts need careful initial aiming to limit glare and washout.
Keep lenses clean and choose a beam angle that preserves trail contrast for safer visibility.
Dust and Beam Spread
Dust scatters light and creates a bright haze, so a wide flood or diffused flush-mount pod often reveals more usable trail detail than a narrow spot that concentrates glare. Flush mounting doesn’t alter optics; the lens sets your pattern. Its lower, forward position can fill the trail immediately ahead, while beam width determines peripheral coverage.
- Choose a wide flood or frosted diffuser to preserve contrast across suspended dust.
- A tight spot concentrates output, often making nearby particles brighter than trail features.
- Set aim at normal ride height; small angle changes shift illumination through dusty air.
- Keep the beam below dense dust layers and check coverage before driving fast.
Compare patterns on a familiar route, then slow down whenever visibility or obstacle detection drops sharply.
Glare in Trail Haze
Even with a suitable beam spread, suspended trail dust can scatter pod light into a bright haze that washes out terrain detail. You’re looking through illuminated particles, so a tight, high-intensity spot can create a harsh hotspot and reduce contrast. A broader, lower-intensity flood or wide pattern generally produces less scatter glare in dusty air.
Flush-mounted pods sit nearly even with the surface and can reduce direct eye-line glare, but they won’t stop haze from reflecting toward you if you aim the beam too high. Keep the beam center at or below the horizon; upward aim can flatten the scene despite greater brightness. Mount style doesn’t change LED optics, so choose a forgiving pattern and check aim during installation. Correcting it early matters, especially with flush installs, which are fixed sooner. Don’t let glare conceal trail hazards.
Visibility by Mount Style
On dusty trails, mount style affects visibility mainly through impact protection and aim, not the pod’s beam optics. Flush mounts sit nearly even with your bumper, keeping the beam clear and placing lenses farther from brush and rocks. Surface pods protrude, so debris can strike them, misalign a lens, and shorten usable reach without changing optics.
- Set a flush pod’s fixed cutout angle carefully before driving; dusty scatter can amplify glare.
- Choose flood output when you need forgiving, broad wash from a less adjustable installation.
- Fine-tune surface pods more easily, but recheck aim after impacts and clear lenses often.
- Prioritize intact, correctly aimed lights; protection usually matters more than mount-specific optics.
At speed, reduce pace whenever dust obscures your path; no mount restores forward visibility.
Beam Spread on Narrow Trails
How does beam spread affect your margin for error on a narrow trail?
On tight single-track, a flush-mount pod’s wider flood beam usually gives you more tolerance than a tight spot. Its recessed angle still puts useful light on the ground ahead when you’re slightly off-line, helping preserve reaction distance.
With a spot beam, small steering corrections can shift the hotspot away from ruts, rocks, and your tire path, while illuminating less trail width.
Mount style doesn’t change the optics’ pattern, but geometry affects where the beam lands. Plan your aim; flush installs are harder to fine-tune after cutting. Choose suitable diffusion—flood or a wide/flood-and-spot mix—to reveal edges, branches, and washouts.
For safety, favor a bright center with peripheral spread over peak throw alone.
Conclusion
Choose flush-mount pods when your panel has enough depth and reinforcement; they sit cleanly, but tight pockets can trap heat and complicate wiring. Surface mounts simplify access and cooling, though exposed brackets may catch trail debris or loosen under vibration.
Check cutout size, harness reach, lens cleaning, and beam spread before you install. Secure every fastener, aim lights to avoid blinding others, and test the pattern on a dark route before relying on them.