How to Choose LED Pod Lights: Size, Beam, Lumens and IP Rating
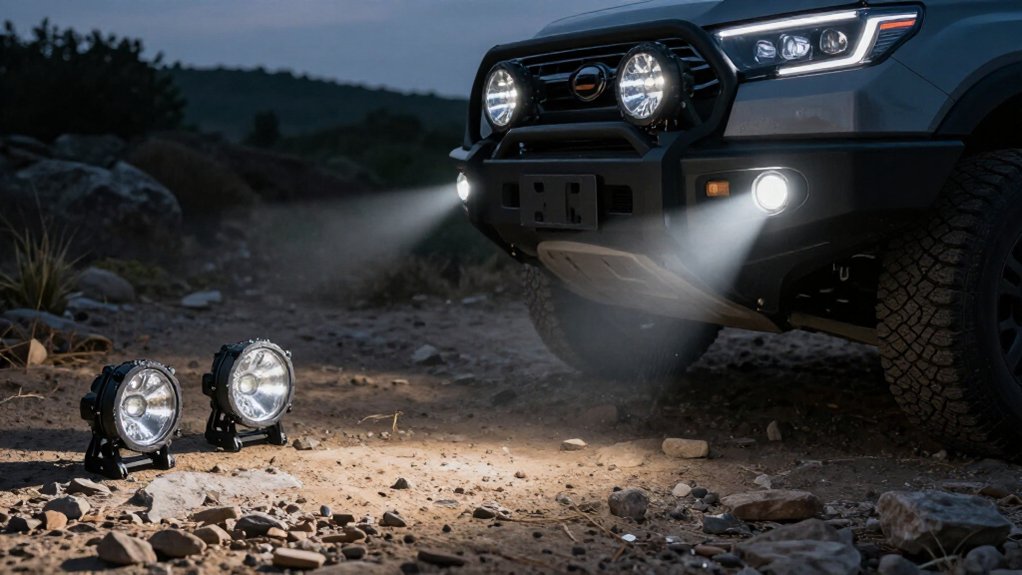
Choose LED pod lights by matching their size to mounting space and rear clearance.
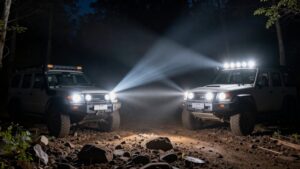
For fast trail driving, use spot or combo beams; for technical trails below 10 mph, floods illuminate nearby obstacles.
Aim them ahead of your tires and across trail edges.
Select 5,000–10,000 lumens for casual use and more for aggressive terrain.
Choose IP68 for dust and immersion, or IP69K for hot-water washdowns.
Keep going to compare mounting and fit details before you buy.
Trail vs. Worksite Use
Choose LED pod beams based on how you’ll use them: for faster trail driving, spot or combo beams project farther to help reveal hazards, while flood beams spread light across nearby obstacles and trail edges at slower speeds.
For worksite tasks, choose higher lumen output and a flood-leaning or broad combo pattern to illuminate debris, tools, and material handling zones evenly. Match expected conditions to beam reach and enclosure rating. For wet, dusty, or pressure-washed environments, select pods rated at least IP68; prefer IP69K when high-pressure, hot-water cleaning or repeated exposure is likely.
Start with one beam type, such as a flood pair for general coverage, then add a spot pair if you need longer sight lines beyond trail ruts or the work area.
Targeted Near-Field Illumination
When long-range throw isn’t the priority, flood-beam LED pods provide wide, close-range coverage, typically effective about 20–30 feet, for rocks, ruts, and obstacles near your vehicle.
Choose flood pods when you’ll travel at slow, technical speeds below roughly 10 mph. At that pace, you need a broad view of the ground immediately ahead, not distant terrain. Position each pod to cover the trail surface before your tires reach it, including the edges where rocks or ruts can hide.
Adjust the aim with the vehicle on level ground, then check the beam from the driver’s seat. Keep the hotspot on your approach path and avoid directing intense light toward your hood, nearby riders, or reflective surfaces. Mounting height and angle affect coverage: test them over uneven ground and refine placement until the illuminated area matches your line. This setup helps you identify obstacles early enough to choose a controlled path safely.
Beam, Lumens, and IP Rating
Match the beam pattern to your speed and terrain: spot pods throw light farther for faster travel, flood pods spread it across nearby terrain at slower speeds, and combo pods balance both.
Use total lumens to compare output: higher values generally provide more usable illumination in the same conditions. Aim for 5,000–10,000 lumens for casual trails; moderate or aggressive terrain often calls for 10,000+.
| Choice | Guidance |
|---|---|
| Beam | Spot pods throw farther at speed; flood spreads nearby; combo balances |
| Lumens | 5,000–10,000 casual; 10,000+ moderate/aggressive |
| Color | 3000K warm/amber scatters less in fog/dust; 4000–5000K neutral white balances visibility |
| IP rating | IP68: dust-tight, immersion; IP69K: high-pressure, high-temperature jets |
Check the rating against exposure: choose IP68 for dust and deeper, longer immersion, or IP69K when high-pressure, high-temperature water jets are a concern.
Mounting Styles: Flush vs. Bracket
Choose flush mounting for a low-profile fit, but confirm the housing, seals, and wiring have enough clearance behind the panel. Brackets give you more pitch and yaw adjustment, helping you aim spot or flood beams.
Match the style to your space, sealing needs, and whether you need to fine-tune aim.
Flush Mount Integration
Flush-mount LED pods sit nearly level with the vehicle body, reducing snagging and wind noise compared with protruding bracket-mounted lights. This integration gives your installation a low-profile finish, but you’ll need careful measurement before you cut the panel. Check the pod’s overall diameter and lens offset against the cutout, and verify that the housing, wiring pigtails, and IP-sealed gasket have enough depth behind the surface.
Flush installations often leave less clearance, so account for nearby structure and wiring. Seal the body interface with the specified gasket and tighten fasteners to the recommended torque. A continuous, compressed seal helps prevent water from tracking into the cutout; without it, moisture can damage even a rated pod. Confirm the lens sits evenly and the perimeter remains fully sealed.
Bracket Mount Flexibility
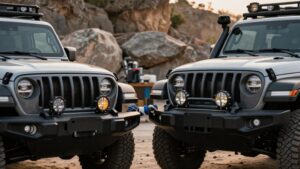
For flexible aiming, bracket-mounted pods let you fine-tune beam direction and fit curved or angled surfaces such as A-pillars, ditch edges, and bumper bars.
Choose brackets when you need adjustable aim or lack a flat mounting face; flush mounts suit flat surfaces when you want a low-profile finish that reduces snag points and preserves aerodynamics.
For spot pods, bracket adjustment helps keep the narrow hotspot on target at distance. Flood pods tolerate less precise alignment because their wider beam covers more area.
Check that each bracket can support pod weight and resist vibration so off-road impacts don’t shift the beam. Whichever style you choose, preserve the pod’s IP-rated sealing interface to protect against dust and water. Recheck fasteners periodically, especially after rough terrain use.
Installation Space Requirements
Once you’ve settled on an aiming style, measure the mounting space before choosing a pod.
For a flush mount, measure the cavity behind the panel, including housing depth and clearance for the back. This low stand-off profile suits tight spaces, but the surface must provide enough recess. A bracket mount needs room for bracket thickness and its bolt pattern.
Allow access to fasteners and verify the mounting surface can support the load.
With either style, keep the connector and boot clear of edges that could crush them, and preserve the venting path so the seal remains intact. This matters for IP68/IP69K pods in exposure. Leave space behind the pod to dissipate heat, and use a mount that limits shock transfer through its housing, especially off-road.
Choosing the Right Style
Which mounting style fits your vehicle best? Choose flush-mounted pods when clearance is tight and you want a low-profile look. Before cutting an opening, confirm you can reach the rear for wiring and seal the housing properly.
Flush installation needs careful preparation to prevent water ingress at the mounting point.
Choose bracket-mounted pods when you need to aim or tilt lights for changing terrain. Brackets let you adjust direction without cutting into the vehicle surface, and they’re often easier to install and service.
Whichever style you choose, protect performance with an IP68-rated pod; it’s dust-tight and suitable for deeper water exposure. If you frequently pressure-wash your vehicle, consider IP69K-rated pods, which withstand high-pressure, high-temperature water jets. Check seals after installation and routine vehicle maintenance.
Terrain-Specific Pod Light Picks
For rock crawling, use flood or combo optics to light obstacles 20–30 feet ahead; on tight forest trails, combo beams balance close-side visibility with forward reach.
Open desert runs call for spot beams that provide 100+ feet of visibility. In mud and snow, choose pods rated at least IP68—or IP69K for high-pressure, high-temperature washing—and size your setup to match your driving needs.
Rock Crawling
When you’re crawling below about 10 mph, choose flood or combo pod lights to reveal ruts and rocks 20–30 feet ahead; far-throw spot beams won’t show the near-field details you need. Mount a pair of pods low, then aim them precisely at the trail surface.
This exposes traction cues without throwing excess glare across uneven stone.
For casual trail use, target roughly 5,000–10,000 total lumens, adding pods if needed to cover the ground evenly. Check the beam rating: a narrow spot can pick out hazards along your line of travel, while a wide flood reveals adjacent obstacles.
Choose IP68 or higher to keep dust out and withstand mud, silt, splashes, immersion, and repeated washdowns. Test your aim at crawling speed, then adjust before tackling obstacles.
Tight Forest Trails
On tight forest trails, choose spot or combo pods to illuminate obstacles 100 feet or more ahead between trees. Pair them in a tall, narrow layout and angle them outward to keep light off the treeline while covering winding corridors. Choose a mid-size output of roughly 10,000–20,000 total lumens across your pods; this reveals detail without washing nearby branches in glare.
Use flood pods instead when you’re moving below 10 mph through ruts and logs; their wide pattern lights terrain about 20–30 feet ahead. For wet leaves and mist, prioritize IP68 or IP69K construction. IP68 keeps dust out and withstands full immersion beyond about three feet, while IP69K handles high-pressure washdown after muddy sections.
Check the pod’s mounting angle and wiring seals after installation.
Open Desert Runs
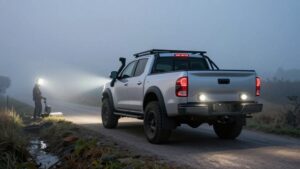
Across open desert runs, choose spot or combo pods that throw light 100 feet or more ahead, giving you time to spot hazards at speed.
Match pod size to mounting reach: longer, narrower setups, often with 2–3-inch optics, help you hold a tighter aim across uneven dunes. Treat lumens as a planning guide; target roughly 8,000–15,000+ total lumens from pods alone or paired with a light bar for aggressive, higher-speed runs.
Choose IP68 or IP69K protection to keep fine dust out and withstand pressure washing and hot water exposure. On dust-heavy routes, check for complete dustproof sealing; fine grit can accelerate lens and reflector wear even when a lamp is rated waterproof.
Mount pods so beams clear your hood and stay aimed as suspension moves over rough ground.
Mud And Snow
Desert setups favor distance; mud and snow demand coverage, sealing, and dependable heat management. You should choose pods rated at least IP67 (1m/30min); IP68/IP69K adds protection against dust, splashes, and pressure-wash cleaning. For ruts and nearby obstacles, use flood beams for broad near-to-mid coverage, or combo beams to retain spot reach while lighting the sides.
In snow, consider 3000K, 4000K, or 5000K output: warmer or neutral white can reduce glare and eye fatigue compared with very cool, blue-white light.
At technical trail speeds, target roughly 5,000–10,000 total lumens. For aggressive driving, consider 10,000–20,000+ lumens to cut through spray and limited visibility. Choose rugged housings with sound thermal management; undersized or poorly cooled pods can overheat, shortening LED life. Install them where spray exposure is expected, and verify seals after service work.
Voltage and Wiring Compatibility
Before choosing LED pods, confirm whether your vehicle uses a 12V or 24V system; wide-voltage 10–60V models can suit mixed fleets and handle voltage swings.
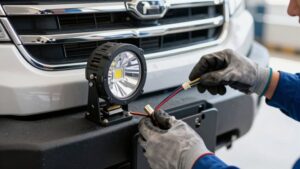
Next, match the wiring plan to the pods’ current draw, and account for voltage drop on long runs so output stays steady under load. Install a relay, correctly gauged power and ground wires, and an in-line fuse; don’t route pod current through switch wiring, which can overheat and waste voltage.
Check that the pods tolerate cold-crank dips and alternator load-dump transients, or they may flicker or fail. For high-output lights, use weather-rated connectors and keep terminals clean and sealed: moisture in the wiring can undermine performance regardless of the pod’s IP rating. Verify polarity and secure connections before testing.
Lens Durability and Replacement
Once the wiring is secure, check whether the lens can withstand off-road vibration and rock strikes, common causes of pod damage. Choose pods with sealed lenses designed for vibration and debris impact. Off-road dust and rocks can crack optics.
Prioritize IP68 or IP69K protection to keep the lens area dust-tight through splashes, pressure washing, and deep water exposure. Look for stated impact resistance and a replacement-lens option. Confirm the exact lens model or part number, and whether you’ll swap the full lens or install a drop-in element; mismatched optics can alter beam focus.
Replacing a damaged lens costs less than replacing the pod when its LEDs and driver still work. Check availability so you can restore the beam without discarding functioning hardware.
Counterfeit Certification Marks
Counterfeit certification marks can make an LED pod appear safer or more durable than it is. Compare each logo with the issuing organization’s official mark; poor printing, misspellings, or mismatched details are warning signs. Don’t accept a “CE-like” symbol or another untraceable claim without supporting records.
Use this checklist before buying:
- Verify the standard and scheme named.
- Match certificate or registration number with issuer records.
- Request test report identifiers and documentation from seller.
- Confirm exact IP rating test evidence; a symbol alone proves nothing.
- Reject marks you can’t authenticate through authority or manufacturer/dealer.
Counterfeit claims can conceal weak sealing, so check evidence for the precise enclosure rating you need.
If records don’t verify the mark, treat the rating and certification as unreliable before purchase.
Check Alternator Reserve Capacity
Check whether your alternator has enough reserve capacity to power the pods at idle without sagging voltage or straining the charging system. Then compare the combined rated wattage with your vehicle’s electrical capacity and typical alternator output; don’t judge by engine-speed output alone. Check these points:
- Confirm the pods match your 12V or 24V system; wide-voltage 10–60V models can tolerate broader supply variation.
- Allow for cold-crank voltage and alternator load dumps; LED drivers draw less than halogens but still need stable input.
- If you use the pods at low RPM, verify peak draw won’t overheat the alternator or pull battery voltage below safe limits.
- Fit correctly rated wiring, a fuse, and a relay to protect the circuit.
- Recheck voltage under load at idle during testing.
Conclusion
Choose pod lights by matching their size and beam to your trail or worksite tasks. For near-field visibility, choose a controlled pattern; compare useful lumens, not claims, and select an IP rating suited to exposure.
Confirm flush or bracket mounts fit your vehicle, and verify voltage, wiring, and alternator reserve. Match terrain, favor durable lenses with replaceable covers, and don’t accept certification marks without verifying authenticity. A check keeps your setup reliable when conditions change.
For practical guidance on this related topic, see our guide to work light lumens chart task how.