How to Clock LED Headlight Bulbs for a Sharp, Glare-Free Beam Cutoff
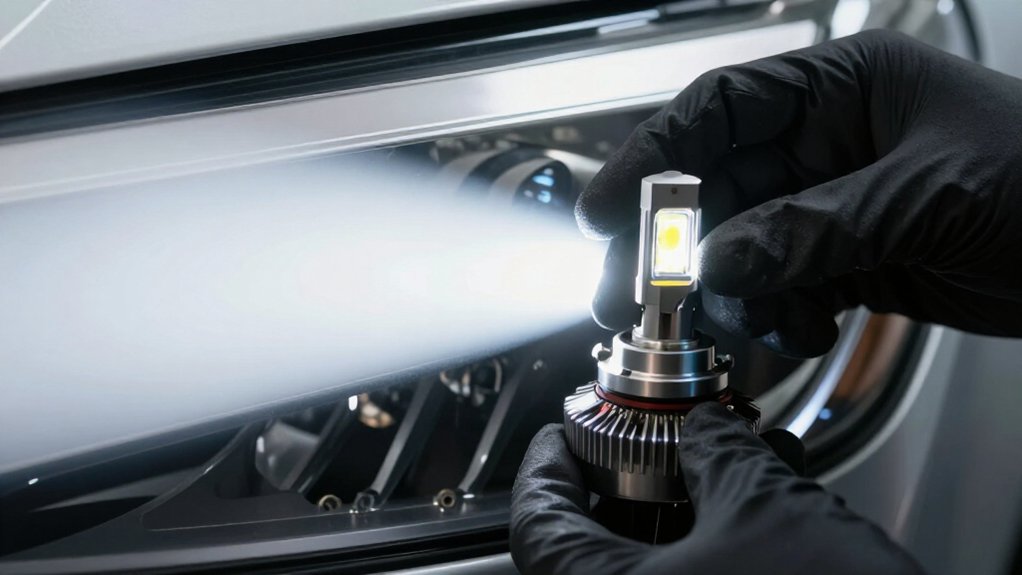
To clock LED bulbs, align the base marks and seat each bulb fully.
Clean both lenses, then park on level ground facing a flat wall about 25 feet away.
Orient chips horizontally at the intended focal plane; H4-style reflectors need chips at three and nine o’clock.
Reinstall dust caps securely.
Check for a sharp cutoff, with the hotspot below the aiming line and no spill above.
If flicker or haze persists, inspect connections and seals.
Further checks can pinpoint causes.
Beam Alignment Goal
The goal is to place the LED emitters where the OEM halogen filament sat, so the housing forms its intended low-beam cutoff.
After installation, you should assess the beam on level ground, with a wall roughly 25 feet ahead. Position the brightest hotspot slightly below the headlight’s horizontal aiming line; a hotspot above it can raise the cutoff and create glare.
Look for even left-to-right low-beam coverage and a stable, defined cutoff. The cutoff may appear flat or include a designed step or kick-up. Keep most light below that edge, where it illuminates the road without scattering into mirrors or oncoming drivers’ eyes. A fuzzy or uneven line typically signals that the emitters aren’t reproducing the filament’s intended focal position in the housing, so correct the alignment.
Verify Bulb Clocking Marks
Before installing the bulb, locate the clocking marks or alignment notches on its base and use them to orient the LED chips in the same focal position as the original halogen filament. Check that the marks match your application; H4 reflector-style bulbs may require a design-specific rotation, often near 3 or 9 o’clock. If supplied, match the diagram’s mark to the housing reference point.
- Start with exact mark alignment first.
- Seat fully; confirm marks remain visible, since partial seating can rotate the chip.
- Incorrect rotation can blur the cutoff and send excess light above it, increasing glare.
- At 25 feet on level ground, check a wall: a crisp upper edge confirms alignment; a fuzzy or tilted edge suggests wrong clocking. Switch off lamps before adjustment.
Step 1: Clear the Headlight Lenses
Once the bulb is clocked, clean both headlight lenses with a plastic-safe cleaner to keep haze and grime from scattering light and blurring the cutoff.
Use a cleaner labeled safe for automotive plastic; harsh solvents can cloud the lens. Remove oxidation and grime, since even a thin film can soften the low-beam cutoff’s sharp edge. Clean the inner surface if accessible.
Wipe with lint-free microfiber, then dry completely; water spots can mimic fuzzy edges during your wall test.
If the lens is heavily yellowed or pitted, restore or replace it before adjusting bulb orientation; damaged optics won’t respond to clocking. Confirm each lens seats in its housing, with no gaps or moisture.
Internal fogging can wash out the glare-controlled cutoff and compromise beam performance.
Step 2: Park on Level Ground
To check your F-150’s low-beam cutoff accurately, park on level ground facing a flat wall or aiming screen, with the truck at normal ride height and about 25 feet (7.6 m) away. Keep the cabin load and tire pressures consistent with your usual driving conditions; extra cargo or underinflated tires can alter ride height and shift the apparent cutoff. Confirm both lamps are on low beam before evaluating the pattern. High beams can mask glare and won’t reveal the low-beam cutoff correctly.
Keep the wall square to the truck and unobstructed, giving you a consistent reference. After any adjustment, switch the lamps off and on briefly; recheck for a stable, sharp cutoff and minimal bright cloud above the line. Don’t assess a moving truck.
Step 3: Orient Chips Horizontally
Clock the LED bulb so its chips sit horizontally in the same focal position as the original halogen filament, which helps the housing form the correct cutoff.
For H4-style reflector applications, begin with dual-chip emitters at 3-and-9-o’clock positions. Align chips with the housing’s intended focal plane; mismatch can shift the cutoff on a wall. Check a level-wall image from 25 feet. The brightest hotspot should stay below the cutoff.
If the line looks blurry or tilted, dark gaps appear, or light spills above it, recheck horizontal clocking: the chip plane may not match the housing optics. Deviate only if a beam photo confirms minimal light above the cutoff. Confirm left-right symmetry for your traffic direction; incorrect alignment can place the step or kick-up on the wrong side, increasing glare for oncoming drivers.
Step 4: Rotate Bulb Until Cutoff Levels
After installation, rotate the bulb a few degrees at a time and check the beam on a level wall 25 feet away. Clock the LED emitters to the reflector or projector’s focal-plane position, near 3 and 9 o’clock, depending on bulb design. At the correct orientation, the low-beam cutoff should show a crisp, level edge, with light below it.
Turn the bulb incrementally until blur, haze, and hotspots diminish. If the beam has a traffic-side step or kick-up, keep that feature on the correct side; incorrect clocking can direct glare toward oncoming drivers. Stop if the cutoff rises too high, turns fuzzy, or forms a bright cloud above the line.
Re-clock the bulb and confirm it’s fully seated; don’t mistake emitter misalignment for brightness.
Step 5: Recheck Both Low-Beam Cutoffs
Once the bulbs are properly aligned and seated, park on level ground about 25 feet from a flat wall and switch on the low beams. Confirm a stable cutoff with the brightest area below the line. Compare the left and right cutoffs for equal height and symmetry.
A blurry edge or a higher beam can indicate that a bulb isn’t fully seated or is mis-clocked. Check for clouds or scattered light above the cutoff; this means the LED chip isn’t emitting from the intended filament position.
After any adjustment, recheck both lamps. Ensure no dark spot appears and no hotspot shifts; uniformity should remain consistent. If either cutoff sits too high or uneven, loosen the bulb, realign it by an increment, seat it, and verify both cutoffs before driving at night.
Step 6: Reinstall Dust Caps Properly
Before reinstalling the dust caps, confirm each bulb is fully locked and seated; a loose bulb or misseated cap can dim the cutoff and increase glare. Clean dust or moisture from the cap opening before fitting it; debris can keep the cap from sitting flat and may misalign bulb aim. Align the cap’s locating tabs or threads with the housing, then tighten it by hand only.
Don’t overtighten: excess force can warp the housing or disturb the bulb’s position. Seat the caps fully and check that each gasket compresses evenly around its edge. An uneven seal can leave the LED skewed or pull it away from its focal position. After closure, recheck the chip or clocking mark against the housing to ensure orientation hasn’t shifted.
Compare the Beam Against a Wall
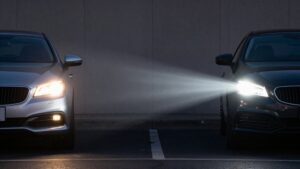
To check LED clocking, park on level ground about 25 feet from a flat wall, switch on the low beams, and photograph both headlights so you can compare their cutoff lines side by side. Look for a stable, crisp edge, with most light below it and little glow above. Dark spots, double hotspots, or a smeared cutoff can indicate misalignment with the reflector or projector focal point. Confirm the cutoff step faces the correct side for your traffic pattern; right-hand-traffic lamps typically rise toward the right roadside.
If the cutoff sits too high or looks fuzzy, switch off the lamps, re-clock the bulb in small increments, and reseat it fully. Repeat until the brightest hotspot sits slightly below your horizontal reference line, with a controlled upper boundary that limits glare to oncoming drivers and protects other road users.
Diagnose Post-Installation Flicker
If your F-150’s LEDs flicker after installation, check the power connections first: switch off the lights, then confirm each bulb is fully seated and locked, with plug terminals secure and the heat-sink collar clear of the housing.
After seating, verify both bulbs click in and clock chips near 3 or 9 o’clock, as your bulb design specifies. Incorrect aim can shift the cutoff with vibration or heat. Check the pattern on a wall after startup.
| Symptom | Likely check |
|---|---|
| Startup-only flicker or dash warning | CANbus/load match |
| Constant flicker | Wiring, ground, or bulb |
Hyper-flashing suggests a load mismatch; use a compatible LED kit or decoder, and allow its startup cycle to finish. If flicker appears after bumps or toggling high beams, recheck connections.
A steady, sharp cutoff without brightness changes confirms stable output. Switch off the lights before reseating parts; don’t work around energized wiring. Ignition-only flicker may indicate driver instability; continuous flicker points toward wiring, grounding, or an internal bulb fault instead.
Check for Condensation After Rain
After rain, inspect both headlights for internal condensation: a hazy film or droplets between the lens and bulb, not moisture on the exterior.
Condensation may mean a compromised seal: the bulb may not seat fully, its gasket may fit poorly, or the cap may be loose. Brief, light fogging can be normal if it clears within 20–30 minutes of driving with low beams on. Persistent clouding signals a leak or failed seal.
At night, after the lamps warm, check the beam on a wall. Fog can blur the cutoff, leaving a fuzzy upper edge despite correct clocking. If condensation remains after several drive cycles, such as the next day’s dry run, remove the bulb. Verify orientation, seating, and a watertight cap before reinstalling the bulb securely.
Conclusion
Clocking your LED bulbs correctly helps you keep the beam pattern controlled and the cutoff sharp, but alignment depends on clean lenses, level parking, and properly seated dust caps. After installation, compare both beams on a wall and correct any unevenness before driving at night.
If you see flicker, diagnose the connection or compatibility issue. Check for moisture after rain; don’t ignore condensation that could damage the housing or compromise visibility. Safe aim protects everyone.