How to Find Your Headlight Bulb Size (Manual, Bulb Base and Lookup Tools)
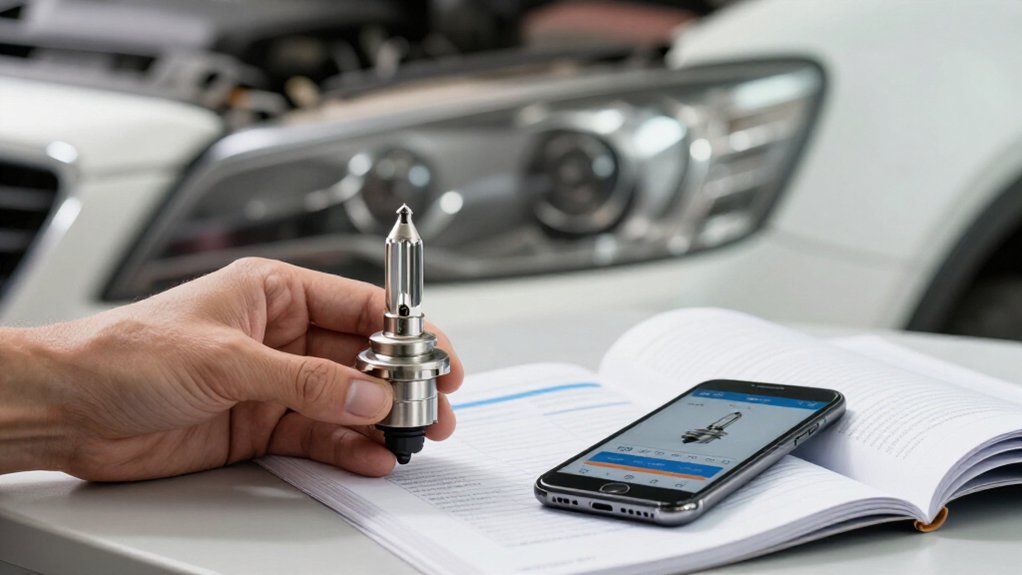
To find your headlight bulb size, check the owner’s manual for the low-, high-, or dual-beam type. Switch off the lamps and let bulbs cool before removal.
Read the code stamped on the old bulb’s base; don’t assume similar codes interchange. Photograph the marking, then cross-check it with lookup tools and manufacturer catalogs using your year, make, and model.
If sources conflict, consult a parts specialist before buying. The steps below explain fitment checks.
Bulb Identification Methods
Start with your owner’s manual, which typically specifies the factory bulb type for each position, such as H11 for a low beam or 9005 for a high beam. Use a vehicle-based bulb finder: enter your year, make, and model, but treat results as fitment guides, not guarantees. Cross-check with Philips or Osram/Sylvania fitment tools. Listings can vary with trim or midyear changes, so confirm the application matches your vehicle.
Don’t assume similar names mean interchangeable bulbs: PSX24W may require minor tab adjustment compared with P14.5s. A mismatched base can prevent proper fit and affect performance. If sources conflict, consult a qualified parts specialist before buying or installing a bulb. Never force a bulb; correct seating and alignment preserve visibility and help protect other road users.
Check Bulb’s Stamped Part Number
Once the bulb is removed from its socket, read the manufacturer part number stamped on its metal base; this marking, often a code such as H11 or 9005, is your most reliable identifier.
Use the stamped code rather than assuming similar bulb-family names are interchangeable; PSX24W and 5202, for example, identify different types.
- Check the base for the complete code; worn or partial markings can lead to a mismatch.
- For HID/Xenon bulbs, verify D1S/D2S versus D3S/D4S. These belong to different voltage groups, and fitting a D2S bulb to a D4S ballast can damage the system instantly.
- After identifying the number, cross-check it in your vehicle’s fitment tool from Osram/Sylvania or Philips before purchase.
Keep the lamp off and bulb cool while handling.
Step 1: Photograph the Bulb Markings
After identifying the bulb’s stamped code, photograph the markings on its base before buying a replacement. Switch off the headlamps and let the bulb cool before handling it; then remove it without touching the glass. Photograph the base in clear, even light, keeping every letter, number, and the base shape legible.
A code such as H11, 9005, or P14.5s / 64150 can identify fitment; capture all markings in one image, including paired identifiers such as 9003 / HB2 / 64193 / HS1.
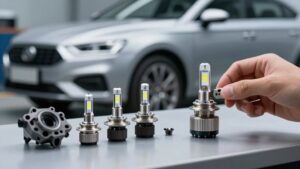
Use the model shown to distinguish a single-beam bulb, which serves low or high beam, from a dual-beam bulb, which combines both. Keep the photo handy when checking lookup tools or a manufacturer’s fitment guide. Compare the complete code and base style, not appearance alone, when matching exact fitment.
Step 2: Check the Owner’s Manual
Check the lighting section of your owner’s manual for the factory bulb models listed separately for low and high beams. These model numbers, such as H11 or 9005, identify the bulb’s base and fitment. Use the listed specification to choose the correct replacement the first time, rather than relying on appearance alone.
Confirm that the manual applies to your vehicle’s model year and trim. Manufacturers may use different bulbs across trims, even within the same model, so don’t assume another version’s specification matches yours. If you’re uncertain, treat the manual as your primary reference before ordering LED replacement bulbs.
Use its model number to guide a final check of the markings on your existing bulb. Don’t install a bulb that doesn’t match the required fitment; improper seating can compromise beam alignment and safe visibility.
Step 3: Use Vehicle Lookup Tools
You can confirm the fitment by entering your vehicle’s year, make, and model in the Osram/Sylvania bulb finder, then cross-checking the result with Philips or HIDConcept. Compare the same vehicle details in each database; catalogs can differ because of mid-year changes, regional variations, or manufacturer updates.
Treat these tools as confirmation, not a guarantee. Before ordering, compare the listed bulb model with the markings on the bulb you remove. If results conflict or you’re uncertain, inspect the existing bulb’s base and read its printed code, such as H11 or 9005. Don’t assume similar-looking bulbs interchange: base and connector designs and electrical requirements may differ. For example, D1S and D3S bulbs aren’t interchangeable. Confirming the physical marking helps prevent an incorrect purchase and avoids forcing a mismatched bulb into the housing or connector. Handle the removed bulb carefully, and consult a qualified technician if you can’t identify its code with confidence.
Step 4: Verify Beam Type Requirements
Beam type determines how many bulbs your headlights use and which replacement you need. First, confirm whether your system uses single-beam or dual-beam/bi-beam headlights. In a single-beam setup, separate bulbs often serve low and high beams; for example, an H11 may power low beam, while a 9005 handles high beam.
A dual-beam/bi-beam system uses one bulb per headlight assembly to provide both functions through internal switching. Check the lighting section of your owner’s manual before ordering; the beam architecture determines the correct replacement.
When using a bulb finder or fitment guide, match the vehicle bulb model and the specified beam type: low, high, or dual. Don’t assume two vehicles with the same model year use the same beam arrangement.
Step 5: Compare the Bulb’s Connector Style
Beyond beam type, the bulb’s base and connector must match your headlight socket exactly. Check the existing bulb’s base for its exact code, such as H11 or 9005. Don’t substitute a “similar” bulb; its socket may differ and prevent proper seating or electrical connection.
Use that code from your owner’s manual to cross-check the listed size.
For HID/Xenon bulbs, connector compatibility also depends on voltage family: D1S and D2S use 85-volt igniters, while D3S and D4S use 42-volt igniters. Mixing families can damage the ballast. LED replacements still need the correct base and connector.
A fitment tool can suggest a size, but results may vary by trim or region. Before you buy, verify the connector against the installed bulb’s part number whenever possible.
Step 6: Reinstall the Dust Cover
After replacing the bulb, reinstall the dust cover to keep moisture, dirt, and road debris out of the headlight housing. Check the cover to ensure nothing prevents a proper seal. Align its tabs or edges with the housing, then press it into place.
Make sure every edge fits snugly; a gap can expose the bulb and shorten its service life or affect light performance. Don’t force the cover if it resists, since incorrect positioning can pinch wiring or contact the bulb base. Adjust the wires and cover, then fasten it according to the vehicle’s design.
Once installed, confirm the bulb remains securely seated in its socket before you close the headlight assembly. A correctly fitted cover protects the replacement bulb and helps maintain operation.
Verify Beam Alignment
Once the bulb and dust cover are secure, check the beam aim before driving at night. Park on a flat surface facing a wall, then switch on low beams. Check that their cutoffs sit level and centered; neither side should appear higher or lower.
If one headlight looks dim, stop and confirm the bulb sits in its socket and that its base matches the beam design. Recheck markings, such as H11 or 9005, and confirm you installed the correct type in the correct position.
Test low-to-high switching: single-beam systems use separate bulbs, while dual-beam systems combine functions in one bulb. If beams still don’t match, use the factory adjusters; don’t swap bulb models to compensate. Wrong sizes can fail or damage the system.
Dashboard Bulb Warning Persists
If the dashboard headlight warning persists, the replacement bulb may not match the exact required fitment. Check low- and high-beam specifications in your owner’s manual before ordering; the base type and electrical rating both matter.
| Item | Check | Purpose |
|---|---|---|
| Manual | Low/high-beam size and rating | Confirms required specification |
| Old bulb | Printed marking, such as H11 or 9005 | Identifies exact fitment |
| Finder | Year, make, model result | Reference; verify accuracy |
| New bulb | Base and part number versus old bulb | Confirms an exact match |
Use an Osram/Sylvania or Philips vehicle-based finder as a reference, then verify its result. If the alert remains, compare the old and new bulbs’ printed bases or part numbers before reinstalling.
Don’t drive if headlight operation is uncertain; consult a technician promptly.
Replace Bulbs in Pairs
Replace headlight bulbs in pairs to keep light output and color consistent across both sides. When one bulb fails, its counterpart is often near the end of its service life because both beams operate together and age at similar rates.
Replacing both can save you a second repair and avoid uneven downroad visibility from a dim lamp. Consistent brightness and color help you judge road edges, signs, and hazards more predictably at night.
If you’re upgrading, fit matching bulbs in both positions; mismatched output or beam characteristics can compromise the pattern. First confirm the correct size and type for each function using your manual or a lookup tool. On vehicles with separate low- and high-beam bulbs, replace the pair for the same function, rather than mixing types.
Conclusion
Confirm your headlight bulb size with the stamped part number, owner’s manual, or a reliable vehicle lookup tool before buying. Match the bulb base and specifications; don’t force an incompatible bulb into the socket. Reinstall the dust cover securely, then verify beam alignment so you don’t dazzle other drivers or reduce visibility.
If a dashboard warning persists, have the circuit checked. Replace bulbs in pairs when practical, since matched output helps maintain balanced illumination. Always follow your vehicle’s service instructions.