Fog Light Bulb Size Chart: H10, H11, 9006, 9145 and More
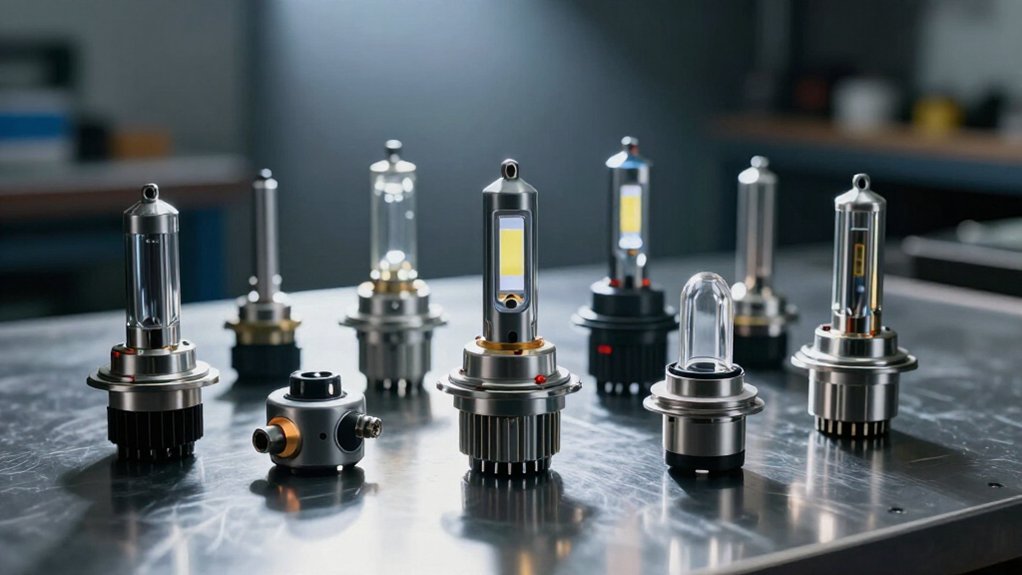
Common fog bulb sizes include H10, H11, 9006, 880, 881, 2504/PSX24W, and H3, but your vehicle’s bulb position determines the correct fit.
H10 and 9145 are cross-listed, yet shared labels don’t guarantee matching bases or connectors.
Check the printed bulb number, compare the base, and confirm year, make, model, and fog-lamp position in a fitment chart or owner’s manual.
For LEDs, verify 12V compatibility and align chips horizontally, facing 3 and 9 o’clock.
The sections below cover further checks.
9145 and H10 Cross-Reference
Are 9145 and H10 interchangeable? They’re commonly cross-referenced fog/DRL bulb types, but you should verify the base before ordering. Compare the base shape and the number printed on your existing bulb; look for “H10” or “9145.”
A shared cross-reference doesn’t guarantee fitment if your vehicle uses a different socket or application. When your car uses the H10/9145 family, you’ll often find products listed for both fog-light and daytime-running-light positions.
Some listings offer 12V, 6000K LED replacements described as plug-and-play, but that claim applies only when the bulb base matches your housing. After installation, check operation. Your vehicle’s electronics may trigger a bulb warning or flicker with an LED; depending on the position and system, you may need a CANbus decoder in certain vehicle configurations.
Common Fog Bulb Sizes
Beyond the H10/9145 family, common fog-light sizes include H11, 9006, 880, 881, 2504/PSX24W, and H3. Your vehicle determines which fitment belongs in each fog position; don’t assume nearby sizes interchange.
| Size | Typical listing | Check |
|---|---|---|
| H11 | Fog/DRL | Verify H8/H16 |
| 9006 | Fog/auxiliary | Confirm position |
H10 and 9145 are often grouped because they describe the same basic fog/DRL-style size on many models. Listings may group H11 with related H8/H16 applications, but verify the exact size before ordering. Use your vehicle’s year, make, and model plus “bulb position” to find the correct entry. Check whether the chart specifies H10, H11, 9006, or 9145 for the fog lamps, not a general fitment list. This confirms the size assigned to that specific lamp position.
9145 Base and Connector
Because fitment charts may group 9145 with H10 or H11, match the exact base and connector to your vehicle’s fog-light position before buying.
A 9145 is a fog/DRL-style bulb commonly cross-listed with H10 and H11; some listings also compare it with 9140. These labels identify candidates, but don’t guarantee interchangeable fitment. Check your owner’s manual or vehicle-specific bulb chart, then verify the socket and position before ordering.
Trim differences or modifications may change the connector, even within one model year. Many 9145 LED replacements are listed as 12V, often 6000K “Xenon White”; confirm electrical and fitment requirements. If installation causes dashboard warnings or flickering, your vehicle’s bulb-check system may require a Canbus/anti-flicker decoder.
Check kit compatibility. Use the listed position for your specific vehicle.
LED Chip Orientation Guide
For even coverage, install your LED fog bulbs with the chip sets facing 3 and 9 o’clock, aligned horizontally. This orientation supports a balanced beam, but match the chips to your reflector or projector to limit dark spots and glare.
Check the base markings, then test the beam after installation to verify its direction and output.
Chip Placement Direction
For an even fog-light beam, install flip-chip H10/9145/H11-style LEDs with the chip rows facing side-to-side: one toward 3 o’clock and the other toward 9 o’clock. These bulbs use two chip rows; position them across the bulb’s sides inside the housing. This placement helps your reflector or projector produce a balanced 360° distribution and limits uneven illumination across the fog-lamp spread.
Before tightening, check the bulb’s base markings and confirm the fitment matches your socket. If the orientation isn’t obvious, consult the included chip-orientation guide and follow its instructions. Seat the bulb without forcing it, then secure it only after you’ve verified that the chip faces point in the specified directions. This check helps the lamp housing reproduce its intended beam pattern on the road.
Horizontal Chip Alignment
Many LED fog and auxiliary bulbs use a horizontal flip-chip design, so align the LED faces side-to-side: one toward 3 o’clock and the other toward 9 o’clock. This side-to-side placement helps distribute light around the bulb and can reduce reflector hotspots. Before fully seating it, check the base markings and compare the chip faces with the reflector’s alignment.
Rotate the bulb as needed, then confirm its tabs engage and the seal sits flush. Don’t force the socket or assume connector position shows chip direction; keyed bases and housing layouts vary. If markings aren’t clear, consult the instructions or compare the bulb with the original. Secure the assembly only after confirming the chips remain at opposing sides in your housing before restoring power and testing the lamp’s operation.
Vertical Beam Pattern
After confirming side-to-side chip alignment, check how the bulb sits relative to the housing’s vertical axis. Follow the bulb maker’s orientation marks before locking the base.
For many LED fog-light bulbs, one chip set should face roughly 3 o’clock and the other 9 o’clock, keeping the emitting surfaces side-to-side. This arrangement supports more even 360-degree light distribution within the housing. Don’t rotate the bulb so its chips face up and down unless its instructions specify that position.
Incorrect rotation can create uneven hotspots or dark spots and may compromise the intended cutoff and beam consistency. Seat the bulb fully, then check its clocking again; a secure fit doesn’t guarantee correct chip alignment. If the beam appears inconsistent, switch off the lamps and correct the bulb’s orientation.
Reflector and Projector Setup
Because reflector and projector housings shape light differently, an LED bulb’s “perfect beam pattern” depends on matching its chip placement to the housing. For H10/9145-style LED fog bulbs, install the emitter chips side-to-side: one set should face 3-o’clock and the other 9-o’clock. This orientation helps distribute light around the housing evenly, reducing the chance of glare and dark spots.
When your housing uses a projector, follow the bulb maker’s orientation marks rather than assuming reflector instructions apply unchanged. For low-beam performance, manufacturers may reference a 45-degree cutoff; you’ll preserve its intended shape only when the chips align correctly with the reflector and installed bulb.
Before rotating a bulb, confirm the required size—H10, H11, or 9145—matches your socket and housing. An incorrect fit can shift the emitters from their designed position and undermine beam geometry. Use maker guidance when the housing layout isn’t obvious to you.
Verify Light Output
Before checking light output, confirm the bulb base—such as H10, H11, 9145, or 9006—matches the housing. For Boslla-style bulbs, position one set of LED chips toward 3 o’clock and the other toward 9 o’clock. This side-to-side alignment is designed to spread light more evenly through the fog housing.
Check the beam on a level surface after installation. Look for an even pattern and dark areas; mis-aimed LEDs can create dark spots and increase glare risk. Adjust the bulb seating or aim if the output appears uneven, following your vehicle’s service guidance.
If you swap bulb positions or reinstall a bulb, keep the chips facing side-to-side at 3 and 9 o’clock. Recheck the output after each change. Use guidance only with correct fitment.
Factory Trim-Level Variations
Factory trim levels can change the fog light bulb position and size, even within the same model year. Your vehicle’s fitment results may list 9006 for one trim and H10/9145 or H11 for another, depending on the original equipment setup. Use the selector’s exact bulb position and trim details; don’t rely on model year alone.
If you’ve installed aftermarket headlight or fog-light assemblies, their bulb requirements may differ from the vehicle’s original factory fittings. The chart prioritizes OEM accuracy, so it can show different matching sizes for the same vehicle. Before ordering, check the bulb marking or your owner’s manual.
If you’re still unsure whether your trim takes H10, H11, 9006, or 9145, enter the precise vehicle details in the fitment tool and confirm the listed position.
Fog-Lamp Housing Water Ingress
Even with the correct bulb size, water inside the fog-lamp housing can fog the lens and damage the bulb or connector.
Inspect the weep holes, gaskets, and rubber boots around the bulb and wiring for cracks or looseness; degraded seals commonly let water in. If your H10/9145/H11-style bulb doesn’t sit squarely, its protective seal may not contact the housing evenly, allowing leakage. Reseat it and confirm the seal lies flat.
If you find standing water, dry the housing and repair the ingress point before installing a replacement bulb. For added resistance to rain, snow, and wet-road spray, choose an LED fog bulb with IP67 protection and a sealed housing. That rating helps resist exposure; it doesn’t correct a leaking fog-lamp housing before use.
2007 Silverado 3500 Classic
For a 2007 Chevrolet Silverado 3500 Classic, identify the fog-light bulb position and OEM bulb base before ordering; charts may list H10/9145, H11, or 9006, depending on the fitment data. Use the vehicle finder’s fog-lamp position rather than relying on a model-year result, because trim differences or modifications can change the listed fitment.
H10 and 9145 are grouped as designations, but don’t assume they’re interchangeable for your truck without checking the selected position and base. Confirm the bulb marking or the label at the bulb location, then compare its base with the replacement listing. These chart entries describe original equipment; if your Silverado has aftermarket fog-light assemblies, their sockets may call for another size. When the markings aren’t clear, consult the bulb-finding guide before purchase.
Fuse and Wiring Diagnosis
If both fog lamps are out, check the fog-light fuse first; a blown fuse, often visible as a broken element or confirmed by an open-continuity test, can cut power to both. Then verify the fog-light switch and relay, if equipped; either can fail while the fuse tests good. Inspect the harness for corrosion, loose connectors, or damaged insulation, which can create voltage drop. Check the ground wire and connection at each lamp housing; a poor ground can cause intermittent operation.
- Test for voltage at the bulb connector with lamps commanded on; voltage confirms supply reaches the connector.
- If voltage is absent, trace upstream through wiring, switch, and relay; repair loose or corroded connections. If present, inspect bulb and connector before replacing any confirmed failed component.
- Retest the lamps after repairs to confirm steady operation.
Mercury Bulb Size Chart
Use the Mercury bulb size chart to match each replacement bulb to the correct position and socket; fitments vary by model year and configuration. Check the chart by year, make, model, and bulb position before ordering. Headlamp entries may include H11/H8/H9, 9005/HB3, 9006/HB4, H13/9008, 9004/HB1, H7, or 9007/HB5. Fog lamps and daytime running lights may use 880, 881, H11, H10/9145, 9006/HB4, or H3; select the listed position, not just a similar-looking bulb.
- Match the socket designation to your lamp.
- Check reverse, brake/tail, and turn-signal entries: charts may show 1156/1157, 3156/3157, or T15/921/912 for reverse, and 1156/1157 or 3156/3157 for brake/tail and signals.
- If you’re unsure, verify the base markings or owner’s manual before installation. Confirm the replacement fits before you reinstall the lamp.
Conclusion
Use the bulb size specified for your exact vehicle trim and verify the connector before buying. Although 9145 and H10 bulbs are commonly cross-referenced, confirm fitment in your owner’s manual or by checking the original lamp. Match LED chip orientation to the housing, and inspect seals for water ingress.
If a replacement still fails, check the fuse and wiring before changing bulbs again. These steps help you avoid incompatible parts and restore reliable fog-lamp operation.