What Is a Chase Light Bar? Rear UTV Lighting Modes Explained
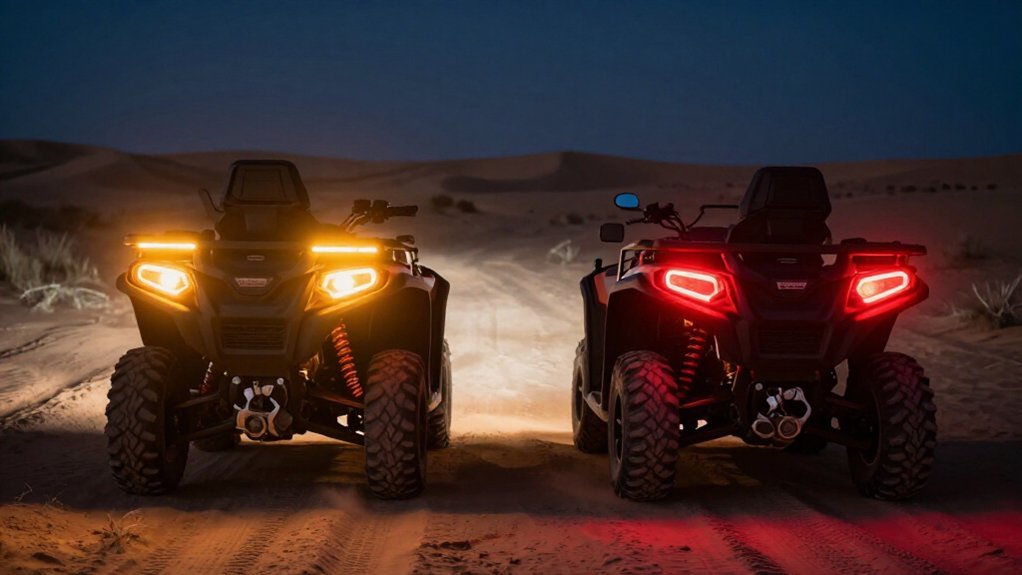
A chase light bar adds a rear signal to your UTV, showing position in dust or darkness.
A red running mode marks your location, while brighter brake output signals slowing; left and right outputs can indicate turns.
Amber can stay readable in grit, but beam pattern and clean lenses matter as much as lumens.
Match each input to its harness, fuse for maximum load, and test every mode before riding.
Check mounting clearance.
Explore setup and safe-use details next.
Brake, Turn, and Dust Modes
Brake, turn, and dust modes give following drivers distinct cues instead of one ambiguous rear glow. When you press the pedal, brake mode raises rear output so drivers behind you can recognize deceleration in darkness or dust. Baja Designs lists RTL amber brake output at 30 watts and 599 lumens. A running or taillight mode provides a baseline reference between braking events, keeping the vehicle identifiable.
Wire left and right outputs as turn indicators to show which way you intend to move; don’t make others infer direction from a glow.
In dusty conditions, select the amber dust or chase output. Amber optics can remain more readable through dust, snow, or fog. Keep brake, turn, and chase behaviors distinct so followers can interpret each signal.
Origins in Baja Conditions
Distinct brake, turn, and dust signals address a problem first faced in Baja racing: dust clouds could quickly hide a following vehicle and wash out its taillights.
In that high-speed environment, you needed rear-facing, high-contrast light that stayed readable when airborne dirt reduced ordinary taillight visibility. Baja Designs’ RTL (Rear Tail Light) grew from this necessity: dust could blind drivers behind or wash out familiar rear cues.
A chase bar communicates more than your UTV’s presence. Running or marker illumination helps define its position; brake lighting makes deceleration clearer, while some systems add reverse-style illumination to indicate backing. These functions matter on trails, too, where dust, fog, or darkness can limit sightlines. Choose a setup designed for those conditions, mount it where it remains visible, and keep its lens clean. Clear rear signals help drivers behind judge your actions sooner, giving them useful information when visibility deteriorates in changing trail conditions.
Passing Slower UTVs Safely
When passing a slower UTV, a chase bar helps the driver behind read your position and slowing intent through dust that can obscure ordinary taillights. Check your route, leave a safe gap, and signal before moving out. A red running light marks your rear position; a brighter brake function tells the rider you’re slowing before spacing closes.
In dust, amber chase mode can stay readable through airborne grit. Use white reverse/cargo lighting to check obstacles at night, then switch to the proper rear mode. Don’t rely on lighting: check traffic and pass only when you have room.
Keep your distance afterward; the bar helps others track you, but judgment remains yours. Coordinate with the other driver when possible, and wait for a clear opening.
Lumens and Beam Patterns
When you compare lumen ratings, remember that beam shape determines how much useful light reaches the ground or a following driver. Choose amber chase optics for visibility through dust and a rear white flood for close-range tasks.
Match the beam to conditions so you don’t waste brightness or impair another driver’s vision.
Understanding Lumen Ratings
Lumens measure a chase bar’s total light output, but beam pattern and optics determine how well drivers can see you through dust. Treat the lumen figure as emitted light, not a guarantee of rear visibility.
A marker beam can keep your UTV readable nearby, while a wider rear flood helps the driver behind follow your position as dust and distance change. Amber often remains legible in suspended dirt because its optics suit that signal; white commonly serves reverse or cargo illumination.
On a multi-function bar, running, brake, and amber modes may deliver different effective output despite sharing one advertised peak rating. Check each mode’s aim and pattern rather than comparing only maximum lumens.
Then inspect the installed bar at night: dust, vibration, and mounting height can shift where light falls and reduce how clearly the driver behind sees you.
Choosing Beam Patterns
A peak lumen rating won’t tell you how clearly a chase bar reads through dust; beam pattern matters just as much. Choose optics for the job, not the largest number on the box. A marker-style, smooth near-vehicle beam gives the following driver a steady position reference without concentrating a blinding spot. Work/Scene optics, such as the Baja Designs S2 Sport pattern, serve this purpose.
| Role | Pattern | Use |
|---|---|---|
| Marker | Dust/chase | Keep position readable through suspended dirt. |
| Area | Flood/wide cornering | Light ground, cargo, obstacles behind. |
Choose a wide cornering lens when you need broader rear fill. Separate area illumination from chase-marker optics: they solve different visibility tasks. Dust, mud film, and vibration can change output, so assess the mounted beam and keep rear signals readable—not overpowering.
Matching Beam to Conditions
Match the beam to the job rather than choosing a bar by its peak lumen rating. For backing up or cargo work, use a white rear flood to spread light across the ground. Its reach depends on diffusion and aim, not lumens alone; poor placement can glare into your eyes or another driver’s.
In suspended dust, choose amber marker optics; they typically stay clearer in dust, snow, and fog, helping drivers behind locate your UTV. A multi-function bar can pair amber chase optics for following visibility with a white reverse flood for close-range illumination. Set beam and placement to light your work without blinding anyone; check visibility from following distance and adjust aim before riding. More output isn’t safer when glare hides your position.
Wiring and Switch Setup
Before wiring your chase light, size the fuse and conductors to the kit’s specified load, and connect keyed power and ground as directed. Match each brake, running, reverse, and turn input to the correct harness or adapter, then confirm your switch or controller selects the intended modes.
Secure and weatherproof every connection, and keep wiring clear of heat, moving parts, and pinch points.
Power and Fuse Sizing
While a chase bar may draw little in running-light mode, size the fuse, wiring, and switch for its maximum expected load. Check the product’s specification, then include every output that may run together; braking or reverse can raise the load beyond running-light draw. KC HiLiTES’ 28-inch example lists up to 5.0 A at 12 VDC, but your kit’s rating governs.
| Load | Sizing check |
|---|---|
| Maximum draw | Match fuse, wire, and switch |
| Harness | Confirm plug-in or circuit-splice layout |
Install the fuse on the supply lead as directed by the kit, and secure connections and a fuseholder against dust, roost, vibration, and washdowns. Route and protect wiring according to the diagram; don’t let undersized components carry peak current.
Switch and Mode Control
Wire the chase bar to the UTV’s brake, tail/running, reverse, and, if supported, turn-signal inputs so it responds to the driver’s actions. Use the kit’s harness or a compatible vehicle-specific adapter; some newer Polaris RZR kits plug into the OE four-pin taillight accessory connection. Confirm which circuits control each output before choosing a switch position.
An on-board rocker or dash switch may let you select modes, but some bars require you to choose whether center white or amber functions operate; don’t energize every circuit together unless the manufacturer specifies it. Check the wiring diagram and map brake, reverse, and turn inputs to the intended patterns. Some XTC Polaris harnesses provide keyed power, ground, brake, and control leads; premium bars may need a separate harness.
Secure Wiring Connections
With each mode mapped to the correct input, secure the wiring using the supplied harness or a compatible vehicle-specific adapter rather than leaving bare splices exposed.
A chase bar may need separate connections for running/marker, brake, reverse, and optional turn-signal or strobe inputs, so following drivers see the intended signal. Before installation, confirm each wire’s function and test every mode; Baja Designs’ uService allows lens pattern or color changes, but RTL behavior can’t be changed that way.
Use the wiring diagram: Polaris XTC harnesses may provide keyed power, ground, left/right brake leads, and three dash controls; newer models may use an OE four-pin taillight port. For Can-Am, XTC harnesses connect keyed power and ground at the busbar, then plug into the rear-light harness for controls.
Night Rides on Tight Trails
On tight trails at night, a chase bar gives the driver behind a clear reference to your UTV’s position when dust and darkness make stock taillights hard to see. Choose an amber chase mode for suspended dust, fog, or weather; its contrast can remain easier to read than colors.
In a group, prioritize amber signals and brake cues so riders can recognize your position and slowing even when debris obscures detail. Use the running and brighter brake functions to communicate movement, then switch to the white reverse or flood section when backing or checking close ground.
Aim and mount the bar carefully: keep the rear scene beam on the ground behind you, while directing chase and marker optics away from riders’ eyes. Test modes before riding.
Street-Legal Use Restrictions
A chase bar that improves visibility on the trail isn’t automatically legal on public roads. Check your jurisdiction’s equipment rules before using any rear-facing mode on streets. Similar brake or running functions don’t make a bar road-approved, and a racing unit such as Baja Designs’ RTL still may not qualify.
| Mode | Verify | Risk |
|---|---|---|
| Brake/running | Approval, wiring | May not qualify |
| Chase/strobe/reverse | Local rules | Restricted operation |
Kits may require aftermarket harnesses or splicing; inspect connections and confirm each mode behaves correctly. Incorrect brake or turn-signal inputs can undermine compliance. Disable prohibited patterns before road entry, and don’t assume a switch or off-road label settles legality.
Check manufacturer documentation and ask your local vehicle authority about auxiliary-lighting and warning/flashing rules. If the bar can’t comply, leave it off or remove it for street driving. Recheck wiring changes.
Color Choice and Visibility
When dust, snow, or fog clouds the trail, an amber chase lens helps your UTV stand out because it cuts through dirty air and signals caution to following drivers. When you ride in a group, suspended particles can smear or fade other rear lights, making amber especially useful.
- Choose Baja amber when trail visibility in dust, snow, or fog matters most.
- Its warning-color meaning helps following drivers read your presence and status quickly.
- Red, green, and blue remain options, but suit race-focused setups more than poor-weather trails.
- Use a diffusing lens pattern to spread output and mark your position without blinding anyone.
Before a ride, confirm your chosen color and pattern suit conditions, then keep enough following distance for changing visibility on the trail.
Check Chassis Mounting Clearance
After choosing a color and lens pattern, check mounting clearance so the bar stays visible without contacting the chassis.
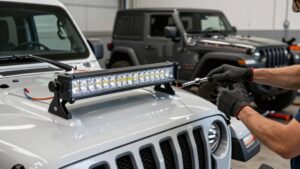
Measure clearance around the roll cage and bed before you drill or tighten hardware. Position the chase bar high enough to remain visible through dust, but don’t place it where a cage tube or body panel blocks its output.
Check the route for the wiring harness, including room for connectors and strain relief; pinched wires can fail when the vehicle moves. Match tube clamps to your chassis tubing diameter. For example, Rigid clamps fit 1.52-inch round tube, so verify dimensions before ordering.
After installation, cycle the suspension through its travel and recheck every gap. If the bar or harness touches anything, reposition it before driving.
Conclusion
Before you choose a chase light bar, match its modes, beam pattern, and color to your riding conditions and local rules. Check chassis mounting clearance, secure the wiring, and test brake, turn, and dust functions before each night ride.
Aim the light so drivers behind you can read your signals without facing unnecessary glare. Use it to improve visibility in darkness, not to replace safe spacing, hand signals, or a controlled pace on tight trails.