What Size Fuse for an LED Light Bar? Fuse Rating by Wattage
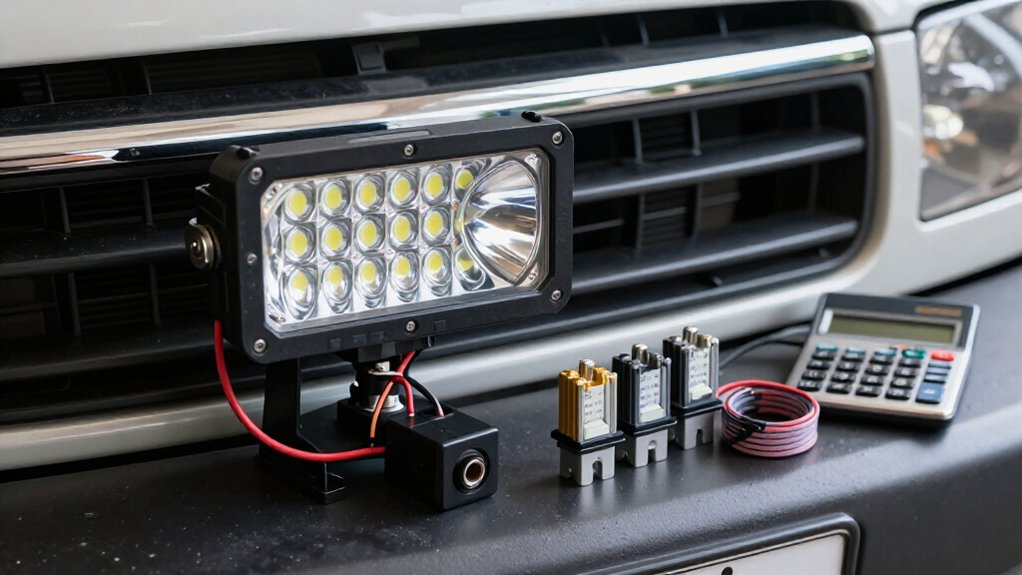
For a 12-volt LED light bar, estimate current by dividing watts by 12; a 60-watt bar draws about 5A.
Choose a fuse roughly 25–40% above measured current, but never exceed the wire’s safe ampacity.
24W suggests 2.5–3A, 36W suggests 4–5A, and 60W suggests 6–7A.
Check manufacturer fuse recommendations and draw.
Account for startup surges; place a rated holder near battery positive.
For parallel bars, add currents.
Further checks can help protect your installation.
Fuse Ratings by Wattage
For a 12V LED light bar, estimate current by dividing its actual wattage by 12: a 60W bar draws about 5A. Choose a fuse roughly 25–40% above the bar’s measured or estimated current; for a 5A load, that’s approximately 6–7A.
Check the manufacturer’s specifications. 12V bars use fuses in the 2–5A range, but a higher-wattage bar or an inaccurate advertised rating can raise actual current and the appropriate fuse rating. Base your calculation on real current whenever possible, since marketing wattage may not reflect operating draw.
Before installation, confirm that the fuse also protects the cable: its rating must not exceed the wire’s safe ampacity. A sized fuse helps interrupt excessive current during a fault without leaving undersized wiring exposed to overheating or fire.
LED Bar Wattage-to-Fuse Chart
Use this 12V LED light bar wattage-to-fuse chart as a starting point: 24W draws about 2A and calls for a 2.5-3A fuse; 36W draws about 3A and calls for a 4-5A fuse; 60W draws about 5A and calls for a 6-7A fuse.
| Bar wattage | Approx. current / fuse |
|---|---|
| 24W | 2A / 2.5-3A |
| 36W | 3A / 4-5A |
| 60W | 5A / 6-7A |
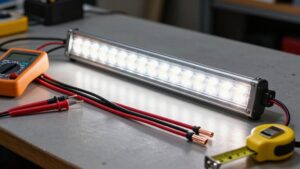
Treat these ratings as starting points, not substitutes for the bar’s specified draw. Check its specification sheet or measure current with a multimeter if the actual draw exceeds the estimate; size the fuse from that measured value, then allow a 25-40% margin. If you connect multiple bars to one feed, add their amp draws first and apply the same margin to the total. Use a suitable standard fuse rating.
12-Volt System Assumptions
The wattage-to-fuse estimates above assume a 12-volt system, where current is approximately power divided by voltage: a 60W bar draws about 5A. Your vehicle’s charging voltage can differ from nominal 12V, so treat this calculation as an estimate, not a substitute for the bar’s specified or measured current.
Typical 12V light bars often use 2–5A, but wattage alone doesn’t establish the correct fuse. Base your selection on actual current, then allow roughly 25–40% margin; a 5A load suggests about 6.25–7A, subject to the nearest suitable standard rating.
You must also ensure the fuse rating doesn’t exceed the wire’s safe ampacity. If your bar’s current or system voltage differs, recalculate and verify the manufacturer’s guidance before energizing the circuit, before you choose a final fuse rating.
Fuse Holder Selection
Choose a 12V DC inline holder that matches your fuse type, has tight, secure terminals, and withstands the expected current with an appropriate safety margin. Select weather-resistant construction for exposed installations, and verify the holder’s wire rating meets or exceeds your circuit wiring’s ampacity.
Mount the fuse as close to the battery’s positive terminal as possible to minimize unprotected cable length.
Choose the Right Holder
Because the holder is part of the circuit’s protection, match its current and voltage ratings to the selected fuse, and make sure it accepts the fuse’s physical type and size—for example, ATC/ATO holders fit standard blade fuses. For a 12V system, choose a holder rated for the fuse’s amperage and at least the system’s DC voltage, commonly 32V or 60V. Install an inline holder close to the battery’s positive terminal to keep unfused cable short and reduce short-circuit risk.
If wiring faces moisture or road spray, select a weather-sealed ATC/ATO or mini-ANL holder. Confirm its terminals clamp the fuse securely; an incorrect fit can loosen under vibration. Use a vibration-resistant holder with solid crimp connections sized for the wire gauge supplying the light bar.
Match Fuse Type
For most 12V LED light bars, use a holder designed for an automotive ATC/ATO blade fuse and rated for at least 12V DC. Mount the inline holder close to the battery, reducing unfused wire that could overheat during a short. Choose a holder with wire leads suited to the cable, secure terminals, and weather-resistant insulation.
A hinged or sealed cover helps keep moisture and debris away, limiting corrosion and accidental shorts. Route and fasten the holder where it won’t rub against sharp edges or sit in water. Follow installation instructions, make crimp connections, and insulate exposed joints. Install the selected fuse only after verifying its rating for the light bar; don’t increase it to compensate for a holder or wiring mismatch.
Check Current Rating
Check the LED bar’s datasheet for its actual current draw at 12V, or measure it with a multimeter; don’t estimate from marketing wattage alone. Use that current to choose a fuse rated about 25–40% higher, allowing for startup and operating variation without nuisance blows.
Then verify that the inline holder’s current and voltage ratings meet or exceed the selected fuse and system requirements. Match its blade, AGU, or ATC format to the fuse; incompatible parts can create poor contact and excess heat. The fuse must protect your wiring: never choose a rating above the wire gauge’s safe capacity for the run length.
Install the holder as close to the battery as possible, keeping unfused cable short to limit overheating risk if a short occurs.
Consider Weather Resistance
After confirming the fuse and holder ratings, choose an IP-rated holder suited to the light bar’s exposure.
Moisture and corrosion can increase contact resistance, cause intermittent operation, or contribute to fuse failure. If your bar faces road spray or wash water, choose a holder labeled waterproof and dustproof, such as IP67 or an equivalent rating. Check that its lid seals fully and that the cable entries include tight grommets sized for your wire gauge; loose openings can let water wick toward terminals.
Match the holder to the fuse type and voltage class, such as a 32V or 48V DC-rated unit for a 12V automotive system. Before closing the housing, inspect terminal crimps for sound, secure connections. A weather-resistant holder helps maintain reliable circuit protection.
Mount Near Battery
Mount the inline fuse holder as close to the battery’s positive terminal as practical—ideally within a few inches—to minimize unfused wire and reduce short-circuit risk. Choose a holder and fuse rated for DC use at your vehicle’s voltage. For a 12V system, use DC-rated components. Select fuse amperage from calculated current draw, with a small margin.
Use a weather-sealed holder with terminals sized for your cable and load to prevent overheating.
The fuse protects wiring first; don’t exceed your cable’s safe ampacity, even if bar wattage suggests more. Keep the battery-to-fuse cable short. Route it away from sharp edges and heat. If insulation wears through, battery current may flow before the fuse opens. Check the holder’s fit and fuse rating before energizing the circuit.
Check Manufacturer Fuse Recommendations
Start with the fuse rating in the light bar’s manual or spec sheet; it reflects the bar’s actual current draw and internal protection design. Use that value as your baseline rather than choosing a fuse from wattage alone. If the spec lists watts, convert the load to current with I ≈ W/12, assuming a 12-volt system, and check that the result is consistent with the stated fuse rating.
The manufacturer’s recommendation accounts for the bar’s design; don’t substitute a larger fuse if its specified value is smaller. Oversizing can let unsafe current flow before the circuit opens. Install the inline fuse holder as close to the battery as possible, following the maker’s wiring instructions. This placement helps protect wiring from a short circuit near the source. Confirm the fuse type and rating match the documentation before energizing the bar, and inspect the holder and connections for contact.
Account for Startup Surges
LED drivers can briefly draw more current at startup than they use once the bar is running. A driver’s surge may exceed steady-state amperage for a short interval, even when the bar draws near its rated current afterward. Measure running current with a multimeter or use the specification sheet, then select a fuse typically 25–40% higher to reduce nuisance blowing.
For example, a 10-A steady draw points to roughly a 12.5–14-A fuse, provided the connecting wire can safely carry that rating. Don’t increase fuse size beyond the wire’s safe limit; an oversized fuse may let a short overheat the cable before it opens. Install the correct fuse type in an inline holder near the battery, so the surge clears and the unfused cable run remains protected.
Dual-Bar Wiring Example
For two 12V light bars wired in parallel, add their actual current draws to size the fuse: if each draws about 5A, the circuit carries roughly 10A, so a 12.5-14A fuse is a typical starting point. Because both bars run at once, the fuse sees their combined load; confirm each bar’s rated draw rather than estimating from appearance.
For example, use the combined 10A figure to select a fuse about 25-40% higher, then verify the manufacturer’s specifications and startup behavior. In a parallel setup, each bar receives 12V, and branch currents add at the shared feed. If you wire the bars in series instead, current remains the same through the string, so base fuse selection on that single-string current.
Install the fuse in-line on the battery feed, as close to the battery as practical, so it can protect the supply wiring serving both bars. Keep the fuse within the cable’s safe current capacity; never upsize it to stop nuisance trips.
Check for Undersized Wiring
Even when the fuse rating is correct, undersized wiring can overheat before the fuse trips.
Match fuse protection to both the bar’s actual current draw and the wire’s ampacity. Calculate or measure current; never let the fuse exceed the wire’s safe limit. For a 12V bar drawing 2–5 amps, wire that’s too small can cause voltage drop and cable heating before the fuse opens.
If bars share a circuit, add their current draws and verify wiring for the entire run can handle the combined amperage.
- Set the fuse rating by actual load, never above wire ampacity.
- Check every run for combined current and cable length.
- Use adequately sized wire; small 12V cables can drop voltage and heat.
- Place the inline fuse close to the battery to protect unfused wire.
Verify Ground Connection
After confirming the fuse and wiring are correctly sized, check that the light bar’s ground connection makes solid metal-to-metal contact with bare chassis or battery negative.
- Use a short, appropriately gauged ground wire; don’t daisy-chain it through thin factory wiring, which can raise resistance and cause voltage drop.
- With power off, inspect routing and keep the wire clear of sharp edges, moving parts, and water-entry areas to prevent chafing, poor contact, or shorts.
- Measure continuity from ground lead to battery negative with a multimeter; expect near-zero ohms. Retighten hardware if resistance is high.
- After installation, compare measured current with labeled wattage or amperage. Abnormal draw can indicate a faulty ground; correct it before use.
A secure return path helps prevent intermittent faults and overheating.
Conclusion
Choose a fuse based on your LED bar’s current draw, using its rated wattage and system voltage as a starting point, not as a substitute for the manufacturer’s recommendation. Allow for startup surges, select a fuse holder and wiring rated for the circuit, and check that the ground connection is secure.
For multiple bars, calculate the combined load. If the fuse blows repeatedly, don’t install a larger one; inspect the wiring and connections to find the fault before powering the circuit again.