What Are Pod Lights Used For? Ditch, Reverse, Fog and Work Uses
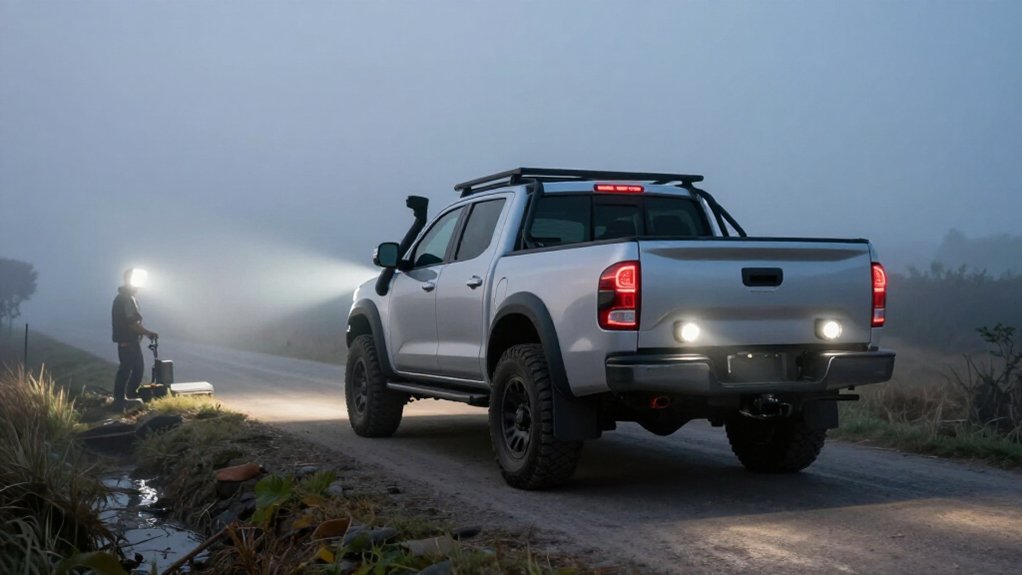
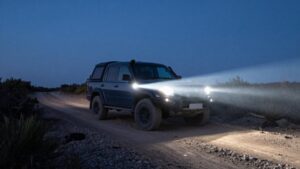
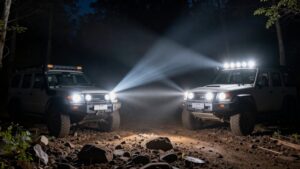
You can use pod lights to illuminate areas factory lamps miss: ditch edges on curves, reverse obstacles behind the bumper, foggy roads with low-mounted approved lamps, and work zones at camp or on trail.
Aim each beam at its task: spot beams reach farther, flood beams cover close ground, and combo beams balance both.
Before switching on, check current draw, fuse, and wiring, control glare, and verify local road-use rules; more practical setup details follow.
Four Common Pod-Light Jobs
Pod lights serve four practical roles, and the right beam pattern and mounting position depend on the job.
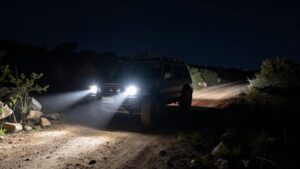
For ditch lighting, small 3-inch pods near the A-pillar or hood crease can aim 20–30 degrees outward, revealing drainage edges on winding turns that centered headlights may miss. Reverse flood pods help you see behind the vehicle on dark trails, especially when factory lamps leave the bumper in shadow.
Low-mounted yellow or dual-color fog pods reduce glare and backscatter in rain, fog, or dust compared with white light. For campsite setup or slow-speed work, broad flood beams fill nearby dark areas so you can handle tasks without relying on a narrow driving beam. Check circuits parked, and switch work lights off before driving near others.
Why Mounting Position Matters
Choosing the right beam is only part of the setup; mounting position determines what the light actually covers.
A pod’s height and angle change its coverage geometry, not just its appearance. A hood-level mount can add a third layer between your headlights’ forward beam and the side area you need to see through a curve.
Set too low, too high, or at the wrong angle, and the beam may miss the hazard zone or create glare.
Bumper pods sit lower and closer to center. They can extend forward reach, but they may leave side-forward gaps because your factory headlights already point mostly ahead.
On winding trails, that gap can delay illumination as you steer, leaving you briefly blind into a corner. Mount for useful coverage, secure the wiring, and verify the beam from the driver’s seat before driving.
For weather or reverse use, choose a mounting point that lets the beam pattern reach the intended area; a visually tidy location may block useful output. Check aim after installation and reassess it if the vehicle’s load, suspension, or accessories change substantially over time.
Positioning Pods for Each Task
Because each task needs a different coverage zone, position and aim your pods to light the area you actually need.
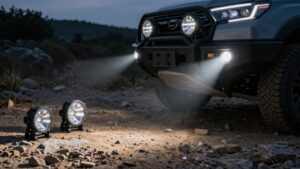
For ditch mounting, place 3-inch pods in the hood crease near the A-pillar base. Angle them outward 20–30 degrees toward ditch lines 20–40 degrees off center, filling the blind corner headlights may miss.
Aim one or two rear pods on the bumper or roof rack so you can see obstacles behind you and your campsite while reversing.
For fog, place yellow or dual-color pods low in bumper pockets; warmer light can reduce glare and backscatter in rain, fog, or dust.
For work, aim pods at the task zone: front foreground, tire or rock area, or rear camp area. Targeted placement helps you see hazards without using them as generic full-width lighting.
Spot, Flood, Combo Beams
Choose spot beams when you need maximum distance, but aim them carefully to avoid leaving nearby hazards unlit. Flood beams provide broad, close-range coverage for slower work.
Combo beams pair a spot core with flood fill, giving you a practical balance of reach and near-field visibility.
Spot Beams for Distance
For ditch lights, beam pattern determines how far you can see and how quickly you can spot hazards off-center.
A spot pod concentrates LED output into a tight column, extending your side-forward view on open, high-speed sections. That added reach can give you more time to recognize an animal, vehicle, or road edge before steering. Aim the lamps carefully: position them to illuminate the blind area beside and ahead of your vehicle without pointing into oncoming traffic or creating distracting glare.
Combo beams pair a spot core with wider fill, adding immediate side visibility around curves. For changing conditions, driving beams offer a compromise: wider than spot but more focused than combo. Match the pattern to speed and terrain, then check aim at night.
Flood Beams for Coverage
Flood beams spread light across a broad area but offer less reach, making them useful for close-range coverage rather than ditch-mounted illumination where distance matters. Use them to light a campsite, work area, or foreground obstacles when you’re stopped or moving slowly.
For side-forward viewing, a flood pattern may leave distant hazards unseen; don’t treat broad coverage as a substitute for adequate stopping distance. Choose the beam to match the task:
| Beam type | Practical coverage |
|---|---|
| Spot | Narrow, longer-throw reach |
| Flood | Broad, close-range area |
If you need mixed trail visibility, driving beams fall between these patterns: they’re wider than spots but more focused than floods. Aim pods carefully, secure wiring, and check local rules. Keep light controlled to avoid glare that can impair other drivers’ vision. Verify the pattern on level ground before entering traffic or trails.
Combo Beams for Versatility
When ditch-mounted pods need to illuminate both distant trail and the area beside your vehicle, combo beams offer a practical balance: a focused spot core extends your view, while a wider flood fill lights near-side hazards as you enter curves.
Mount combo pods at the hood-crease or low-A-pillar position and aim them roughly 20–30° outward. This placement helps the flood portion illuminate the side-forward gap that a spot-only beam can leave dark as you steer into a curve.
Spot beams throw farther in a narrow column, so they’re useful on open trails at higher speeds, but offer less near-side coverage. Flood beams spread broadly at close range, making them better for camp areas or bumper-mounted rock crawling than angled ditch lighting.
Pair combo ditch pods with other lights tuned for different distances, and you’ll avoid asking one pattern to handle every task. Check alignment and wiring before driving, then test coverage at low speed; don’t let light obscure hazards or distract other drivers.
Vehicle Electrical Capacity
Check your alternator’s available current at operating RPM before adding pod lights. Calculate their combined wattage and estimate current draw by dividing total watts by 12 volts.
Protect the wiring with a properly rated relay harness and fuse to prevent overload and excess heat.
Check Alternator Capacity
Before installing pod lights, verify that your alternator can supply their added load along with the headlights, cooling fans, and battery charging demand.
Check its rated output in amps at operating voltage; a factory unit may not support auxiliary lights continuously. A three-inch pod may draw about 48W, and pairs or larger groups can quickly reduce charging margin. Don’t assume a low switch setting limits demand: pods may draw full power as soon as you turn them on.
Assess alternator performance with headlights operating, rather than relying on an idle test alone. Use a voltmeter while driving under load; a healthy charging system should generally stay near 13.5–14.5V. If voltage drops, the alternator may lack capacity.
Address that limit before adding or wiring auxiliary lights. A higher-output alternator may be necessary with higher-wattage pods or multiple units, helping prevent voltage instability and costly premature battery wear.
Calculate Total Electrical Load
Calculate the total wattage of every pod light you’ll run, then divide by system voltage to estimate current draw: a pair of 48W pods uses 96W, or about 6.7A at 14.4V and 8A at 12V. Add each unit’s rated wattage for mixed setups. Treat ditch, fog, reverse, and work lights as separate zone totals, then combine only zones you may run together.
Compare worst-case current with charging capacity and the ratings of wiring, relays, and switches, allowing headroom. Your alternator isn’t unlimited, especially at idle or with accessories running. Don’t assume every zone can run continuously at full output.
Judge the setup by electrical load, not lumens, and check operating voltage if charging voltage varies under normal driving and accessory-use patterns.
Protect Circuits With Fuses
Because a fuse protects the wiring from overheating during a short, fit an appropriately sized fuse at each pod-light circuit’s battery feed or relay input. Size each fuse to protect its wire gauge while allowing normal current draw. A 3-inch pod rated around 48W draws roughly 4A at 12V; choose a fuse above its expected running current but within the wire’s safe limit.
Divide ditch, front, rear, and reverse lighting into zones, with a separate fuse for each so one fault won’t disable all auxiliary lights. Prefer a harness with built-in relays, fuse holders, and correctly gauged wire; it reduces voltage drop and load on factory switches.
Route fused power through the harness and switch location before mounting or closing panels. Confirm current draw and fuse ratings. Check fuse placement against the plan, and verify each connection before energizing.
If a fuse blows, find the fault; don’t fit a larger one.
Trail-Recovery Scene Lighting
During a trail recovery, rear-facing flood pods can illuminate the ground behind your vehicle, making it easier to place recovery gear, monitor winch lines, and guide another vehicle’s approach. Mount a focused pair of 3-inch pods to reveal tools, shackles, and tie-off points near the ground; headlights alone may leave these details hard to see.
Angle targeted pods as a third lighting layer with bumper lights to reduce blind spots along the vehicle’s sides and corners while a spotter guides you.
For backing or repositioning after a pull, rear flood beams help you track tire paths and the snatch point; mount one or two on the bumper or roof rack. In dust, use yellow pods to reduce backscatter and keep hazards and lines visible.
Road-Use Legal Restrictions
Before using pod lights on public roads, make sure your local rules, since requirements vary by jurisdiction and may include approved SAE, DOT, or ECE markings. Ditch lights may be restricted because side-facing output can violate headlamp regulations; off-road approval doesn’t ensure road legality. Check each lamp’s certification and local placement and switching rules in your area.
Fog-style pods are legal only when they meet approved color, beam-pattern, and aiming specifications, and you use them as regulations permit, not as general driving lights. Reverse pods are often easier to approve, but you may need to wire them so they operate only in reverse and meet mounting and brightness limits.
Keep uncertified work lights off public roads; reserve them for off-road use, towing, or campsites.
Overlooking Glare Control
Control glare by aiming pod lights at the area you need, not simply turning up their intensity. Poorly aimed beams can reflect from fog, rain, or dust, reduce contrast, and hide hazards rather than reveal them.
- Mount ditch pods near the hood crease at the A-pillar base, then angle them outward 20, 30°. This lights drainage edges while limiting direct glare.
- Use low, bumper-mounted fog pods to illuminate beneath moisture and mist, reducing reflections into your eyes. Yellow light can also cut backscatter in poor visibility.
- On trails, aim combo-beam pods so the spot core reaches side corners and the wider fill reveals nearby terrain. You’ll gain reaction time without excessive brightness.
Check beam placement from the driver’s seat and readjust if light strikes the hood, windshield, or approaching traffic. Safer illumination depends on beam control, not raw output.
Before driving, check reflected glare on signs and confirm nearby obstacles remain visible from your normal seated position with cargo onboard today.
Switches and Wiring Setup
Plan lighting zones before you buy pods so each switch controls a clear task, such as ditch lights, bumper or rear lights, and reverse or work lights. This keeps controls intuitive when you’re on the trail.
Use a quality relay harness with an in-line fuse rather than a spliced feed. Run battery power through the fuse and relay to a switch, then to the pods; don’t draw pod current through factory circuits. This setup keeps switch current low and protects wiring if a fault occurs.
Route wires away from exhaust heat, moving suspension, and places where water or debris collect. Secure them in loom with clips to prevent chafing. Connect paired pods to the same zone output, and verify polarity and ground before testing.
Conclusion
Use pod lights only after matching their beam pattern and mounting position to the task: ditch, reverse, fog, or work lighting. Aim each pod to illuminate the target without blinding drivers or obscuring the road. Check your vehicle’s electrical capacity, use properly fused wiring and accessible switches, and verify local road-use rules before driving with auxiliary lights on.
For recovery work, light the scene without shining into anyone’s eyes. Careful setup helps you see clearly while keeping others safer.