Do Ditch Lights Cause Wind Noise? Causes and How to Quiet Them
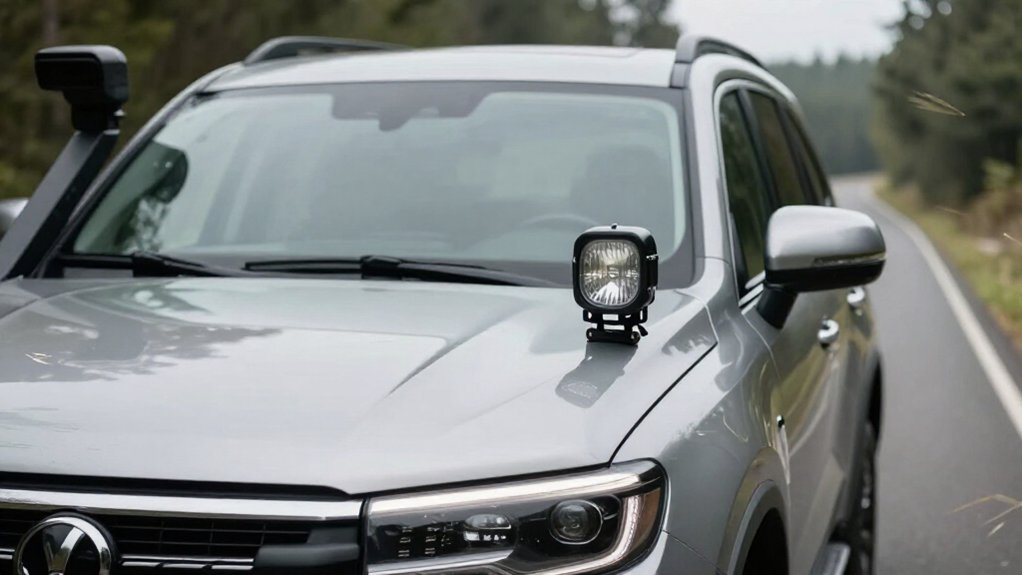
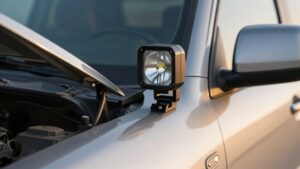
Ditch lights rarely create the turbulence common with roof-mounted light bars, but they can whistle at highway speeds if airflow catches a loose bracket, housing gap, or unsealed wiring entry.
Switch them on and off; if the sound stays unchanged, inspect the mount and surrounding bodywork.
Check for vibration, adjust the angle slightly, and seal gaps with weather-rated material.
Keep housings clear of the A-pillar airbag path.
The checks below can help pinpoint persistent noise.
Ditch-Light Whistle Diagnosis
If you hear a whistle near your ditch lights, don’t assume the lights are causing it: they usually don’t create the turbulent airflow associated with roof-mounted light bars.
To isolate the source, switch the lights on and off. If the whistle stays unchanged, airflow around the body or wiring and bezels is more likely than vibration from the lamps. Inspect the housing for looseness, and check that brackets and mounting surfaces are tight; vibration can produce a howl that resembles wind noise.
Look for gaps behind the housing where air may catch. As a diagnostic, place a small strip of foam or weather stripping across a suspected gap. If the sound drops, refine the seal or adjust the wiring and bezel position. Remove the strip, and secure all components before driving.
Wind Noise at Highway Speeds
At highway speeds, ditch lights generally stay quieter than roof-mounted light bars because they create less exposure to fast-moving airflow. Ditch lights usually produce no audible wind noise, while roof bars face stronger airflow across their housings and rear heat-sink fins.
Small gaps beneath roof-mounted bars can also create pressure changes that cause whistling.
If you hear noise from ditch lights while cruising, airflow may be disturbing the housing, wiring, or mounting bracket rather than the lamp itself. Turbulence can become noticeable as vehicle speed rises, especially when loose wiring or exposed gaps disrupt smooth airflow.
To check the source, test at your normal highway speed with windows closed. Listen for a change after you adjust mounting hardware or add an airflow-shaping tweak carefully.
Bracket Resonance Diagnosis
When ditch-light noise persists at highway speed, check the bracket for resonance before blaming the lamp.
Touch the bracket or housing, or ask a passenger to listen. If the sound changes immediately when you damp the bracket’s motion, vibration likely drives the whistle. Inspect for an air gap between the housing and mounting surface; airflow through that space can couple with the bracket’s natural frequency and sustain a howl.
For a test, loosen the mounts, tilt the bracket down just one or two degrees, then retighten. If the noise drops, the changed airflow pattern likely disrupted resonance. Confirm the fix on the road at similar speed.
If resonance remains likely, place thick rubber isolators between metal surfaces to damp vibration without changing light performance.
LED Housing Shapes
A smooth, compact housing usually catches less air than a boxy one with exposed edges. Those edges and rear-facing cooling fins can disrupt airflow or vibrate, creating a whistle or howl. Choose a shape that limits direct airflow across the fins to reduce wind noise.
Smooth Versus Boxy Housings
Smooth LED housings generally disturb airflow less than boxy ones, reducing the turbulent vortices that can trigger whistle-like vibrations at highway speeds. A boxy or solid mount can make airflow turn more abruptly around its broad surfaces. That can increase pressure differences across the light’s rear and encourage a low howl.
If your bar exposes cooling fins at the back, even a streamlined front may still whistle: air can pass through narrow fin gaps and form eddies along their surfaces. Your vehicle’s shape matters, too. A square wagon or some SUVs can direct wind vertically toward that rear fin area, strengthening the interaction.
To quiet it, inspect the fin stack and smooth the airflow path behind the housing. You can insert spline or suitable airflow-smoothing material lengthwise along the fins to fill gaps. Keep the material secure and clear of components that need cooling; then test at highway speed.
Edges That Catch Air
Even streamlined housings can catch air at sharp edges or open rear sections, directing flow toward the cooling fins and increasing turbulence.
When you inspect your ditch lights, check whether rear edges expose fins to direct airflow. Turbulence across fin edges can excite vibration and produce a high-speed whine. An air gap or misalignment may worsen this effect by channeling flow onto the fins.
| Feature | Likely effect |
|---|---|
| Sharp or open rear edges | Flow concentrates near fins |
| Gap or misalignment | Direct fin airflow |
A smoother rear contour and secure, aligned mounting reduce catch points and limit edge-driven noise. Ditch lights usually create less back-of-housing airflow than roof bars, but their shape and fit still matter. Recheck alignment if you hear a whine at highway speeds outdoors.
Compact Shapes, Less Whistle
Because ditch lights use compact, forward-facing housings, they usually create less turbulent airflow than roof bars with exposed rear fins. Roof bars place finned heat sinks where air can enter a gap behind the light. That flow may separate and accelerate through the gap, producing pressure changes that make thin metal fins vibrate and howl.
Ditch lights use a more contained airflow path. Their compact shape and mounting geometry usually avoid the rear-gap condition, so the housing creates less turbulent wake and exposes fewer vibration-prone fins. You can reduce risk by choosing a slim housing with minimal exposed metal fins and securing its mount firmly. If you hear a whistle, inspect the bracket and gaps first; the installation may let air interact with fins.
A-Pillar Mounting Position
Your mounting height and windshield clearance affect how air passes around each ditch light. Keep the housing and bracket close to the A-pillar, but leave enough clearance to avoid contact with the glass or trim. Adjust the bracket angle to reduce airflow gaps that can cause whistling.
Mounting Height
Mounting height affects how much wind reaches your ditch lights and their cooling fins. A-pillar lamps usually run quieter than roof-mounted bars because they avoid roof-rack gaps that generate pressure differences and eddies. But a higher position can expose the housing to faster, cleaner airflow, increasing the chance of a faint whistle. If your lights use finned heat sinks, highway airflow may excite thin fins and amplify vibration.
| Position | Practical effect |
|---|---|
| Lower A-pillar | Less direct airflow |
| Higher A-pillar | Whistle risk may rise |
Fasten the bracket and close gaps around it to prevent channeling that can amplify noise. If a whistle starts after you change height, adjust lamp tilt by 1–2° to deflect airflow from the finned side.
Windshield Clearance
Windshield clearance can affect ditch-light noise: when an A-pillar mount leaves little space between the housing and bodywork, airflow may curl behind the light, creating turbulence and a whistle.
Keep a small, consistent gap between the housing and nearby bodywork, especially beside the A-pillar. This clearance gives fast-moving air room to pass instead of trapping it behind the light. A pressure difference in that pocket can excite heat-sink fins, producing a howl.
Your vehicle’s windshield geometry can also redirect airflow upward across the rear of the housing, increasing turbulence when placement channels the stream toward the fins. Don’t let the light sit tightly against surrounding surfaces. If noise starts after repositioning, slightly change the mount height and test at highway speed with the windows up. Compare the sound between settings; a small clearance adjustment may confirm whether airflow around the A-pillar is responsible. Ensure the housing remains secure and doesn’t contact bodywork.
Bracket Angle
A slight change in A-pillar bracket angle can alter airflow around the housing and affect wind noise more than the light itself. Your A-pillar bracket position shapes airflow around the housing and mounts. If air strikes rear cooling fins vertically, tilt the bracket down about 1–2° to disrupt that path and reduce a whistle. A small gap behind the light can funnel air and increase turbulence.
Test at highway cruising speed with windows up, listening before and after. Keep every mounting fastener tight; vibration can amplify any remaining high-frequency tone.
| Adjustment | Airflow effect | Check |
|---|---|---|
| Down 1–2° | Disrupts direct flow | Listen for howl |
| Gap behind light | Channels air; raises turbulence | Inspect fit |
| Tight hardware | Limits vibration whistle | Check fasteners |
| Highway test | Windows up; compare sound | Confirm change |
Comparing Paired Light Configurations
Which setup stays quieter at highway speed? If you compare ditch lights with a roof-mounted light bar, ditch lights usually produce less wind noise. Their position avoids the roof-rack air gap, where airflow can create a pressure difference and turbulence across the bar. That makes them the quieter choice for highway cruising, though mounting angle and vehicle shape can affect results.
Roof bars deserve inspection when noise develops. Cooling fins can shed airflow into eddies that produce a hiss or howl at speed.
If your bar is noisy, test rubber isolators or weather stripping between fins; these fixes target the finned surface. Don’t assume the same treatment will help ditch lights: they lack a roof bar’s exposed airflow path and fin-related noise source.
A-Pillar Airbag Clearance
A-pillar ditch-light mounts must leave the airbag’s deployment path clear. Your bracket and wiring sit near a zone where the airbag can deploy, so keep every rigid part and cable outside its cover and trajectory.
Choose brackets designed for the A-pillar, or measure and test fitment carefully before installation. Follow your vehicle manufacturer’s guidance, then physically verify clearance without assuming the trim alone defines the deployment path.
Ditch lights usually don’t sit in the roof-bar fin-and-air-gap flow that can produce heat-sink eddies and whistles. Still, poor A-pillar placement can alter local airflow and indirectly change wind noise, as well as compromise safety. Check clearance with the light and wiring in place; if you can’t confirm separation from the deployment zone, choose another safe position.
Overtightened Mounting Hardware
Overtightening ditch-light hardware can distort the bracket or crush its rubber isolators, reducing vibration damping and making wind-induced resonance louder. If your lights feel rigid, airflow may excite cooling fins or internal parts at highway speeds, creating a whistle.
Excess torque can also make the mount act like a sounding board.
Back off slightly and retorque evenly to restore proper seating and isolator contact. Then test at your usual cruising speed with the windows up; compare before and after.
- Check bracket alignment before tightening when the housing feels rigid.
- Tighten each fastener gradually, alternating sides.
- Keep rubber isolators seated, not flattened.
- Use the manufacturer’s torque specification; don’t overtighten.
- Repeat the same route and speed, listening for reduced whistle or vibration after making the adjustment, with windows closed.
Seal Wiring-Entry Gaps
If adjusting the mount doesn’t quiet the whistle, check the wiring entry: an unsealed pass-through can channel air into or under the light housing, creating turbulent noise at highway speed.
Ditch lights rarely make noticeable wind noise, so inspect both the pass-through and housing seal. Follow the wire to its entry point and look for a gap; air can travel along the wire path into the mounting gap. Seal the opening with a weather-rated grommet or sealant, and add strain relief so movement won’t reopen it.
If the housing has cooling fins, keep the seal clear of the rear fins to preserve airflow. Then drive at cruising speed with the windows up and listen for a reduction or disappearance of the whistle; leaks can remain audible.
Conclusion
Ditch lights can whistle, but the cause is usually airflow around the housing, bracket, or wiring, not the light itself. At highway speeds, inspect each side separately, check for loose or overtightened hardware, and seal wiring-entry gaps. Compare paired light configurations, then adjust the A-pillar position without compromising airbag clearance.
If the noise persists, test for bracket resonance or try a different housing shape. Make one change at a time, secure all fasteners, and verify the result with a road test.