Pod Lights vs Light Bar: Which Off-Road Setup Lights the Trail Better?
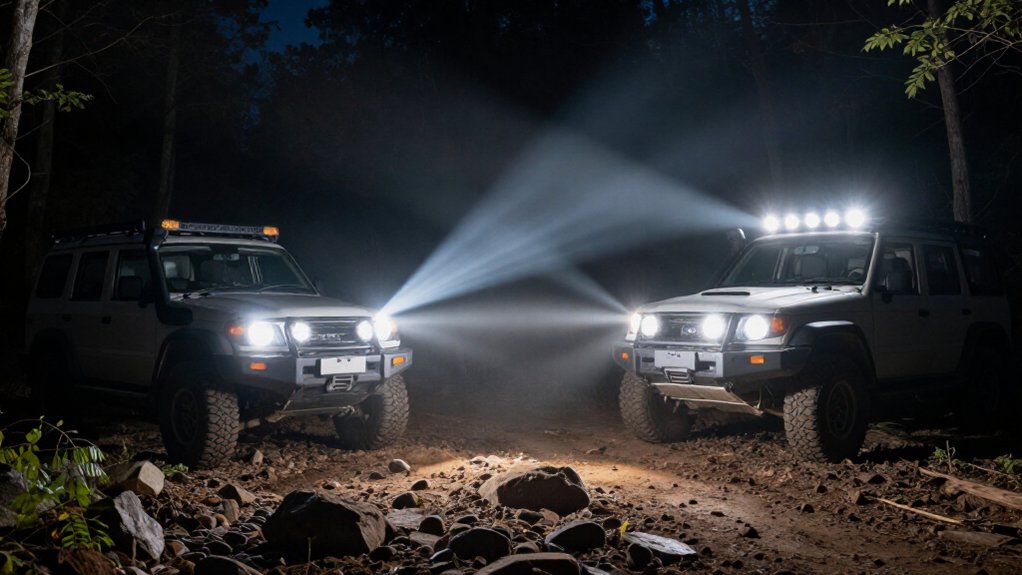
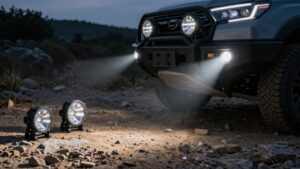
You’ll get trail light by pairing focused pods with a bar: pods throw farther, while the bar fills close and side areas.
In dust, aim pods beyond the densest cloud and limit nearby flood to reduce backscatter.
On tight trails, prioritize close coverage; use pods for corners, gaps, and tire placement.
Mount and wire zones for independent control.
Beam choice and aiming matter as much as output, and details ahead can help you tailor yours.
Dust Beam Behavior
In dust, a pod’s tight spot beam can scatter back toward you, turning a narrow throw into a bright haze that obscures detail farther ahead. At speed, distance matters less than how quickly particles return light to your eyes. A pod’s beam front can help you follow terrain edges, but it may wash out fine detail.
A bar’s broader flood or combo pattern often feels more usable at slower trail pace because it spreads light across the scene instead of concentrating it in one column. Choose the pattern for your conditions, not the label. A spot or driving pattern suits faster travel only when the returned glare stays manageable and visibility remains clear ahead.
| Setup | Dust effect |
|---|---|
| Pods | Strong beam front |
| Bar | Broader spread |
Bar-and-Pod Mounting Options
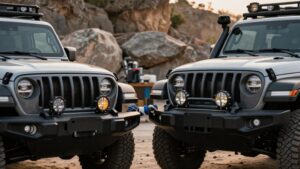
For a balanced setup, mount a light bar on a near-horizontal surface such as a roof rack, windshield header, bumper, or grille guard, then place pods where you need targeted coverage. Pods give you more mounting choices: A-pillars, ditch brackets, bumpers, bed racks, or other wired brackets. Unlike a bar’s fixed beam, each pod housing lets you aim light toward front corners, close terrain, or side angles.
Use the bar for broad forward reach, then position pods where you make decisions; add fog, ditch, or rear units when your layout calls for them.
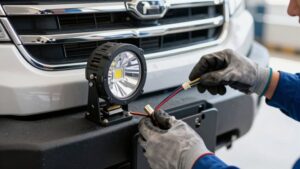
Before drilling, map cab-to-light routes and plan separate relay and harness runs, with proper fusing for each pod zone. One bar may simplify wiring, but extra pods need deliberate circuits.
Compare mounting height, too: a roof bar can cause hood glare or wind noise, while a lower bumper bar and carefully aimed pods can keep illumination on the terrain you need most.
Trail Visibility in Dust
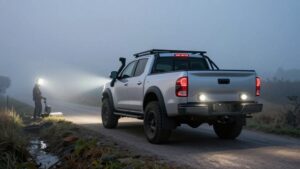
When dust thickens, a light bar’s wide flood can illuminate the cloud near your vehicle, creating glare and haze that reduce usable range. Spot-beam pods cut farther through dusty air because their narrow optics send a focused column ahead instead of lighting dust around your bumper. You can aim their hot spots beyond the densest cloud, preserving trail detail without turning the foreground into a bright scattering source.
A combined setup balances reach and coverage: pods carry light down the trail, while a flood or combination bar fills close and side areas. Mounting also matters. A roof bar may catch more hood and airborne-dust reflection; lower bumper or ditch-area lights can keep illumination concentrated on the route.
In changing dust, compare the beam pattern and aim, not just output claims. The clearer view comes from limiting nearby scatter while keeping enough peripheral light to read obstacles safely.
Switching Between Lighting Modes
Choose the beam pattern to match how quickly you’re moving: use a wide bar or flood beam to read nearby terrain on slow, technical trails, then switch to spot or driving pods for longer-range visibility as speed increases. On mixed terrain, a combo beam bridges the change, pairing broad coverage with tighter throw so you can track nearby obstacles and read ahead.
Aim pod pairs independently: point corner units outward for ditch or side coverage, and keep forward pods aligned down-trail. Keeps illumination controlled as you switch. Treat bars and pods as complementary: use the bar for close decisions, pods for farther ones. Zone switches for each light group, including side, fog, or rear lights, and use relay harnesses rather than weak factory circuits.
Alternator Capacity Limits
As you add pods and a light bar, your alternator and battery limit how much lighting you can run at once.
A common 100-watt pod or bar section draws roughly 7–9 amps at 12.8–14.4 volts. To compare setups, add their wattage, divide by system voltage, then check that current against alternator output left after vehicle loads. A bar may consolidate lighting, while several pods can push the same total draw higher if you switch them on together.
If combined demand exceeds available headroom, voltage can sag, and you may notice dimming, especially at idle or with other electrical loads running. Use relays and adequately sized wiring rather than forcing high current through undersized factory circuits.
For trail reliability, assign spot, ditch, and fog zones; run only the beam you need continuously, and switch other zones on selectively. Keep output steady without overloading your charging system.
Replacement Part Availability
Check replacement-part availability before choosing between pods and a light bar: a failed bar may require replacing the full housing, while modular pods let you swap one unit and keep the rest running. Still, both systems depend on sourcing the exact LED modules, housings, and brackets.
A bar’s single housing can turn a small failure into a full-bar or large-section replacement. With paired pods, you can replace one failed unit and leave the remaining lights installed and operating. However, pod locations, A-pillars, ditch brackets, bumpers, or racks, can require vehicle-specific mounts and wiring, so keep spares.
Before buying, confirm the manufacturer will stock the same housing and flood, spot, or combo optic later; matching parts help you preserve your aim and beam pattern.
Beam Glare on Wet Rock
Once you’ve confirmed replacement parts are available, consider how each light’s beam handles wet rock.
Wet rock glare depends more on beam shape than output. A flood spreads light across surfaces, so glossy stone can throw reflected light toward your eyes and flatten contrast. Spot or driving optics concentrate light farther downrange, helping you read the trail without lighting slick faces.
For traction, pods often give you control when you choose aimed spot or combo lenses and place their brightest output beyond reflective rock. A fixed-optic bar can be harder to fine-tune; a bright combo or flood beam may feel unusable. If glare washes out detail, re-aim toward longer throw. You may pair a broad bar with controlled pods for close support and decisions.
Mounting Location Flexibility
A light bar needs a near-horizontal mounting surface, such as a roof rack, windshield header, or bumper. Pod lights’ compact modules let you mount them on A-pillars, bumpers, rack corners, or roll cages.
Choose based on your available mounting points and the coverage you need.
Bar Placement Options
Because a light bar works best on a near-horizontal surface, it’s typically mounted on a roof rack, windshield header, bumper, or grille guard for broad forward coverage. Choose a roof position when you need long-range reach over open terrain, but check garage height, branches, and wind noise. Airflow around an exposed bar can also create glare on your hood or windshield, especially with poor beam aim.
Mounting it at the windshield header keeps the source forward while reducing roofline exposure, though your vehicle’s mounting points must support the bar securely.
Pod Mounting Versatility
Unlike a light bar’s fixed horizontal footprint, compact pods can mount on A-pillar brackets, bumpers, bed racks, or roof-rack corners, letting you place light where your truck needs it. Because pods are compact and typically sold in pairs, you can fit them to your truck’s layout rather than commit to one long mounting surface. Aim each pod toward a front corner, fog zone, or side approach to address blind spots that a single bar mount may leave. This precision also helps you balance forward reach with peripheral visibility.
A roof- or windshield-header bar needs a near-horizontal mounting surface, while pods suit varied brackets and cages, including mirror or roll-cage mounts on UTVs. Before wiring, plan each position, its aim, and cable route. That lets you build a flexible multi-position system without relying on one fixed beam location. Check clearance, vibration, and nearby bodywork so each beam stays useful without obstructing access or dazzling others.
Tight-Trail Night Runs
On tight trails, prioritize cornering visibility with a flood or combo bar that lights close-to-mid terrain. Avoid overlighting narrow paths with a wide beam; focused pods can reach gaps without flooding the trail.
Compact, adjustable pods let you target dark corners and openings where a bar’s coverage falls short.
Prioritize Cornering Visibility
Where should your light land on a tight night trail? Put usable beam where you make steering decisions: around the bend, not just on the bumper’s near ground. High, outboard driving pods throw toward the apex and exit.
- Mount pods near the front corners to reach the line you’ll follow.
- Aim each pair at the apex and exit, including ditch or fog-pocket zones.
- Use pods’ focused throw to read turns before you arrive.
- Choose a flood bar for short-to-mid-range coverage during slow technical work.
- Combine bar forward fill with adjustable pods for cornering throw.
A bar supports forward fill, but may miss your chosen line at speed. This gives you near fill plus targeted light at turns.
Aim pods around obstacles to put usable light where decisions happen.
Avoid Overlighting Narrow Trails
A wide flood bar can overlight a narrow trail, wasting output on the ground ahead and throwing glare back from rocks or your hood. That excess contrast can make ruts and edges harder to judge as your eyes adapt to bright foreground patches.
On tight runs, pods with spot or driving patterns place light on specific turns, obstacles, and tire paths instead of washing the corridor. Aim them toward decision points, with low corner coverage to reveal nearby rocks or ditch edges without lighting every surface.
A bar still works if its beam favors a narrower or combo pattern and you aim it so usable light lands where your tires will track. Broad flood can help during slow crawling, but on technical narrow sections, targeted beams usually give clearer cues with less reflected glare. Choose coverage for the corridor and your actual driving speed, not maximum brightness alone.
Use Compact, Adjustable Pods
When trail geometry changes quickly, compact, adjustable pods let you aim focused spot or driving beams at the turns and obstacles ahead without flooding the whole corridor. Unlike a single light bar, independently aimed pods let you target decision zones instead of spreading light uniformly. Place them; you’ll limit hood glare and reveal useful detail at technical speeds.
- Aim pods at front-corner turns, where focused beams expose obstacles.
- Add ditch-facing beams to improve side visibility without washing out the trail.
- Mount pods on A-pillars or brackets to reduce hood glare and tune aim.
- Use bumper pods to light close obstacles that a roof-mounted bar may miss.
- Pair pods with a bar: pods handle precise coverage while the bar illuminates trail or camp areas.
For tight, technical runs, start with adjustable pods; add a bar when you need wider coverage.
Pods for Rock Crawling
On slow, technical rock lines, pods let you aim narrow spot, driving, or combo beams at front corners, ledges, crevices, and side approaches, areas a forward-facing light bar can miss or over-illuminate. That precision matters when you need to judge tire placement rather than flood the trail ahead. A bar can provide close-to-mid fill, but its fixed forward footprint may waste output on slow lines while leaving a ledge or cross-angle in shadow.
Place pods around front corners, then add side or rear units to keep obstacles visible as you reposition. Because you can aim each pod independently, you can build coverage incrementally for tight rock, cross-angles, or steep approaches without committing to one beam pattern.
For mixed terrain, pair targeted pods with a flood or combo bar: the pods reveal decision points, while the bar fills trail. Choose beam angles to match your vehicle’s mounting positions and driving line, then test them before night runs.
Conclusion
Choose pods when your route demands flexible placement, controlled near-field light, and careful rock-crawling visibility. A light bar gives you broad, continuous reach, but dust, wet-rock glare, and tight trails can make that spread harder to manage.
For mixed terrain, combine a bar with selectively aimed pods and switch modes as conditions change. Before upgrading, check alternator capacity and mounting clearance. Match the beam pattern to your typical night runs, then aim and test it on the trail.