Light Bar Beam Angles Explained: 30°, 60° and 90° in Real Terms
At an 8-foot mounting height, a 30° beam creates a compact, bright center, about a 10-foot ground footprint, with fast falloff.
Choose 60° for roughly 15 feet of coverage and a useful balance of reach, brightness, and spread.
A 90° beam washes a wider lane, reducing dark gaps but lowering intensity per square foot.
Your best angle depends on lane width, distance, overlap, and aim; the sections below explain how those factors shape real-world performance.
30°, 60°, or 90°?
Which beam angle fits your dock depends on whether you need reach or broad coverage.
At 8 feet, a 30° bar produces a compact spot, roughly a 10-foot-radius scale, with a bright center and dimmer edges. A 60° beam covers about a 15-foot area scale at the same height. It gives you more even illumination than 30° while retaining stronger intensity near the middle.
If you’re trying to see where a lure lands farther out, 60° often offers a useful balance: it concentrates light more than a 90° beam. Choose 90° when you need a wider wash across the dock and want to reduce dark zones. Its larger footprint spreads intensity across more area, so center brightness per square foot falls overall.
Beam Spread and Road Coverage
On a road, beam angle determines whether your light reaches farther down a focused section or spreads across the lane. At an 8-foot mounting height, a 30° bar lights a small footprint, with a hot center and weaker edges; it suits targeted distance coverage. A 60° beam covers a broader area, roughly 15, while retaining noticeable central intensity.
A 90° beam spreads widest, giving more uniform lane coverage but less intensity per square foot.
Choose based on the pattern you need. Use 30° when you want light concentrated farther along one section. Pick 60° for a balanced sweep that combines useful reach with width. Choose 90° for broad area lighting and easier overlap between fixtures, reducing hard falloff and dark zones across your lane.
Trail Visibility at Night
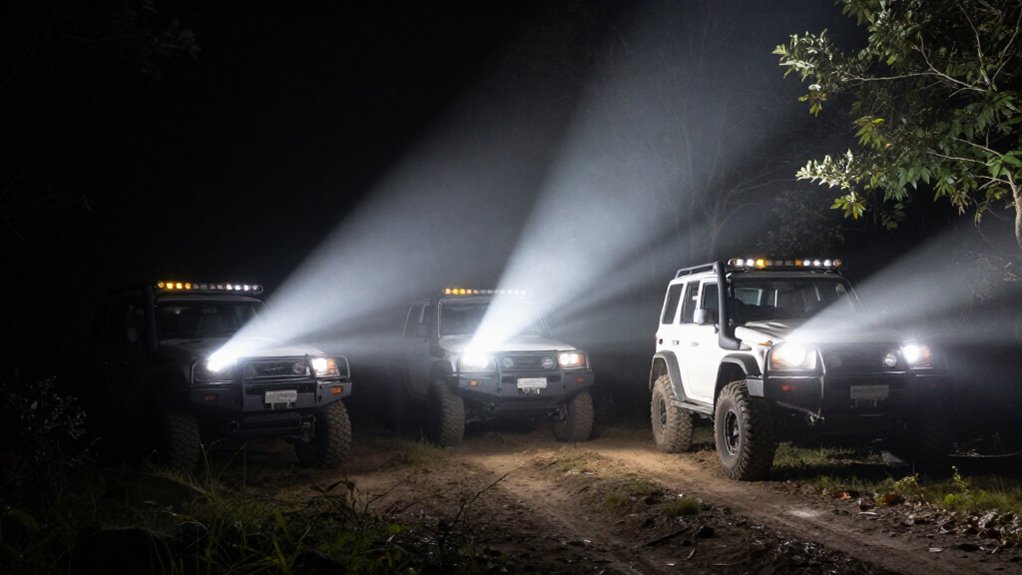
At night, a 30° or 60° beam helps you see farther along the trail, while a 90° beam spreads light more evenly from side to side. From an ~8 ft mount, a 30° beam lights roughly 10 ft of ground, with a bright center and quick falloff. A 60° beam covers about 15 ft, improving mid-distance visibility with a less abrupt hotspot.
Choose either when you need to read the path ahead.
A 90° beam gives wider coverage and reduces dark gaps, but delivers less intensity per square foot. It can help you spot hazards beside the trail. Narrower beams still produce spill light beyond their useful cones, yet can make the trail look patchy if you don’t plan mounting height and spacing carefully.
Spot, Flood, and Combo Patterns
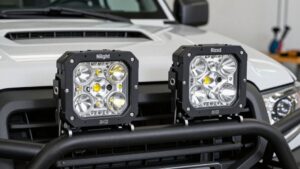
Choose a 30° spot beam when you need a bright center and longer reach. A 60° flood spreads light across a wider area, while a 90° flood provides broader, more uniform coverage.
A combo pattern pairs forward projection with side coverage, helping you see near and far without changing total output.
Spot Beam Reach
Spot beam light bars concentrate output into a narrow 10°–30° pattern, creating a bright center that reaches farther for spotting or driving but illuminates less area than a flood. That concentrated center puts more useful light on distant targets, helping you identify hazards or signs before you reach them. Your viewing distance still depends on lamp output, mounting height, aim, lens condition, and atmospheric visibility; beam angle alone doesn’t guarantee a specific range.
The stated angle describes the main cone, not a hard cutoff, so spill beyond it can reveal nearby edges while the center remains brightest. If you need distance plus side awareness, a combo bar places spot intensity in the center and flood coverage at both ends. Choose a narrow spot when your priority is forward reach, and aim it carefully to keep the hotspot on your working path rather than above or below it at your normal operating speed in use.
Flood Beam Spread
For broad area coverage, flood beams spread light across a wider field—commonly 40°–60°—than spot beams, which typically concentrate it into a 10°–30° cone. A wider 60° flood creates a larger, more even illuminated area, but distributes intensity across more ground. Compared with a narrower 30° spot, it produces less concentrated central brightness and softer falloff toward the edges.
At an 8-foot mount over a dock or similar surface, a 120° flood-style beam can cover about 30 feet more evenly; a 30° spot covers roughly 10 feet, with much higher center intensity. Choose beam width according to whether you need broad area visibility or focused illumination of a specific landing point. Your mounting height and target distance affect usable coverage, so test the pattern in position. For mixed tasks, a combo bar pairs central reach with side visibility at once.
Combo Pattern Coverage
A combo beam typically devotes about two-thirds of the bar to a tight spot pattern, with wider flood optics at each end. The center throws a concentrated beam farther ahead, while the ends spread light across sides and work areas. On many bars, spot optics span roughly 10°–30°, and flood optics span about 40°–60°.
The bar’s total light output doesn’t increase when you select combo; the pattern redistributes it across the ground. Compared with a pure spot, the side wash softens the bright-center, dark-edge effect and gives you more placement tolerance. Choose combo when you need to see where your lure lands and keep broader side visibility. It balances distance and coverage without committing to a narrow 30° spot or a wide 90° flood.
Mounting Height and Bar Position
Your mounting height changes coverage: at 8 feet, a 120° beam can illuminate roughly 30 feet, while a 30° beam concentrates light on about 10 feet. Position bars so their footprints overlap and prevent dark gaps.
Aim each bar toward the target; tilting shifts its footprint and can send light off-target as glare.
Height Changes Coverage
Mounting height changes a light bar’s footprint: Illuminated Diameter = 2 × (Mounting Height × tan(Beam Angle/2)). Raise your bar, and the same 60° or 90° beam covers a much wider area on the target plane.
At greater heights, choose a narrower beam to keep useful light concentrated; otherwise, excessive spread can increase glare and leave coverage edges underlit.
At 40 ft, a 90° beam produces roughly an 80 ft circular footprint. A 60° beam at that height covers about one-third the area and delivers roughly three times the ground-level foot-candles.
Lower mounting creates a smaller footprint and brighter center, but poor pole or luminaire spacing can leave dark, shadowed zones farther out. Keep mounting height consistent when comparing coverage for reliable, repeatable field comparisons.
Position Controls Beam Reach
Beam angle sets the potential footprint, but bar height and position determine where that light lands. At ground level, estimate diameter as 2 × (mounting height × tan(beam angle/2)). Raising your bar widens spread but lowers intensity density; lowering it creates a tighter, hotter center with shorter reach.
Choose height and beam angle together; the rating isn’t fixed ground coverage.
At higher mounts, a narrower 60° beam concentrates light. At low mounts, a wider 90° beam can fill ground; a narrow 60° beam may concentrate too tightly beneath the bar. Tilting or moving the bar shifts a footprint into an ellipse and changes light reaching the horizontal plane.
Account for that shift when positioning the bar to cover your task area and adjacent zones.
Aim to Avoid Glare
To control glare, set bar height and aim together: a high-mounted 60° bar can create a harsh center and abrupt falloff, while a 90° beam at low-to-moderate height generally spreads light more smoothly.
Choose mounting height for the area needed to cover, not beam angle alone. Higher bars throw a tighter footprint; lower bars spread light wider and more intensely near the target.
With 60°, position neighboring bars to overlap footprints and reduce uneven zones. At short distances, overlap matters more with 30° and 60° beams, which can leave dark gaps. Set tilt carefully: aiming above horizontal can send light into viewers’ eyes, even with the right beam angle. At low-to-moderate heights, a 90° beam overlaps easily for uniform coverage and fewer hot spots and dark patches.
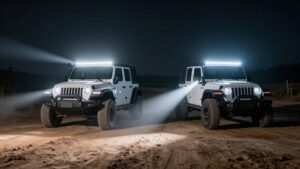
Dusty Desert Trail Runs
When dust and grit hang in the air, a 60° or 90° beam usually gives you more usable trail visibility than a tight 30° spot. Choose a 60° beam when you’ll need reach plus enough width to follow shifting shadows across uneven sand and rocks. Its center stays brighter than a flood while covering more path than a 30° spot.
A 90° beam spreads light broadly, reducing concentrated hot spots that dust scatter can make distracting. Use it when broad nearby coverage matters more than maximum forward reach. Dusty air makes spill more noticeable, so either wider pattern can preserve usable contrast across the trail. Mounting height also changes the ground footprint: a higher bar covers more ground at the same angle, in practice.
Windshield Glare and Hood Reflection
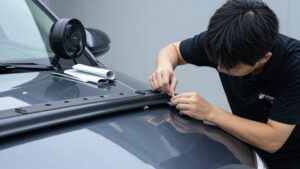
Windshield glare and hood reflections depend as much on beam aim as on beam angle. A 30° beam keeps light tightly forward, but imperfect aim can create sharp windshield hotspots and intense reflections on your hood. A 60° pattern spreads useful intensity wider, reducing pinpoint glare, though off-axis spill can bounce from glossy paint into the windshield.
A 90° beam adds horizontal spread and spill beyond its useful cone, increasing broad windshield glare and backlight risk when you mount it too low or tilt it upward. Tilt matters: even a suitable nominal angle can send part of the beam above horizontal, toward your glass. Aim the brightest center below your windshield’s line of sight; a 60° beam often offers a practical balance. Light outside the useful cone can scatter in your cabin. It scatters.
Overlooking Light Output Loss
Beam angle affects usable light, not just coverage: at the same mounting height, a 90° beam can spread light over roughly three times the area of a 60° beam, lowering foot-candles at the target even if both fixtures produce similar lumens. You may see lower task brightness because the wider cone distributes output across ground; total lumens haven’t increased.
- Choose 60° when you need reach and useful central intensity.
- Use 90° for broad coverage, but expect fewer foot-candles per square metre.
- A 30° beam makes a hotspot; edges may fall into darkness.
- Raise mounting height only with a narrower optic; otherwise light spreads, spills, and can glare.
- Aim the cone at your work area: scattered light still counts in lumens, not useful illuminance.
Check Your Vehicle’s Wiring
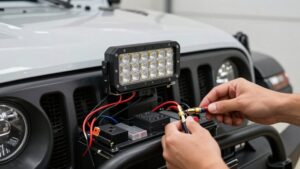
Even the right beam angle can’t deliver consistent lighting if your wiring can’t supply the bar’s rated power. Before you replace a 30°, 60°, or 90° bar, confirm its power and ground wires are sized correctly and polarity is secure. Check the harness can carry the bar’s rated wattage and amperage.
Undersized wiring can reduce voltage and dim output, regardless of beam angle.
Use a multimeter to verify a switched 12V/24V feed at the correct wire, then test ground continuity. A weak ground can cause flicker, undermining spotlighting. Install a fuse near the battery and protect routed cables with abrasion-resistant loom; heat can damage connectors and destabilize output. For bars with spot, flood, or auto modes, match harness labels to control leads so each intended beam behavior activates.
Conclusion
Choose a beam angle for the terrain you drive most. A 30° beam reaches farther with a narrower hotspot, while 60° spreads light across the trail and 90° favors close, wide coverage. Pair spot and flood optics when you need both distance and peripheral visibility.
Position the bar to limit hood reflection and glare, accounting for height, dust, and output loss. Before driving, verify your wiring and aim the lights to illuminate hazards without blinding others.