Spot vs Flood vs Combo Light Bar: Which Beam Fits How You Drive?
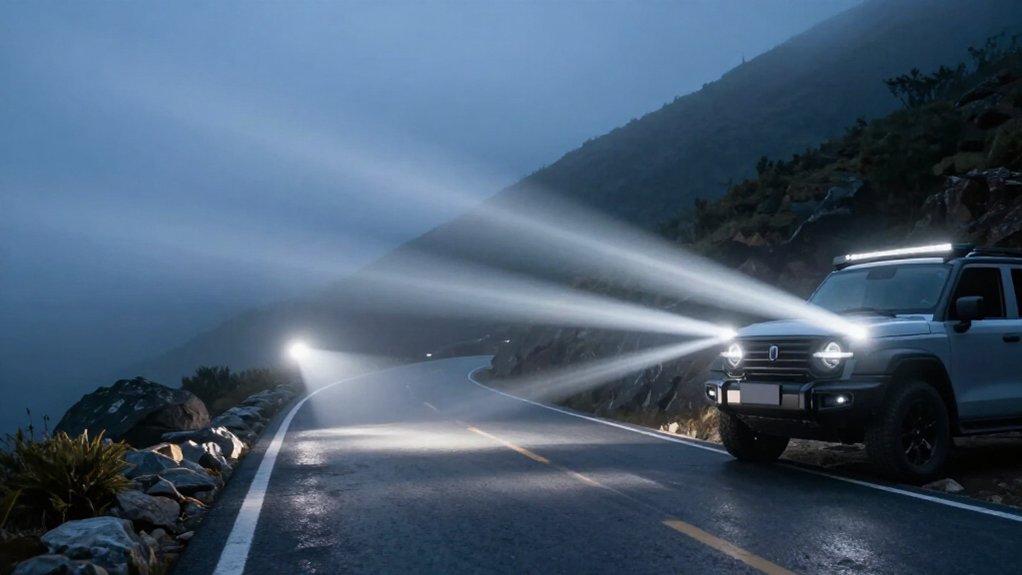
Choose a spot beam for long-range visibility on open roads and faster travel; its narrow pattern helps you identify hazards sooner.
A flood beam spreads roughly 120 degrees, lighting trail edges and nearby obstacles at low speeds or around work areas.
Pick a combo for mixed routes that need forward reach and near-field coverage.
Aim lights so you can stop within the illuminated distance, then test slowly before increasing speed.
More practical guidance follows below.
Near-Field vs. Long-Range Visibility
Where do you need light most: close to the vehicle or far down the road? Choose based on where you must detect hazards. Flood patterns provide near-field visibility with roughly 120° spread, helping you spot obstacles and roadside features. Spot patterns concentrate light into a beam typically narrower than 30°, so you can identify hazards farther ahead.
| Use | Practical result |
|---|---|
| Near field | Flood: ~120° spread |
| Far ahead | Spot: <30° beam |
On Intensity Solis, a spot beam reaches 1 lux at about 3,385 feet; a flood reaches that level at 2,391 feet.
That tradeoff helps you choose placement: mount a driver-side spot for down-road reach and a passenger-side flood to illuminate hazards. This arrangement can reduce blind areas around the vehicle.
Beam Shape and Trail Coverage
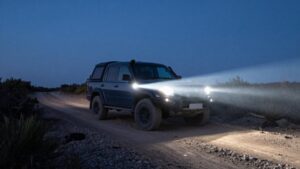
Range tells you how far a beam reaches; shape determines what you can see along the trail. Spot beams usually stay under 30 degrees, concentrating light forward while limiting side spill. Choose one when you travel faster on smoother dirt roads: it can reveal terrain changes and hazards farther ahead, giving you more time to respond.
Flood beams spread roughly 120 degrees, lighting nearby trail edges and roadside obstacles. At lower speeds in forests or technical terrain, that wider coverage helps you detect fallen trees, rocks, or scrub beside your route.
Combo patterns balance reach and lateral awareness, reducing dark areas around your vehicle. For changing speeds and mixed terrain, match the beam to your coverage needs before choosing your bar.
Reflective Trail Marker Visibility
When reflective trail markers guide your route, beam shape determines how soon you spot them.
A spot beam‘s narrow, concentrated output prioritizes long-distance throw over side illumination, helping you identify markers farther down the route and gain reaction time.
A flood beam spreads light across the foreground and trail edges, where markers often sit near your vehicle. On winding routes, its wider coverage can reveal markers around the next corner, while a spot beam helps you respond earlier as you approach.
Combo beams pair long-range detection with broad near-field visibility at once, keeping markers and trail-edge features visible as bends and terrain change. If you drive mixed routes, spot-and-flood coverage can help you see both far ahead and across the immediate trail width.
Quick Aim-and-Install Setup
Once you’ve chosen a spot, flood, or combo beam, mount the light with a clear forward line of sight and aim it to keep your stopping distance within the illuminated area. Use these checks before driving:
- Point a spot beam straight ahead to maximize down-road throw.
- Aim a flood beam slightly lower to light the foreground and trail edges.
- On a combo, place the driver-side spot forward and passenger-side flood wide.
- Secure mounts, then verify the beam doesn’t shift when you tighten hardware.
- Test slowly, then increase speed on a safe stretch; confirm you spot obstacles and terrain changes early.
Keep the throw matched to your speed: don’t outdrive the illuminated area. Check that peripheral coverage leaves no dark zone close to the vehicle.
Weather and Terrain Considerations
Weather and terrain should guide your beam choice because rain, darkness, and hidden trail hazards can shorten your reaction time.
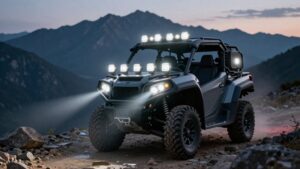
In foul weather, prioritize a focused forward beam, spot or combo, to reveal obstacles and wildlife sooner. On open backroads or highways, a spot beam throws light farther down the road; reach can extend about half a mile. Choose flood coverage, 120 degrees, for slow travel on winding forest roads or scrub-heavy trails, where rocks and fallen trees may sit near the edge.
If your route shifts between open stretches and tight trails, a combo balances long-range projection with foreground and side illumination; one spot and one flood is common. Smoother maintained roads need less side coverage, while uneven, bush-heavy routes make it more valuable.
Replacing Cracked Lenses
A cracked light-bar lens can reduce visibility and let moisture damage the optics, so replace the lens assembly, or the full housing if that’s the available option. Match replacement optics to your original beam pattern; a different spot, flood, or combo fit can change spread and throw distance.
- Clean the lens seat and inspect it for damage before installation.
- Confirm the gasket sits evenly, then tighten fasteners to the maker’s specification.
- If you find internal condensation, replace the seal and check wiring and the driver.
- After fitting, check aim on level ground at the correct height and alignment.
- Test the light for fogging and stable output before driving.
Even leaks can fog optics and reduce visibility, so sealing matters as much as matching beam type.
Glare for Oncoming Drivers
To limit glare for oncoming drivers, choose a tighter spot beam—typically under 30°—for down-road reach, and aim it so the brightest part stays out of other drivers’ eyes. That narrower spread generally reduces off-axis light, which can otherwise reach approaching vehicles, especially when you meet traffic near a hill crest.
A flood beam, often around 120° wide, throws more light to the sides; reserve it for low-speed use and aim it carefully when nearby traffic is possible. A combo bar can balance long-range reach with less side spill than a full flood, but alignment still determines where its brightest output lands. If drivers flash you, switch from full flood to spot or spot-flood and re-aim; don’t respond by adding brightness at night.
Power Draw and Heat Output
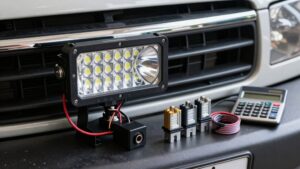
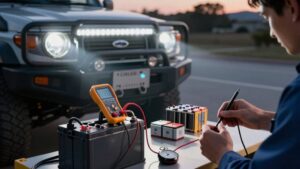
Before choosing a spot, flood, or combo bar, check that your alternator and battery can support its current draw. High-output LEDs generate heat, so verify the bar’s thermal design can maintain safe, steady output during long runs.
Electrical Load
Although spot, flood, and combo beams differ in coverage, beam pattern alone doesn’t determine power draw; the lights’ wattage and current rating do. Before you choose a kit, compare its rated amperage with your vehicle’s available electrical capacity; beam width isn’t a safe proxy for demand.
- A spot LED can draw similar current to a flood unit with comparable wattage.
- Adding a second fixture raises total draw and alternator demand.
- Two separate spots may demand more power than one bar; compare ratings, not beam labels.
- A combo bar can replace separate spot and flood fixtures, reducing wiring runs, relays, and connected loads.
- More current produces more heat in LEDs and driver circuitry, increasing electrical stress and risking shorter service life when consistently overloaded.
Thermal Management
Current draw also affects heat: higher-output spot, flood, and combo bars can place more demand on your alternator and wiring, while concentrated spot beams may create localized heat around the LEDs and optics.
Beam shape alone doesn’t predict temperature: flood bars may spread light broadly yet run hot when many LEDs and the driver draw substantial wattage. A combo bar remains a high-power multi-emitter system even when it pairs an 8-degree spot with wide flood coverage.
Choose a model with an aluminum housing, use sound thermal paste where specified, and keep cooling airflow unobstructed. Under continuous night wheeling, foul-weather, or wildlife-risk use, inadequate cooling can reduce brightness over time and shorten LED or driver life.
Match the bar’s current draw to your vehicle’s charging capacity, and install appropriately rated wiring and connectors to limit voltage drop. Check connections and housing temperature periodically; don’t cover vents or ignore flicker. If output fades, shut the lights off and investigate.
Lighting for Work Sites
For work sites, use a flood or scene beam to illuminate a wide zone and reveal nearby hazards, surfaces, and equipment. Choose roughly 120° flood coverage for side-to-side tasks; use a spot beam when you need clear forward reach.
If you need both, a combo bar or paired spot and flood lights can improve task visibility while limiting dark areas near your work zone.
Illuminate Work Zones
When lighting a work zone, choose a flood pattern to cast a wide, near-field beam—often around 120°—across the area where you’re working. That coverage helps you inspect the ground and equipment without relying on a distant throw. Use it when you’re moving slowly through a broad work area, where nearby hazards demand attention.
Check the light before you begin:
- Aim side coverage toward the ground around your vehicle.
- Scan for fallen trees and large rocks near the road edge.
- Watch nearby terrain features that can hide footing or equipment.
- Keep the lit area clear of glare and avoid shining into coworkers’ eyes.
- Recheck coverage as you reposition the vehicle or work tools.
For distant corners, add spot reach while keeping nearby hazards visible.
Choose the Right Beam
At a work site, match the beam to the hazards you need to see: choose a flood pattern with roughly 120° spread for nearby ground and roadside coverage, a spot beam for far-ahead clarity, or a combo for both long throw and wider peripheral light.
A spot beam can provide far-ahead clarity; one Intensity Spot reaches about 1 lux at 3,385 feet. For hazards beside your path—fallen trees or large rocks—choose flood or combo lighting, not spot alone.
A combo handles changing conditions, pairing an 8° spot with a 90° flood, as TrailFX combos do. For balanced coverage from one bar, place a spot on the driver’s side and a flood on the passenger’s side. Choose according to hazards and required reach.
Improve Task Visibility
On work sites, a flood beam improves near-field visibility by lighting the foreground, roadside edges, and nearby hazards that a narrow spot beam may leave in shadow. For low-speed tasks, prioritize spread over maximum throw: you need to identify obstacles early enough to steer or stop.
- Light the ground around your vehicle at campsites and job sites.
- Fill shadows in brush so rocks, branches, and edge hazards remain visible.
- Aim flood coverage across the foreground, not only far down the route.
- Choose a combo beam when tasks require both side visibility and forward reach.
- In foul weather or wildlife areas, maintain a clear, well-aimed sightline ahead.
Before moving, check beam aim and coverage; focused positioning can improve reaction time when hazards appear ahead of your vehicle.
Matching a Beam to Your Driving Speed
Match beam shape to your speed: on highways or smooth dirt roads at 20–30 mph, a narrow spot beam (under 30°) reaches farther and can help you identify hazards earlier. At higher speeds, prioritize focused down-road clarity; a spot beam gives you more distance to assess the lane and respond. The Ultra Vision Nitro 180 Maxx spot, for example, claims visibility up to 2.2 km ahead, though actual range depends on conditions and installation.
On technical trails or around camp, slow down and use flood illumination to reveal nearby obstacles and roadside features. When your pace shifts between open stretches and winding brush, a combo beam balances reach with peripheral coverage, reducing dark gaps. You can also pair one spot with one flood: aim the spot for long-range penetration and the flood to widen your foreground view through slower sections. Choose a beam that lets you stop within the distance you can see at night.
Conclusion
Choose a spot beam when you need distance at speed, a flood beam for nearby trail edges and work, or a combo when you need both. Match output to your vehicle’s capacity, aim lights to avoid glare, and check local regulations. Test coverage at speed before relying on it at night.
If weather, terrain, or oncoming traffic changes, adjust speed and your plan. The safest beam is the one that helps you see without compromising others.