
How to Aim Ditch Lights for Corner Coverage Without Blinding Anyone
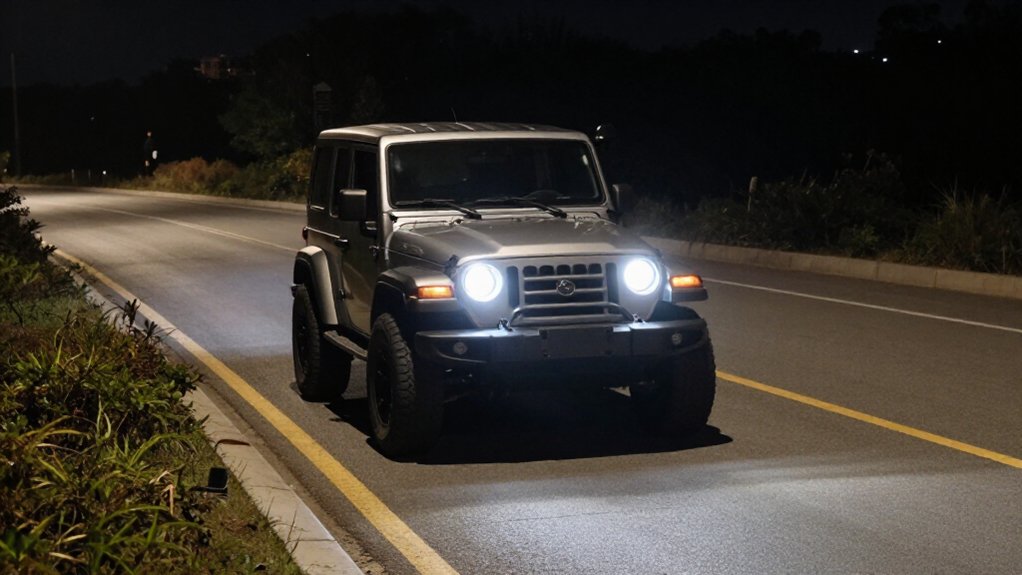
Park on level pavement, load your vehicle normally, and set tire pressure to the door-jamb specification.
At a 25-foot distance, aim each combo ditch light about 20–30 degrees outward so its spot reaches the trail edge while flood reveals hazards.
Mark the hood glare boundary at seated eye height, then back off until reflections stay below it.
Align hotspots, torque mounts, and check for oncoming glare.
Inspect wiring for chafing.
More checks can refine coverage.
Driver-Side Corner Coverage
For driver-side corner coverage, aim the ditch light about 20–30° outward from straight ahead so its beam reaches the trail or road edge without piling extra light into your headlights’ lane. Choose a combo pattern: the spot core carries light side-forward, while the wider flood reveals rocks, ruts, and brush. Position the pod near the hood-crease base at the A-pillar.
You want light on the ground and sidewall zone, not reflected from the hood toward oncoming traffic. At night, inspect the pattern beside a wall or turnout. Confirm the corner is visible and no hot spot reaches other drivers’ eyes.
If tight turns hide driver-side hazards until late, adjust degrees farther outward, not forward. Stop when the corner reads without overpowering forward glare.
25-Foot Test Distance
After setting the outward angle, verify the beam at 25 feet: park on level ground facing a wall or flat sign, then adjust each ditch light so its hot spot reaches the corner zone without shining straight back toward your eyes. Aim each beam about 20–30° outward; its hot spot should hug the trail edge, not duplicate your headlights’ forward pool. Recheck from your usual position.
- Check your sightline: glare off the hood, tow mirrors, or bumper means you should aim down and outward slightly.
- Keep the beam near 20–30° outward, lighting the side-forward gap for corner entry.
- With combo patterns, ensure the spot doesn’t dominate at eye level; let the flood fill the side.
- Test driver and passenger sides separately; confirm the position or vehicle lean can shift either beam, so correct small differences before road use.
Step 1: Park on Level Pavement
On level pavement, park with the vehicle loaded as you normally drive, including the driver and typical gear, so suspension pitch and ride height don’t skew the aim. Choose a flat wall or garage door at a consistent distance, and mark the pods’ height and the vehicle’s straight-ahead centerline as your references. Then switch on the ditch lights and note where each beam falls relative to the side-forward corner area.
Make adjustments methodically, using the same marks and distance each time so you can compare changes rather than guess. Check at dusk or night in a low-traffic place, not on a public road. Look for light spilling into your sightline or backscatter reflecting off the hood; reposition the pods if glare distracts you, too.
Step 2: Set Tire Pressure First
Before aiming your ditch lights, set tire pressure to the door-jamb specification or manufacturer’s chart while the tires are cold.
Check pressures before you aim because tire pressure affects ride height and suspension geometry. Use the listed PSI, not a guess or the sidewall maximum. Set pressure before driving, when the tires are cold, for a consistent starting position.
Don’t aim with underinflated tires; a drop of five to ten PSI can let the vehicle sag, pitching lamps down and shifting corner coverage. Overinflation by a similar amount can raise ride height and lift beams, increasing glare for oncoming drivers. After you add passengers, tools, or other cargo, recheck pressure and account for the changed load, which can compress suspension and alter beam placement.
Step 3: Mark the Hood Glare Boundary
With the vehicle on level ground, switch on the ditch lights and use your seated eye height to mark where their beam first creates glare on the hood or windshield. Place tape on the hood crease to record that boundary. Ask a spotter to watch your mirrors and forward view for reflected hotspots while you adjust.
Back the aim off until the beam stays short of the mark, including when the suspension moves over uneven ground. Keep the brightest area outside the glare zone; don’t accept a setting that sends light into your eyes or obscures useful view. Check the installed beam pattern, because a combo beam’s wider fill may reach the hood sooner than a spot beam. Recheck the mark after each adjustment.
Step 4: Aim Passenger-Side Pod Outward
For corner coverage, aim the passenger-side pod about 20–30° outward from straight ahead, using a combo or spread beam to light the side-forward lane the headlights miss.
Keep the beam on the trail edge and adjacent terrain, not the hood line; a high or inward aim can throw glare back across the hood and waste light. From a stationary spot, fine-tune the angle until you can pick out more shoulder, curb, or vegetation on the right without producing headlight-level dazzle for oncoming drivers.
Then check the passenger-side view and mirror in a dark area: confirm the beam improves side visibility, but ends before it points directly into traffic eyes. Recheck after securing the pod, since vibration or a shifted mount can alter its aim. Use the right-hand-turn approach to judge side-forward coverage, not brightness alone.
Step 5: Add Passenger-Side Light Gradually
Start with the passenger-side ditch lights aimed 20–30° outward, then adjust in small 2–5° increments in a dark, safe area. Use a combo beam’s flood portion to reveal nearby road edges; keep its spot core just high enough to show obstacles near the front-right tire before you turn.
Watch for brush, drop-offs, and trail-edge detail at the front corner. The beam should reach side-forward without reflecting off your hood or shining into oncoming drivers’ eyes. If bright hotspots appear on the lane ahead, back the aim off slightly.
Recheck after changing a bracket or beam pattern; a lens-mode swap can shift glare toward eye level during right turns. Test with headlights on, from the driver’s seat, and repeat after every optic change before driving.
Step 6: Torque Mounting Hardware
Torque the ditch-light bracket with a calibrated wrench, following the vehicle- and bracket-maker’s specifications. Use a torque-rated mount designed for your vehicle, such as a hood-crease or A-pillar bracket. Confirm the anchor points grip securely.
Install only the specified fastener grade; brackets use rated stainless or zinc-plated hardware. Match the washer arrangement to the manufacturer’s instructions: use flat and lock washers or an approved threadlocker setup. Tighten opposing fasteners evenly in a cross pattern to prevent bracket twist.
Torque electrical ground lugs, fuse holders, and switch or relay studs to their specified values. Ensure the ground lug contacts bare metal to limit heat and voltage drop. Recheck bolts after your first drive, then periodically, particularly after rough trails; settling can reduce clamping force.
Verify No Oncoming-Driver Glare
Aim each ditch light about 20–30° outward from straight ahead, with a combo beam’s brightest spot just outside the headlight beam to illuminate the trail edge without targeting oncoming drivers.
Test at dusk on a quiet road. Watch for wet-road-like reflections on windshield or hood, and check mirrors for direct glare. If you see reflections or a clear line into the opposing lane, lower the vertical aim or turn the pod slightly farther outward.
Keep lenses near the hood crease or A-pillar base; set tilt so the brightest region stays below the level visible to oncoming headlights across the road. Recheck both sides, since driver and passenger placements can differ. Confirm neither beam points inward when the vehicle leans. Adjust until corner coverage remains useful without obvious glare.
Diagnose Uneven Beam Overlap
On flat ground, compare where each pod’s hot spot reaches the trail edge; both should land roughly 5–15 feet out at a similar distance. If one side blacks out your side view, turn that pod inward 1–2° at a time or adjust bracket height until both beams share the corner boundary. On a wall, check that the combo-spot cores form a consistent side-forward rectangle; let the wider flood fill gaps, not stack on the headlight’s bright center. Hood-edge reflection signals that pod aims too high or too far forward.
| Check | Target |
|---|---|
| Side hot spot | Similar reach |
| Beam edge | Match line |
| Test range | 10 m |
| Tolerance | 10–20 mm |
Mark pavement edges; adjust until they match within 10–20 mm at 10 m, then recheck seated.
Inspect Wiring for Chafing
Trace each harness from the battery or relay to both pods, checking for rubbed insulation at the hood hinge, inner fender, A-pillar trim, and bracket corners. These contact points can wear through insulation and expose conductors, creating a short or fire risk.
Inspect loom and grommets wherever wires pass through the firewall or inner panels. Confirm each pass-through has secure strain relief, with no bare conductor at flex points.
Secure the bundle every few inches with suitable clips or cable ties. Keep it clear of the hood, latch mechanism, and vibration zones. If you find damage, cut back to clean wire and splice using heat-shrink butt connectors; electrical tape alone won’t provide a durable repair. Restore the original abrasion protection with loom or wrap. Before aiming or testing, gently tug leads near mounts and check clearance through the hood’s full travel.
Conclusion
Aim your ditch lights to widen corner coverage, not to illuminate oncoming drivers’ eyes. Park on level pavement, set tire pressure, and use a consistent 25-foot test distance. Mark the hood glare boundary, adjust each beam, then torque the mounts.
Verify there’s no glare from the driver’s position and diagnose uneven overlap before driving. Inspect wiring for chafing after adjustments. If you can’t confirm a safe pattern, lower the lights or have a qualified shop check alignment before using them on-road.
