Curved vs Straight LED Light Bar: Wider Spread or Longer Reach?
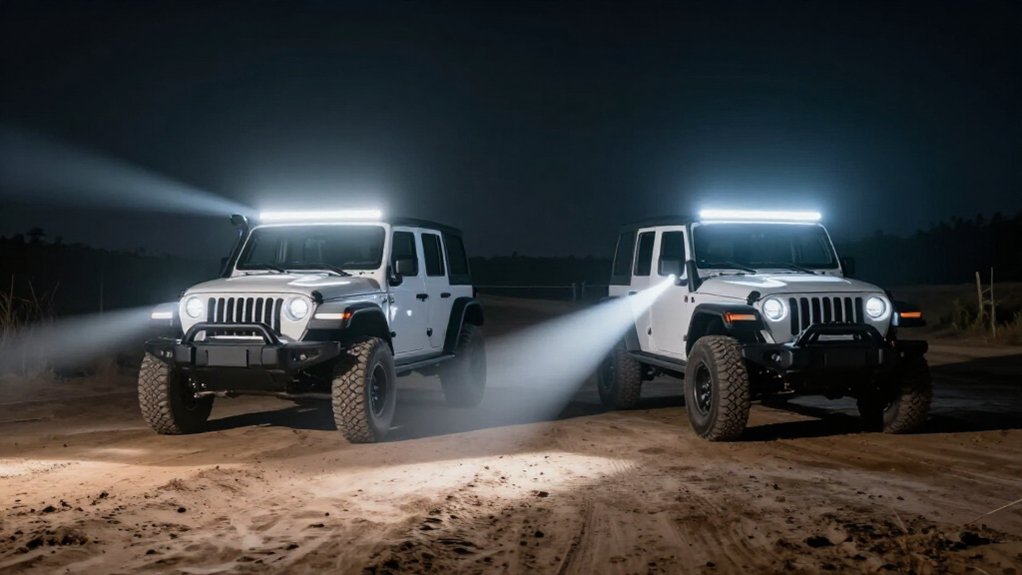
Choose a straight LED light bar when you need a tighter hotspot and stronger forward illumination for identifying terrain 100–300 meters ahead. Choose a curved bar when slow, technical trails demand wider side coverage around switchbacks and near-edge hazards.
Optics, beam pattern, and mounting position matter more than housing shape alone; curved designs may slightly sacrifice some center brightness. Match reach to speed, then compare installed beam performance and fit. The details below clarify these trade-offs.
Curved Versus Straight Beam Reach
For long-range reach, a straight LED light bar typically delivers a tighter hotspot because its LED chips share one focal axis. At 100–300 m, you’ll usually see more usable lux from a straight bar, helping you identify trail depth at distance.
A curved bar spreads light wider, but its center throw can weaken slightly against an equivalent straight bar. Choose spot or combo optics when you need forward reach; beam pattern matters more than shape alone. For slow technical driving, wider side visibility can make bends and obstacles easier to detect.
| Setup | Reach profile | Best use |
|---|---|---|
| Straight | Tighter hotspot; longer throw | Downrange spotting |
| Curved | Wider spread; less center concentration | Slow technical routes |
At roughly 100–300 m, compare usable illumination on target, not just advertised output or bar length.
LED Placement and Housing Shape
Beam reach also depends on LED placement and housing geometry: a straight bar aligns its LEDs on one focal plane, keeping light concentrated forward, while a curved bar angles its end pods outward to widen lateral coverage. That distinction doesn’t determine output alone; optics still matter. For equal length and chip count, curved housings may lose roughly 3–7% brightness efficiency because reflector geometry and LED aim aren’t as perpendicular to the road.
Choose by fit and application:
- Straight bars suit flat mounts and fit widely without shims.
- Curved housings can follow rooflines or A-pillars.
- Both designs support similar chips, lenses, and spot, flood, or combo patterns.
- You’ll still need to compare optic quality and mounting stability.
Side-View Coverage on Switchbacks
On slow switchbacks through dense brush, a curved LED bar’s outward-angled end pods widen side coverage, helping you spot rocks, drop-offs, and branches near the inside of a turn without repositioning the bar. A curved bar angles outer LEDs outward, spreading illumination across more horizontal area than a straight bar’s forward-axis beam.
That broader field can reveal edge hazards earlier along thick, narrow tracks, while you keep the light fixed.
Straight bars concentrate output into a tighter hotspot and reach farther down the trail, but may leave inside-edge hazards in shadow. Curved optics may sacrifice about 3–7% of brightness at comparable length and chip count. At low speed, that tradeoff often matters less than peripheral visibility. Choose curved coverage to detect nearby margins; choose straight throw to assess distant terrain.
Switchback Cornering Control
When a switchback tightens, a curved LED bar’s outward-angled end pods widen the horizontal field, helping you track the turn’s near edge at slow speed. Arc-mounted optics spread light across roughly 120–160 degrees, improving peripheral guidance as you steer through tight trail bends.
A straight bar instead keeps a stronger centered hotspot, helping you read the lane through faster, open-radius corners.
- Match beam pattern to turn speed, not bar shape alone.
- Expect curved designs to lose about 3–7% brightness versus comparable straight bars.
- Check optics and LED-chip quality before prioritizing spread or reach.
- Choose sealed IP68/IP69K construction to preserve output after vibration, dust, and washdown.
Your switchback choice should follow sightline demands: prioritize side coverage for crawling turns, or a centered beam when speed stretches your view. Test the installed beam on terrain, since real corner control depends on usable illumination, not nominal output figures alone.
Roofline Clearance and Angles
Along a rounded roofline, a curved LED bar can follow the cab contour, often clearing the roof crown with shorter brackets than a straight bar. That closer fit can help you preserve beam aim with less bracket height; a straight bar may need clearance or shims. Curved bars angle end pods outward, reducing harsh dark corners at beam edges when your roof placement isn’t level.
A vehicle-specific housing may sit closer to the glass and A-pillar, with less wind noise. Check the mounting surface: on a flat bumper top, the arc can make the bar rock or leave a center gap, so you may need shims or fabrication for contact. A straight bar sits flush more easily on flat channels and racks. Match the arc and bracket geometry to your cab, then verify clearance and aim.
Replacement Parts Availability
If you need a replacement quickly, straight LED bars are often easier to source because their common widths and bracket patterns fit many aftermarket bull bars, roof racks, and bumpers. Curved bars can take longer: their housings follow vehicle-specific arcs, so a contour made for one roof may not sit flush on another.
Check these points before you order:
- Match mounting width; a mismatch can prevent secure seating.
- Verify bracket-hole spacing against your existing mount.
- For a curved replacement, confirm exact arc and length options.
- When switching shapes, assess fit: an arc on a flat surface can rock or leave gaps.
Straight bars often share standardized SKUs; curved OEM-style replacements may require exact geometry, increasing sourcing time. Confirm compatibility before ordering carefully.
Glare Into Dust Clouds
In a dust cloud, a curved LED bar’s wider horizontal spread can send more light back toward your eyes, reducing contrast. Its arc and angled end pods illuminate a broader field, but that coverage can increase backscatter within suspended particles.
Shorter beam cutoff and wide peripheral output may scatter light toward you even when lumens remain unchanged.
A straight bar concentrates its hotspot nearer the center, keeping the brightest portion less likely to enter the densest plume. Pairing it with a spot or combo optic, rather than a broad flood, limits lateral light and reduces glare. Still, bar shape doesn’t determine performance alone.
Beam pattern, lens design, and reflectors control how much light dust returns to your eyes, so compare output, not curvature alone.
Installation and Wiring Tradeoffs
Your mounting point determines fit: a straight bar usually sits flush on flat surfaces, while a curved bar may need shims or fabrication to prevent gaps and rocking. Check how the bar’s shape affects bracket clearance and access to wiring connections.
Route cables clear of glass and roof edges, with strain relief and sealed grommets to limit water entry.
Mounting Point Compatibility
Although both shapes can mount securely, a straight LED light bar usually fits flat, universal locations such as bull bars, bumper tops, and flat roof racks, while a curved bar is designed to follow vehicle-specific roof, channel, or A-pillar contours. You should confirm mounting width and end-pod sweep before ordering, so housings clear the grille, roof crown, and rack cross-members.
On a flat bumper, a curved bar may rock or leave a center gap because its ends contact first; shimming may be required.
- Check bracket spacing against the mounting surface.
- Compare end angles with nearby bodywork.
- Shim only as needed; keep the bar stable.
- Tighten mounts to resist corrugated-road vibration.
Stable mounts help preserve lens sealing through cycling and washdown under changing conditions.
Wiring Access And Routing
Wiring access depends more on mounting location and bracket geometry than on the bar’s optics: a curved bar can leave tighter clearances near the A-pillar or roofline, while a straight bar on a bumper or roof rack usually gives you a more predictable harness route.
When you mount a curved bar near a curved roofline, check bracket gaps and add cable standoff points where the housing switches over toward the mounting surface; these prevent pinching. Route the power lead in loom or conduit, clear of sharp edges and moving parts, and establish a sound ground. Secure the harness at intervals to resist corrugated-road vibration, and position every connector above standing water, including at river-crossing angles. This protects sealing and reliability despite typical IP68/IP69K ratings off-road.
Terrain-Based Bar Selection
For fast, open-trail driving, choose a straight bar to keep the hotspot centered and extend forward reach for terrain reading. On tight, technical tracks, a curved bar broadens side illumination, helping you spot obstacles around bends and ditches.
If you drive mixed terrain, weigh that wider lateral coverage against the straight bar’s stronger center throw, then match the bar to your mounting surface.
Open-Trail Priorities
Choose a straight light bar for open, fast terrain where longer forward throw and a tighter hotspot help you read the trail at distance, including around 300 meters in open desert. Pair it with a spot or combo beam to prioritize deep down-trail planning; the concentrated hotspot supports earlier line choice and speed adjustment. Your selection should reflect pace and sight distance, not merely nominal output.
- Choose a straight housing when distance reading outweighs broad near-field coverage on fast, exposed open routes.
- At roughly 300 meters, its forward reach can help you identify terrain changes much sooner.
- A tighter hotspot concentrates useful intensity down-trail, supporting navigation before you reach hazards.
- Avoid assuming wider output improves range; beam shape determines where usable illumination falls.
Tight-Terrain Visibility
On tight, slow trails, a curved light bar spreads illumination laterally, helping you spot bends, ditches, and obstacles near the shoulders without repositioning the bar. For low-speed technical driving, that wider pattern supports peripheral awareness when the trail narrows or changes direction. You can detect edge hazards earlier, reducing the need to steer your view away from the intended line. A curved bar suits this task because its arc distributes output across the near field rather than concentrating the beam on one forward axis.
When choosing optics for a narrow route, pair a curved bar with a flood or combo pattern if lateral coverage matters. Choose a straight bar only when your line requires focused spot reach farther ahead; its hotspot stays more centered.
Mixed-Terrain Trade-Offs
Because mixed terrain shifts between close obstacles and distant sightlines, match your light bar to the terrain’s dominant demand: curved bars widen peripheral coverage for slow technical trails, while straight bars concentrate more light ahead for faster runs where reading the ground 100–300 m away matters.
- Choose curved bars on trails or worksites; their wider near-field spread reveals rocks, ditches, and brush.
- Choose straight bars for fast desert or prerunner runs; tighter hotspots throw farther, helping you read terrain about 100–300 m ahead.
- Expect curved optics to sacrifice 3–7% brightness at the center versus straight bars because reflector angles reduce concentration.
- Fit curved bars to roof or windshield contours; use straight bars on bumpers or racks.
Spot/combo favors reach; flood/wide-combo favors side visibility.
Warranty and Service Coverage
Although curved and straight LED light bars can meet the same IP68/IP69K protection levels, warranty durability depends more on sealing, construction, and validation than on shape. Check whether the manufacturer validates its rating through -40 to +85°C thermal cycling, road vibration, and 480+ hours of salt-spray testing; these results, not curvature, often anchor coverage. Curved bars may measure 3–7% dimmer than comparable straight bars because reflector angles redirect light, so compare output before disputing performance.
Service can be simpler with straight bars: standard brackets and SKUs are easier to source, while a vehicle-specific curved unit may need OEM lens, bracket, or bezel parts. Also verify chip provenance: genuine Osram or Luminus chips rated beyond 50,000 hours support claims; relabelled or reclaimed chips can lose 30–50% brightness within 200 hours.
Conclusion
Choose a straight LED bar when you need concentrated forward reach across open terrain; choose a curved bar when you need broader peripheral coverage on switchbacks and uneven trails. Match beam pattern to speed, mounting height, roofline clearance, and the dust you expect.
Verify housing fit, wiring capacity, and warranty support before installation. If you’re unsure, prioritize controlled glare and usable side visibility over peak output alone. The right bar improves what you can see.