Why Your LED Headlights Flicker (and the Fixes That Actually Work)
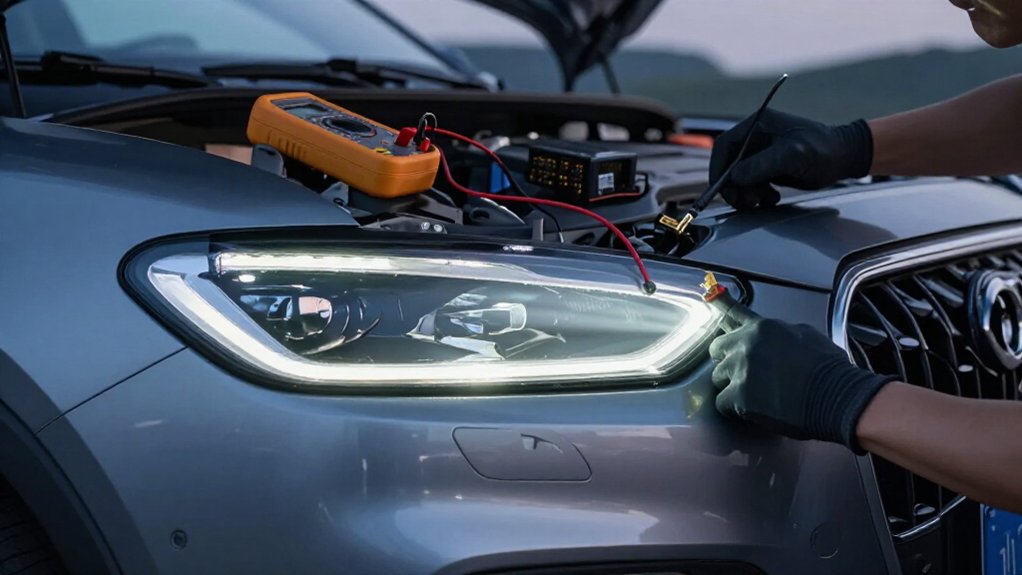
If your LED headlights flicker, don’t assume the bulbs are defective. Your vehicle may interpret their lower 20–30-watt draw as a failed 55-watt halogen, while voltage swings, an incompatible driver, or loose or corroded connections can interrupt power.
Check bulb seating, grounds, connectors, and charging voltage; secure wiring and confirm the kit supports your vehicle and DRL mode.
A compatible decoder may stop load-related pulsing.
Use resistors cautiously because they get hot.
Checks below pinpoint fixes.
Why LED Headlights Flicker
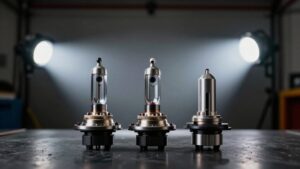
If your LED headlights flicker, the vehicle’s electrical system may be reacting to a load it wasn’t designed for. Many headlight circuits expect halogen bulbs drawing 55 watts or more, but an LED may draw only 20 to 30 watts. That mismatch can make your vehicle interpret the bulb as failed and pulse power.
Flicker at startup or when another electrical load switches on points to voltage fluctuations. LEDs tolerate inconsistent voltage less readily than halogens, so a brief dip or spike may disrupt their output.
Rapid pulsing after installation often signals a CAN-bus or daytime running light compatibility issue. A weak or incorrect LED driver can also regulate current poorly, causing repeated on-off cycling. Check bulb specifications and use compatible decoder or anti-flicker hardware.
Flicker and Night Visibility
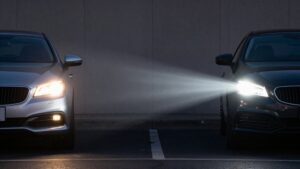
A flickering LED headlight can leave brief gaps in your nighttime beam, especially when voltage fluctuates at startup or idle.
When the LED driver reacts to an unstable supply, rapid strobing can make objects harder to detect. If flicker appears only while the engine starts or systems load the alternator, check charging voltage; unstable 13.5–14.5V output can cycle brightness or briefly drop the beam. Lower-wattage retrofit bulbs may also confuse your vehicle’s bulb-status monitoring and trigger pulsing, reducing light when visibility matters.
Inspect grounds and headlight and driver connectors for corrosion or poor contact, which can interrupt power. Correct those faults first. Then choose CANBUS-ready, vehicle-specific LEDs or fit CANBUS decoders or matched load resistors. Stabilizers help keep output steady, improving reliable nighttime illumination.
Beam Changes Over Bumps
When your LED beam flickers or shifts over bumps, vibration may be disturbing a loose connection in the headlight harness or ground. At idle, a shaky LED driver mount may cycle as suspension movement jolts the wiring. A worn relay contact or corroded connector pin can also interrupt power, causing a brief pulse.
| Symptom | Check |
|---|---|
| Beam dips | Loose ground |
| Strobe | Corroded pins |
| Pulse | Relay or driver mount |
With the lights on, gently inspect the bulb adapter and harness for strain; don’t pull wires. Reseat connectors, clean green or white corrosion with contact cleaner, tighten chassis grounds, and secure the harness so road impacts can’t flex it.
If symptoms persist, test voltage at the lamp while reproducing movement; repair the connection before replacing parts.
CANbus Decoders and Resistors
If your vehicle flags an LED’s lower draw, a CANbus decoder can stabilize the monitored load and stop flicker or bulb warnings, including in DRL mode.
If it doesn’t, a 6–8-ohm resistor wired in parallel may mimic the halogen load; match its rating to your headlamp circuit. Resistors get hot, so mount them securely on metal away from wiring and plastic.
When CANbus Decoders Help
LED headlights drawing roughly 20–30 W can trigger a vehicle’s bulb-failure detection when it expects a 55 W or higher halogen load. Your control module may interpret the lower draw as an open circuit, then pulse the output while checking voltage and resistance. A CANbus decoder or anti-flicker harness can stabilize that signal, preventing startup strobing or DRL-mode flashing.
Before adding parts, check whether your LED kit is CANbus-ready; many include an integrated decoder. If flicker remains, confirm the symptom occurs with the engine running and inspect connectors for corrosion or loose pins. Then measure voltage with a multimeter: a healthy 12 V system typically reads about 13.5–14.5 V while running. A decoder corrects load-sensing behavior, but it won’t repair alternator faults or wiring voltage drops.
Choosing Load Resistors
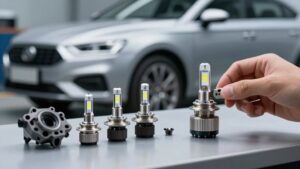
Because your vehicle may mistake a low-draw LED for a failed halogen bulb, choose a CANbus decoder or load resistor to match the kit and the vehicle’s lighting system. A decoder suits kits designed for CANbus use; it interprets the signal and can suppress flicker and bulb-fault warnings.
If you’re considering a resistor, match its rating to the vehicle’s circuit; common designs use roughly 6-8-ohm loads, but specifications vary. It connects in parallel with the LED circuit, simulating halogen demand while generating heat.
| Option | Best indication |
|---|---|
| CANbus decoder | Kit supports decoder; flicker or warning persists |
| Load resistor | Correct specified load; compatible circuit |
| Built-in decoder | Plug-and-play kit lists CANbus support |
Test startup, idle, and DRL modes; confirm normal 13.5-14.5 V charging voltage, since swings can still cause flashing.
Safe Installation Tips
Before installing a CANbus decoder or load resistor, disconnect the battery’s negative terminal to prevent shorts.
On modern CANbus-equipped vehicles, LEDs draw about 20–30 watts, versus 55 watts or more for halogens. That lower load can trigger a bulb-fault warning or flicker. Fit a vehicle-specific decoder or anti-flicker harness, or choose a plug-and-play assembly with a built-in driver.
If your vehicle still strobe-flickers at startup because it doesn’t regulate LED current, wire a 6–8-ohm load resistor in parallel with the LED leads. Keep resistors and decoder connections clear of heat-sensitive parts; secure wiring with proper splices or electrical tape to resist vibration. Restore power, then test at key-on and during engine start. Confirm flicker stops and no lamp-out error appears.
Don’t mount a resistor against plastic or wiring; it can become hot during operation, so fasten it to a metal surface where airflow remains clear.
Vehicle-Specific Wiring Differences
Your factory wiring may route DRL and low-beam power differently, so check the pinout and feed before diagnosing flicker. Verify the ground connection, since added resistance can destabilize LED current.
If your model uses a unique connector or control profile, use a model-specific adapter or anti-flicker harness.
Factory Wiring Variations
Even within the same model, factory wiring can vary by year and trim, so an LED kit that works in one vehicle may flicker in another.
Your headlamp circuit may use a relay or a body control module (BCM) that monitors current for a 55-watt halogen bulb. A 20 to 30-watt LED draws less, so the controller can interpret the load as a failed bulb and pulse or strobe it.
Connector layouts and trigger logic vary: your kit may receive a daytime-running-light feed instead of the main-beam signal, or expect the opposite polarity. Compare your vehicle’s wiring diagram and connector pinout with the kit specifications. If they don’t match, install the correct adapter or an anti-flicker, CAN-bus-compatible harness; replacing the bulb won’t correct a circuit mismatch.
Grounding Differences
A matching connector and anti-flicker harness won’t fix a poor ground: the LED driver needs a stable return path, and your vehicle’s factory ground points or wire gauge may not suit the kit.
Check the headlight harness ground for looseness, corrosion, or paint beneath its contact point. A weak connection adds resistance and can make the driver’s reference voltage pulse.
You may notice strobing at startup or idle when alternator load changes. If several lamps or accessories share a ground point, their current draw can shift ground voltage and expose instability that halogens may tolerate.
Switch other loads on and observe whether flicker changes. Clean the ground and headlight contacts with contact cleaner; tighten the ground against bare metal. Apply dielectric grease during reassembly.
Model-Specific Adapters
Why do some LED headlights flicker only on certain vehicles? Vehicle-specific wiring can change how your car detects bulbs and controls daytime running lights. If your system uses bulb monitoring or CAN-bus checks, a universal adapter may trigger startup strobing or flicker.
A CANBUS-ready anti-flicker decoder matched to the halogen bulb’s electrical load can prevent low-wattage errors and power cycling. Trucks and SUVs may behave differently in DRL mode, so confirm the adapter supports your vehicle. F-150, Silverado, and Ram fitments vary by year and trim.
Check the part number against your model before installing. Verify polarity and pin fit at the harness; poor contact or incorrect wiring can make voltage regulation hunt until alternator output stabilizes near 13.5–14.5V.
Dashboard Warning-Light Behavior
Dashboard warnings can appear alongside LED headlight flicker because the vehicle’s computer monitors bulb load and may interpret lower-wattage LEDs, often 20–30 W versus 55 W or more for halogens, as failed bulbs.
If you see a startup strobe that settles without a persistent message, suspect a momentary voltage or current irregularity during cranking, not a failed lamp. On CAN-bus vehicles, an incompatible LED can trigger a bulb-out alert or cause the computer to shut off the circuit until you install a decoder or anti-flicker harness. Note whether pulsing starts when the A/C or radio switches on; that pattern points to voltage fluctuation alongside load monitoring.
Fit a CANbus-ready unit or inline resistor/decoder, restart, and check whether the warning clears and the beam stays steady.
Warranty and Inspection Consequences
If your LED headlights flicker after installation, adding a load resistor or CANbus decoder without checking the kit’s instructions could jeopardize warranty coverage, especially if the manufacturer requires plug-and-play installation. Many LED kits retain compatibility only with their supplied anti-flicker harness or driver; an incompatible bulb can make flicker claims ineligible.
At inspection, expect voltage checks (about 13.8–14.4 V) and connector checks; loose or corroded wiring may identify your installation, not the lamp, as the fault.
| Check | Your action |
|---|---|
| CANBUS code | Restore approved setup; clear code. |
| Wiring record | Keep receipts/photos; insulate components. |
Disconnect your battery negative before connector work; securely mount resistors away from heat, and insulate connections with tape or dielectric grease when possible.
Misreading Flicker Test Results
A flicker test at ignition or idle can mistake normal LED startup transients for a fault, so recheck the headlights once the alternator stabilizes at roughly 13.5–14.5 V. Test under more than one condition: brief pulsing that disappears after A/C or radio loads engage often reflects voltage regulation or interaction rather than failed LEDs.
- Your vehicle may flag errors because LEDs draw less power than halogens; CAN diagnostics can misread the load, so a code isn’t proof of bulb failure.
- Flicker only in DRL mode or at low brightness suggests mode-switching or dimmer incompatibility, especially with phase-cut control.
- Persistent strobing paired with errors or automatic shutoffs points toward a load-detection mismatch; no errors and a momentary blip usually signal a less compatibility issue.
Check Bulb Seating
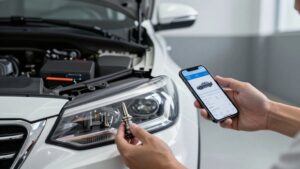
Check bulb seating before replacing components: disconnect the battery’s negative terminal, then remove and inspect the LED bulb and connector. Verify that the bulb sits fully in the OEM housing and faces the specified orientation; misalignment can interrupt contact. Push the harness plug in until its lock engages. A loose plug adds resistance and may cause rapid on-off strobing at startup. Inspect pins, mounting points, and nearby wiring for damage or strain that could shift the connection.
| Symptom | Check |
|---|---|
| Loose fit | Reseat bulb and lock plug |
| Bent pins | Replace terminal contacts |
| Flicker changes | Replace connector contacts |
After reseating, reconnect the battery and test the lights. If flicker changes, replace damaged connector or terminal contacts; don’t keep driving with a partially engaged connection.
Conclusion
Start with the basics: check bulb seating, connectors, grounds, and wiring before buying parts. Note whether flicker follows engine speed, bumps, or a warning light; each clue points to a different fault.
Match any CANbus decoder or resistor to your vehicle’s circuit, and install it safely to avoid excess heat. Then retest in darkness and verify beam aim. If flicker persists, get a proper electrical diagnosis: don’t accept unreliable headlights as normal on the road.