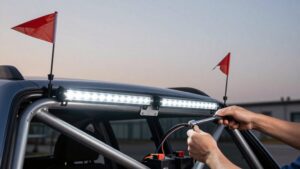
How to Mount Ditch Lights on the A-Pillar or Hood Hinge
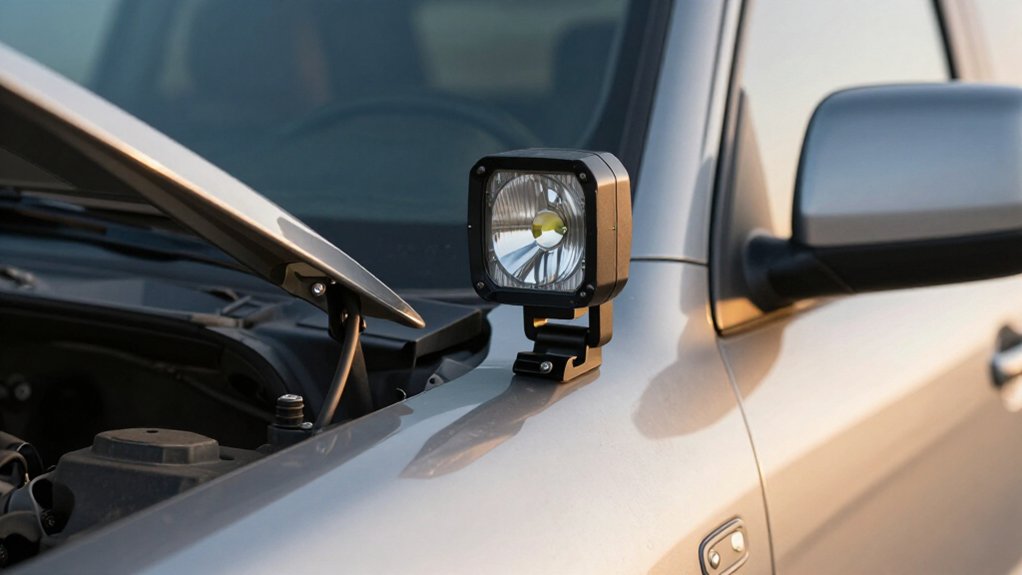
Choose a vehicle-specific A-pillar or hood-hinge bracket matched to your vehicle and pod bolt pattern.
Inspect mounting points for rust, looseness, or damaged threads before fitting supplied hardware.
Protect paint with a thin barrier, then secure the bracket at factory points.
Route the harness away from hinges, heat, and sharp edges, leaving hood-travel slack.
Aim pods outward about 30–45 degrees, check hood clearance, then torque fasteners to manufacturer specifications.
Continue for wiring and aiming details.
A-Pillar Mounting Requirements
For A-pillar ditch lights, use a vehicle-specific bracket or verify that a universal bracket fits your exact year, make, model, and trim, including any fitment exclusions. Before installation, confirm the bracket’s hole pattern matches the pod’s bolt size and housing dimensions, and check its adjustment range. Mount pods on the A-pillars near the windshield base.
Aim each outward about 30–45 degrees to light roadside ditches and trail edges, not straight ahead. Choose rigid, corrosion-resistant brackets and fully engage fasteners in secure vehicle mounting points to resist vibration on rough terrain. After fitting, open the hood fully; ensure housings and connectors clear the hood and windshield and don’t obstruct your sightline.
Secure wiring away from sharp edges, hot surfaces, and moving components, then recheck fasteners and beam aim while parked.
Choose a Hood Hinge Mounting Method
Choose a hood-hinge mount designed for your truck or SUV’s exact year and generation so its bolt pattern aligns and the pod clears the hood and nearby body panels.
Use this method when you’ll need an outward beam, typically 30–45 degrees off-center, while keeping the housing clear as the hood opens. Keep pod hardware slightly loose during setup; then:
- Aim the lamps until each beam’s inner edge overlaps the outer edge of your high-beam zone.
- Route wiring to move with the hood without contacting the hood or hinge; secure it away from engine-bay heat.
- Torque hinge-bracket fasteners to factory specs after aiming, then recheck clearance to prevent vibration-related misalignment on rough terrain.
Confirm the hood opens and closes freely before driving after any adjustment.
Step 1: Protect the Hood’s Finish
Once the pods are aimed, check that the bracket and housing clear the hood, windshield edge, and cowl throughout opening and closing. Choose a vehicle-specific A-pillar or hood-hinge bracket to maintain clearance from the hood skin and prevent rubbing or heat transfer. Install it at factory mounting points with specified fasteners, and tighten to the manufacturer’s torque; excess force can warp tabs and create paint-wearing stress points.
Use corrosion-resistant, vibration-resistant hardware, and place a thin, paint-safe barrier beneath the bracket to prevent metal-on-paint contact. Route and secure wiring with enough slack for hood movement; keep it from pulling against or chafing the hood edge. After aiming, repeat the clearance check through the full motion. Contact can quickly damage paint; correct any interference before use.
Step 2: Inspect Hood Hinge Hardware
Before installing a hood-hinge ditch-light bracket, inspect the hinge bolts and mounting points for rust, stripped threads, elongation, looseness, or corrosion; replace damaged hardware with the correct equivalents.
Check that hinge-to-body mounting points are solid and torque-tested. Loose or corroded hardware can shift alignment and cause bracket vibration on rough terrain.
Verify the bracket fits the factory bolt location and spacing; don’t force it or use smaller bolts. Test-fit, then cycle the hood slowly; verify clearance at the hinge and adjacent panels. Ensure wiring won’t be pinched or tensioned during hinge movement. Confirm you can tighten the hardware to factory specifications after fitment.
If threads or mounting points are questionable, stop and repair them before installation. This helps keep the bracket stable over rough terrain.
Step 3: Remove the A-Pillar Trim
Start at the bottom edge of the A-pillar trim and gently release its clips as you work upward, removing any visible screws and avoiding force that could crack or distort the panel.
Park on ground, switch off the ignition, and protect the surrounding paint and glass before you start. Use a plastic trim tool near each clip, applying steady pressure rather than levering across the panel.
If an integrated wiring channel or sensor mount sits beneath the trim, support the panel and disconnect its connector before full removal. Don’t pull on wires. Set the trim on a clean, dry surface, and organize fasteners by length for correct reinstallation. With the panel off, inspect the mounting surface and verify hood and windshield clearance before proceeding.
Step 4: Attach Pods to Brackets
With the brackets installed, bolt each compatible LED pod to its bracket using the supplied hardware and matching bolt pattern. Keep the pod mounting bolts slightly loose initially; this lets you make minor position adjustments before final tightening. Verify each housing sits clear of the hood and windshield.
Open and close the hood carefully while watching each housing. Confirm neither pod contacts the hood, cowl, or any moving body panel throughout its travel. If you find interference, reposition the pod within the bracket’s adjustment range before tightening.
Once clearance is confirmed, torque all pod-to-bracket bolts to the manufacturer’s specification. Then recheck the fasteners for a secure fit, reducing vibration risk on rough terrain.
Step 5: Aim Beams Past Hood
Once the pods are secure, aim them outward about 30–45° from the vehicle centerline so they light ditches and trail edges without washing the hood in glare.
Use a dark wall or flat ground 25 feet away as your aiming surface. With the pods loosely mounted, adjust each beam until its inner edge slightly overlaps the outer edge of your high-beam hotspot; don’t point the pods straight ahead. Keep each housing far enough from the hood and body that the beam clears the hood edge.
Check side coverage, and eliminate reflected light that obscures ground. Close the hood and verify that neither pod nor housing contacts the hood or windshield. Recheck clearance through hood and suspension movement, confirming the beams remain aimed outward.
Step 6: Torque Mounting Bolts and Fasteners
Secure the bracket with the correct bolt size and grade, keeping each hood-hinge bolt fully engaged in its original threads. Remove and replace factory hood-hinge bolts one at a time, seating the bracket at each original mounting point; this preserves thread engagement and avoids leaving the hinge unsupported.
Once the bracket sits in its intended position, tighten its mounting bolts to the vehicle’s factory torque specification, or to the bracket maker’s lower specified value. Don’t guess or substitute undersized or incorrect-grade hardware: it can reduce clamping force and let the assembly shift on rough terrain. Use a calibrated torque wrench and follow the specified sequence, if provided.
After your first drive on rough roads, recheck torque; initial seating can relax fasteners even when you tightened them correctly. Inspect and recheck periodically, especially after vibration-heavy use, and correct any loosening promptly before operating the vehicle.
Verify Beam Aim and Clearance
After tightening the mounts, aim each pod about 30–45° outward from the vehicle’s centerline to light ditches and trail edges without reflecting glare onto the hood.
Set up a dark wall or flat ground roughly 25 feet away; or check the pattern at night on a quiet trail. Adjust each light until its inner beam edge overlaps the outer edge of your high-beam pattern.
Open and close the hood fully, confirming neither pod nor bracket contacts the hood, cowl, or windshield at any point in its travel. Check that housings and hardware don’t obstruct your view or create reflections in the windshield or mirrors.
After aiming, tighten and recheck every bracket fastener to prevent vibration from shifting the beam direction. Retest hood and windshield clearance.
Resolve Pinched Wiring
If the hood pinches the ditch-light wiring, reroute the waterproof connector through the gap between the hood and cowl, leaving enough slack for full hood travel without routing it near hinge bolts or sharp edges. Secure the harness along factory wiring paths with zip ties; add protective loom wherever it could contact metal, especially at the hinge-cowl junction.
| Check | Secure | Risk |
|---|---|---|
| Hood cycle | Slack stays free | Crushing causes failure |
| Harness route | Loom protects metal | Abrasion threatens safety |
Open and close the hood fully; verify the harness can’t shift, stretch, or get crushed. Keep it away from hot engine components, steering, and moving parts. Route the switch wire through a factory rubber firewall grommet to prevent abrasion. Inspect the entire path before restoring power safely.
Clean Lenses After Muddy Drives
Once the wiring is protected and the lights are off, let the pods and lenses cool before cleaning them after a muddy drive. Rinse each lens with clean water to remove loose grit before wiping; dragging grit across the surface can scratch it. Use a microfiber cloth with mild soap and water, or a lens-safe cleaner, to lift mud film and road grime from the LED pod lens. Don’t use paper towels or harsh solvents: they can cause micro-scratches or chemical haze that reduce light output and beam sharpness.
If mud has caked onto the lenses, soak it lightly or apply a gentle lens cleaner. Dry each lens with a clean microfiber cloth to prevent water spots. Periodically check that your A-pillar ditch light lenses remain clear and residue-free; even a thin grime layer can noticeably dim effective illumination.
Conclusion
Choose A-pillar mounts when your vehicle supports them, or use a compatible hood-hinge method that preserves the hood’s finish and hardware. Before driving, confirm every fastener is torqued to its specified value, wiring isn’t pinched, and the beams aim correctly without obstructing visibility.
Recheck clearance through the hood’s full travel. After muddy drives, clean the lenses so output stays effective. If a mount shifts or wiring chafes, stop and correct it before using the lights.