Amber vs White Ditch Lights: Best Color for Trails and Bad Weather
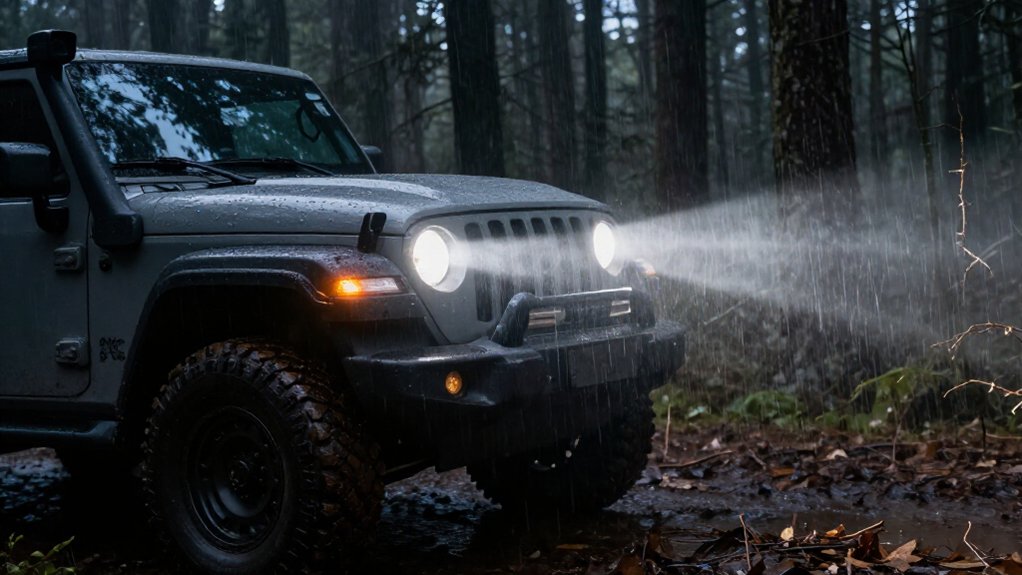
Choose amber ditch lights when dust, fog, rain, or snow creates backscatter; they can help you see ruts, trail edges, and wildlife.
Use white in clear conditions when you need more reach.
Aim lamps slightly outward and down to cover shoulders without directing glare into your sightline.
If you have dual-color control, switch before haze builds, and slow down when visibility drops.
Your mount, lens upkeep, and local lighting rules also shape a safe setup.
Ditch Light Beam Placement
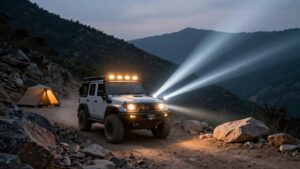
Mount ditch lights low and outboard, near the front bumper corners, and aim them slightly outward with a downward bias to illuminate trail edges without directing glare at oncoming traffic or nearby riders. That placement spreads the beam across ditches, ruts, roots, and tree trunks that forward-facing pods may miss. Keep both lamps matched left to right; an upward or high-mounted aim can create a bright wall and erase terrain detail.
| Mount position | Aim | Effect |
|---|---|---|
| Low, outboard | Downward | Reveals trail edges |
| Wider on woods | Outward | Flags side hazards |
In dust or rain, position the beam to meet the ground where airborne particles first enter your path, limiting reflected light toward your eyes.
Check alignment on level ground before driving, and recheck regularly.
Amber vs. White Light Spectrum
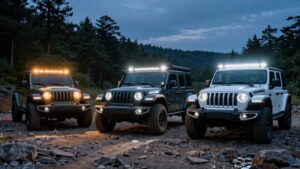
When dust, rain, or fog reduces visibility, amber ditch lights often produce less glare than cool-white lights because their longer wavelengths scatter less from airborne particles. Amber LEDs emit longer yellow-orange wavelengths, which scatter less from airborne moisture and dust than the shorter wavelengths in cool-white output. This can reduce reflected light reaching your eyes and limit veiling glare.
White LEDs may appear more intense in clear air, but their shorter spectrum can create a backscatter wall in fog, rain, or dust. Choose amber for reduced glare; choose white when clear, dry conditions make perceived brightness your priority. A combined setup lets you select the spectrum suited to conditions. Color alone doesn’t guarantee safe illumination, so aim beams correctly for your specific operating conditions.
Trail Visibility in Bad Weather
On rough trails, amber ditch lights can make hazards easier to pick out in dust, fog, rain, or snow by reducing reflected glare from airborne particles. That lower scatter helps you distinguish obstacles instead of facing the bright-wall effect white beams can create when moisture, dust, or haze reflects light.
- You can read ruts and uneven ground more quickly in muddy or sandy sections.
- You’ll gain usable contrast in airborne dust, fog, rain, and snow, not merely higher perceived brightness.
- White beams offer greater clarity and reach in clear conditions, but reflected haze may obscure nearby detail.
Amber also reduces eye strain during long night runs; keep speed conservative, scan ahead, and leave room to stop when visibility limits your view of the trail.
Switching Modes Mid-Trail
Switch ditch-light modes as conditions change: use white for clear-weather reach, then select amber as soon as dust, fog, heavy rain, or snow begins to scatter light and wash out trail detail. You should switch before visibility drops, using airborne particles, haze, and wet-terrain glare as cues rather than waiting until hazards disappear.
With dual-color lights, keep amber as your main visibility aid in poor air; reserve white for clear conditions when you need maximum perceived brightness. If beams operate independently, assign amber to the weather-sensitive spread and use white for closer highlights only when appropriate.
Before setting out, confirm your switch logic permits separate control; some systems allow simultaneous colors. Check circuit ratings; avoid combinations that could overload wiring or cause overheating.
A-Pillar Mount Fit
Fit A-pillar ditch lights with an amber, side-forward beam to illuminate the shoulder and track where ruts and debris can hide.
Your mount should let you aim each light slightly outward and downward, placing coverage near the vehicle without sending excessive glare toward oncoming traffic. Amber output can improve contrast and reduce glare in dust, fog, rain, and snow; its longer wavelengths can cut through airborne particles better than white LEDs.
For mixed conditions, keep amber on the A-pillars and use white lights elsewhere when you need greater distance and general illumination.
- Choose a ditch-pattern beam for side-forward coverage.
- Check bracket fit and secure mounting before aiming the lamps.
- Verify the beam reaches the shoulder without blinding approaching drivers on narrow trail sections.
Lens Cleaning Frequency
Clean your ditch-light lenses at least every couple of weeks on dusty trails; even a thin layer of dust can reduce usable light and contrast. After any heavy dust cloud or mud run, clean them again; moisture and grit on the front lens can scatter light and create glare, even though amber reduces reflections.
First rinse the lens with water, then use microfiber and gentle soap. This lens-safe method helps protect the glare-control coating from scratches. If your beam looks hazy on a foggy or rainy night, clean the lens immediately before blaming the weather. Build a lens wipe into your pre-drive checks; the routine takes about five to ten minutes. Regular cleaning keeps output and contrast more predictable when you need visibility.
Legal Restrictions and Road Compliance
Although amber ditch lights can improve visibility in dust or fog, their color doesn’t automatically make them legal for road use. Check your local vehicle lighting statutes or DOT guidance before installing either color for street driving. Requirements vary by location and can cover permitted colors, lamp count, intensity, aim, mounting position, beam pattern, and approval marks.
- Confirm whether auxiliary lamps need certification or an approval mark; amber kits may require the same approval as white ones.
- Aim and control beams to avoid glare; very bright white lamps may need caps, beam limits, or correct switching and aiming.
- Check rules for dual-color systems, too; local wording may restrict when or how you use amber backlights or switchable beams on public roads when applicable.
Amber Lens Durability
When you choose amber ditch lights, check whether the polycarbonate lens resists scratches and rock impacts that could reduce visibility. Confirm its UV and heat stability, since prolonged sun exposure and LED heat can degrade the lens over time.
A durable lens helps preserve beam clarity on rough, low-visibility trails.
Scratch and Impact Resistance
On rough trails, amber lens durability depends more on material and impact protection than color. Amber can reduce glare and backscatter in dust, fog, rain, or snow, but it won’t prevent scratches or fractures.
Repeated grit abrasion and point strikes demand a lens engineered for off-road exposure. Check the manufacturer’s impact rating and inspect lens thickness before buying. Tempered glass and high-strength polycarbonate resist cracking and clouding better than thin, low-grade plastic. Also assess the housing and mount: impacts transmitted through a weak assembly can break optics even when the lens is robust.
- Choose a rated, thick lens suited to vibration and debris.
- Favor an aluminum body with a guard to shield the lens.
- Select replaceable rock guards or swappable lenses to limit repair costs.
UV and Heat Stability
In prolonged sun and repeated heat cycles, an amber ditch-light lens needs UV- and heat-stable materials to resist haze, yellowing, and cracking. Amber polymer or glass optics tinted to the yellow-orange band generally tolerate UV exposure well; the tint filters some damaging wavelengths, helping preserve clarity.
But UV and heat can still embrittle polymers and create optical haze. If your lights face direct sun or sit beneath the bumper, thermal cycling can also shift color or weaken the lens. A sealed housing and UV-resistant coating help limit yellowing, cracking, and output loss.
Amber light can reduce glare and dust or moisture backscatter, preserving usable contrast as the lens ages, but it can’t compensate for a damaged optic. Check that the manufacturer specifies UV-stable materials or coatings and an operating-temperature range. Those ratings help you choose a lens that maintains beam color and dependable visibility on trail drives.
Spotting Trailside Wildlife
Aim your ditch lights across trail edges to detect wildlife early, where animals are most likely to appear. Amber can reduce glare and preserve silhouette contrast in dust, fog, or snow, while white helps you identify movement in clear conditions.
Spotting animals sooner gives you more time to slow down and react safely.
Early Wildlife Detection
Which ditch-light color helps you spot wildlife sooner depends on visibility: white’s bright, cool output reveals small animals against dark backgrounds on clear, dry trails, while amber reduces glare and backscatter in dust, fog, heavy rain, or snow, making a deer’s outline easier to distinguish before you reach it.
Mount your ditch lights slightly outward and downward to illuminate trail shoulders where animals emerge, rather than relying only on long-range projection. Clear stretches favor white for crisp detection; in low-visibility conditions, amber’s longer-wavelength output can preserve usable contrast and reveal movement near the edge before an animal is close.
- Choose white on clear, dry trails.
- Switch to amber when airborne particles obscure the shoulder.
- Use dual-mode lights to match conditions and scan edges.
Reduced Animal Glare
When dust, fog, or moisture fills the air, amber ditch lights can reduce reflected glare that washes out trailside silhouettes under white beams. White beams can create stronger backscatter in dust or haze, forming a bright wall that lowers contrast. Amber light typically preserves more usable contrast, helping you separate dark animal shapes from illuminated brush.
That distinction matters when you scan trailside vegetation at dusk or through moisture-laden air. With amber as your primary ditch-light color during low-visibility periods, atmospheric reflections are less likely to dominate your view, keeping your focus on roadside cues where animals may appear. If you carry both colors, use amber for wildlife detection in weather or dust, then switch to white on clear, open stretches when you need detail.
Safer Trailside Reactions
Because wildlife can step onto a trail without warning, aim your ditch lights to illuminate the shoulders as well as the route ahead. Side coverage helps you detect an animal before it enters your path, giving you more time to slow or stop safely.
- Choose amber in dust, fog, or rain; its warmer beam reduces backscatter and can reveal silhouettes against muddy or sandy ground clutter.
- Use white on clear, dry nights when neutral illumination helps you distinguish wildlife from reflective rocks or signs.
- Switch between amber and white when conditions change, if your lights support both modes.
Don’t rely on color alone: control speed, scan both shoulders, and avoid sudden steering. Maintain stopping distance; terrain, vegetation, and weather can still hide unexpected wildlife.
Match Beam Output to Speed
Match your ditch-light output to your speed: faster travel calls for more usable brightness farther down the trail, not just a broad side glow, so you can spot hazards with time to react.
On clear, open trails, white lights deliver greater perceived brightness, making them a practical choice when you’re moving quickly and visibility is good. Choose a narrow, brighter beam to reveal distant obstacles sooner; balance it with enough spread to detect nearby hazards.
In dust, fog, rain, or snow, amber reduces glare and backscatter, helping you discern track edges, rocks, and ruts at slower or moderate speeds. In mixed conditions, switch from white on faster, clear sections to amber when airborne particles wash out white.
As visibility falls, slow down; lighting can’t replace stopping distance or sound judgment. Set output and aim to avoid blinding other trail users, and verify the beam reaches the ground where you need it before increasing pace on unfamiliar terrain.
Conclusion
Choose amber ditch lights when you need better contrast in fog, dust, or snow; choose white when you need detail on clear trails. Aim beams outward and down, match their reach to your speed, and use selectable modes so you can adapt without distracting drivers.
Check A-pillar fit, lens durability, and local lighting laws before installation. Keep auxiliary lights off on public roads when required, and slow down whenever visibility or wildlife risk limits stopping distance.