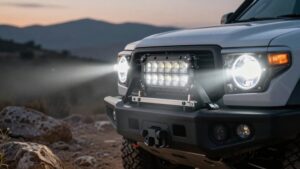
LED Light Bar Maintenance Checklist: Seasonal Care for Longer Life
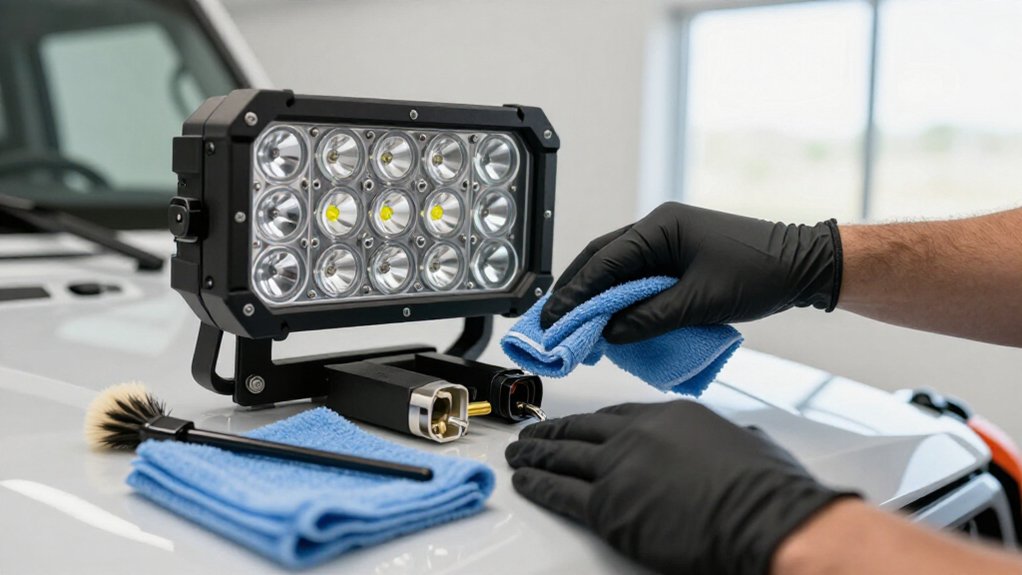
Use a seasonal LED light bar checklist to catch moisture, loose mounts, and battery performance loss before they’ll cause failure.
After winter melt, inspect cable seals, lenses, housings, and splices for cracks, fogging, or water tracks.
disconnect power before handling assemblies.
Check bracket fasteners and alignment each spring and fall, then test beam brightness, transformer settings, timers, and photocells.
Before cold weather, charge batteries within manufacturer temperature limits.
The steps below help protect service life.
Who Benefits From Seasonal Care
Seasonal care benefits anyone with outdoor LED light bars, but it’s especially valuable for properties exposed to freeze-thaw cycles, storms, or heavy yard traffic. If your fixtures line paths or landscape beds, you benefit from seasonal checks because moisture and temperature swings can stress lenses and housings even when LEDs remain operational.
For a multi-zone low-voltage system, spring and fall care helps you catch corroded splices or incorrect transformer schedules before an entire zone fails or dims. If you use photocells or timers, adjust settings for daylight saving changes and shifting dusk to maintain consistent output without unnecessary runtime.
Prioritize care in storm-prone or high-traffic yards, where mower impacts, frost heave, and leaves or mulch can displace bars or obstruct light. Seasonal cleaning benefits facilities seeking fewer callouts: clean optics improve perceived brightness and may reveal condensation inside housings before performance worsens further.
Inspect Cable Seals
After freeze-thaw cycles, inspect each LED light bar’s cable seal for cracks, gaps, or loose compression fittings that could let moisture reach the conductors.
Inspect the lens for internal fogging and trace visible water tracks near the cable entry; both can signal intrusion that corrodes conductors and shortens LED life. Disconnect power before handling the assembly. Gently check the entry point for movement, keeping wiring unstressed.
Remove debris so water can’t pool against the seal.
- Replace seals with cracks, gaps, or loosened compression fittings.
- Treat fogging or water tracks as evidence of a failed barrier.
- Check that the seal sits squarely and remains tight.
- Replace connectors showing corrosion or sealant that’s tacky or melted.
- Inspect the cable jacket for moisture spread from degraded elastomers before restart.
Seasonal Inspection Timing
Once cable seals are sound, schedule inspections around seasonal changes to catch shifting fixtures, moisture, and control issues. Walk the system at dusk after winter melt; re-aim shifted fixtures, verify every zone, and record dim or failed bars.
In early summer, check transformer settings, airflow, housings, and low-voltage splices for moisture.
| Season | Priority check |
|---|---|
| Spring | Confirm zones and output after melt. |
| Early summer | Check ventilation and splice moisture. |
| Fall | Reset timers; test photocells. |
| Before winter | Test output; clear debris. |
During each season, inspect exposed and buried connections for corrosion, particularly wire-nut splices; one splice can disable a zone while its bar remains intact. Isolate power before opening equipment, follow manufacturer procedures, and document faults so you can correct them before the next weather shift.
Mounting Bracket Tightness Checks
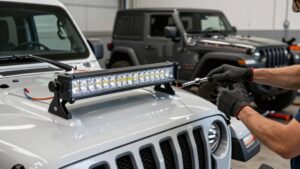
Check bracket fasteners each spring and fall, confirming they’re snug by hand and torqued to your vehicle’s specifications when available; inspect for corrosion at mounting points.
After storms or impacts, look for gaps, shifted alignment marks, or uneven washer compression that signal vibration loosening, and check only when components are cool. Clean threads and retighten loose fasteners to spec, replacing stripped hardware to keep the bar secure and its beam aimed correctly.
Check Bracket Fasteners
At each seasonal change, inspect every LED light bar bracket and confirm that its surface fasteners are snug, with no rust trails or gaps around the bolt heads.
Recheck torque after winter freeze-thaw cycles and following heavy rain or wind; repeated expansion and contraction can loosen fasteners and increase vibration fatigue. Examine the bracket interface for elongated holes, stripped threads, or missing washers. Replace affected hardware rather than simply retightening it.
Confirm each fastener suits outdoor exposure, such as corrosion-resistant stainless or grade-rated hardware. Remove sand or debris from threads, since contamination can reduce clamp force. Gently push the bar by hand, without tools; if it moves, stop operation and tighten all bracket fasteners evenly, not just one corner. Follow the specified torque values.
Inspect Mounting Points
After confirming the bracket fasteners are secure, inspect the mounting points during spring and fall checks for loosening caused by freeze-thaw cycles or summer heat. Use a torque wrench to tighten fasteners to the manufacturer’s value; if marked “torque to spec,” use the next-highest safe setting. Inspect bracket bases and exposed hardware for corrosion, especially where road spray, salt mist, or lawn moisture enters gaps.
Confirm the bar remains centered and level at the interface; shifted brackets can alter beam aim and strain hardware. Check installation points for stripped threads, cracked welds, or elongated holes. Replace damaged fasteners, and don’t reuse hardware that’s loosened. If damage prevents secure installation, stop and repair or replace affected components before use. Check alignment again after final tightening carefully.
Spot Vibration Loosening
Because vibration can gradually loosen fasteners, confirm at each seasonal check that the light bar sits firmly in its bracket with no gaps, flexing, or misalignment. After cleaning road grime from the bracket and threads, tighten its fasteners with torque-rated hardware to the manufacturer’s specification; common values fall between 10 and 25 N·m, but verify your model’s requirement. Recheck after rough-road, off-road, or frequent start-stop driving, since repeated micro-movement can loosen bolts.
Then apply moderate hand pressure laterally and vertically. The bar shouldn’t rock or click; either response means you must retighten it immediately or replace damaged hardware. Check for stripped threads and replace failed lock washers, ineffective threadlocker, or damaged bolts. Don’t drive with a loose bar: it can shift, impair aim, or detach, creating a safety risk.
Look for Corrosion
During spring and fall checks, inspect the mounting brackets for looseness and corrosion, especially where steel brackets meet aluminum housings or rain and snowmelt collect. Inspect bracket-to-surface contact points at least twice yearly; looseness can expose fasteners and nearby wire connections to moisture. Look for rust, pitting, and damaged coatings, then replace visibly corroded hardware; dissimilar metals and trapped water accelerate deterioration.
Keep cable entries sealed; they shouldn’t be pinched since bracket movement and retained moisture can damage conductors over time. After any cleaning and reassembly, run the light bar and watch its beam against a fixed surface. If the beam shifts, stop use where misalignment could create a road hazard and recheck the mounting condition before returning it safely to service.
Retighten Securely
As part of your spring dusk check, switch on the LED light bar, then inspect its mounting bolts for looseness from freeze-thaw cycles, lawn equipment vibration, or winter impacts. Retighten each bracket fastener to your model’s specified torque; smaller brackets commonly use the low-to-mid tens of inch-pounds, but don’t rely on a general range.
Check the manual before tightening. Use corrosion-resistant hardware, such as stainless-steel bolts or equivalent, and apply thread-locking compound only if the manufacturer recommends it. Keep power off while handling the mounting hardware, and use the correct tool to avoid damaging fastener heads.
After tightening, verify aim and press the bracket gently. Movement means fasteners need another pass. Repeat in fall: thermal contraction can relax pressure, misalign, and cause dimming or flicker.
Cold-Weather Battery Care
Before use, check your LED light bar’s battery charge and recharge it fully before cold weather reduces runtime. Keep the battery warm, and don’t charge it immediately after freezing exposure.
For storage, follow the battery maker’s guidance and avoid leaving it at a very low charge.
Check Battery Charge
Check the light bar’s battery charge and state of health before cold weather, since freezing temperatures can reduce available voltage and usable capacity. Before first winter use, confirm the pack reaches full charge with the manufacturer-approved charger; don’t charge a battery that feels icy, and follow its specified safe operating temperature. If your manual lists a low-voltage cutoff, verify full brightness during initial operation.
Note dimming or shortened runtime under cold load as possible evidence of inadequate charge or declining battery health. After charging, run the light bar briefly and confirm that it sustains output. Record runtime across several cold starts; these measurements can reveal capacity loss before it affects dependable illumination.
Keep battery storage dry and temperature-stable rather than leaving it outdoors or in an unheated garage; cold can raise internal resistance and limit charging. Recharge only when the pack has warmed to its safe range.
Protect Against Freezing
To reduce freeze-thaw damage, keep the battery near room temperature whenever possible. Cold cycles can lower capacity and speed up failure, so don’t leave a depleted battery exposed to subfreezing conditions. Before the coldest nights, charge it with a manufacturer-rated charger, following the temperature limits; don’t charge or discharge when temperatures are close to freezing.
If your light bar has a removable battery, bring it indoors between uses, and let it reach the charger’s temperature range before connecting power. Inspect terminals and ensure they’re clean and dry. Moisture that freezes can disrupt contact and cause intermittent operation.
Examine the battery compartment and seals for cracks or openings. Trapped water can expand as it freezes, loosening the enclosure and damaging wiring; repair defects before use.
Store Batteries Properly
After protecting the battery from freezing during use, prepare it for storage by removing it from the light bar if it’ll be left in subfreezing conditions.
Store removed batteries in a cool, dry place at room temperature to slow chemical degradation and prevent leakage. If a battery must remain installed, clean and dry its contacts to limit corrosion and cold-weather voltage sag.
Fully charge rechargeable packs before storage, then recharge them every one to three months in winter to prevent deep discharge and capacity loss. Keep spare batteries upright in original packaging or a protective case to prevent terminal shorts; cold can make them brittle and damage-prone.
Inspect batteries for swelling, crusty residue, or odor before reinstalling. Replace suspect units to prevent damage.
Check Beam Brightness Consistency
At the start of spring, inspect the light bar at dusk and compare beam brightness along its full run; clean lens faces first so dirt and algae don’t mask LED performance. Walk the illuminated run and note dim or uneven sections before grime. After cleaning, compare each zone; replace the lowest-output component first, then retest.
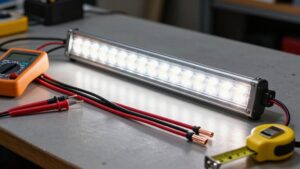
Aging LEDs, lamps, or halogens that degrade early can create uneven brightness. Where possible, check voltage at the farthest point with a multimeter and compare the reading with expected range; excessive voltage drop can dim beams unevenly. After repairs, confirm the bar’s aim and mounting haven’t shifted due to frost heave, impact, or settling. Keep clear of traffic and terminals, and follow the manufacturer’s isolation procedure before handling wiring.
Cracked Housing, Water Intrusion
Once brightness checks are complete, inspect the LED light bar housing for cracks, gaps, and loose seals, especially around screws, brackets, and end caps stressed by frost heave. Each spring, check for hairline damage; even a narrow opening can admit moisture and accelerate corrosion at internal connectors. Look through the lens after rain or thaw cycles for condensation, fogging, water trails, or salt-like deposits on components.
Inspect each mounting point for pulled-in soil or movement from frost heave that may stress the housing and create leak paths.
If you’ve found water inside, disconnect power at the circuit source before handling the fixture. Dry it thoroughly, then reseal the housing or replace failed gaskets or the housing before restoring power. Seal splice connections with gel-filled connectors and maintain strain relief at cable entries; moisture can travel along wiring into electrical junctions. Recheck the repair for signs of renewed condensation after the next cycle.
Avoiding Improper Cleaning Methods
Before cleaning your LED light bar, disconnect its power and let it cool to prevent thermal shock and residue from baking onto the lens.
Use controlled methods to protect optical finishes and seals:
- Avoid harsh chemicals, abrasive pads, and pressure washing; they can cloud lenses, strip coatings, or force moisture inside.
- Clean the lens and housing with a soft microfiber cloth; add mild soap and warm water only if needed.
- Never scrape the lens with metal tools or dry-brush grit; fine scratches scatter light and emphasize hotspots.
- Keep high-pressure jets and direct streams away from vents and connectors to prevent corrosion or electrical shorts.
- Rinse gently without directing water into openings, then dry surfaces with a microfiber cloth before restoring power.
Track Runtime Hours per Season
Track each LED light bar’s operating hours by season using its timer schedule or a plug-in hours meter, then record monthly or seasonal totals.
Keep a separate runtime baseline for every bar and installation; actual hours-on, not calendar age alone, better indicate LED output loss and heat stress. For landscape systems, review spring and fall timer or photocell settings when daylight-saving time or sunset changes alter schedules. Those shifts can add or subtract several operating hours each week.
Log dates and cumulative hours, and note dim zones or uneven brightness alongside the affected bar’s totals. Compare when symptoms appear with that bar’s seasonal runtime to identify early lumen depreciation. If hours rise unexpectedly, inspect the timer and photocell before replacing equipment. Isolate power before servicing wiring or opening a fixture, and follow the manufacturer’s instructions. Use the log to plan targeted inspections and maintenance around actual use safely.
Conclusion
With seasonal checks, you can extend your LED light bar’s service life and spot hazards before they cause failure. Inspect seals, housing, brackets, wiring, beam consistency, and runtime hours; adjust your schedule for temperature and exposure.
Clean only with methods approved by the manufacturer, and disconnect power before servicing. If you find water intrusion, damaged wiring, loose mounts, or uneven output, stop using the bar until you repair or replace the affected parts. Verify secure operation before returning it to service.
Off-Road Lighting Amp Draw & Wire Gauge Calculator
Find how many amps your LED light bar, pods and rock lights draw on 12 V or 24 V, then check wire gauge and voltage drop for your run.
Cordless LED Work Light Runtime Calculator
Estimate how long a cordless LED work light runs on a tool battery from volts, Ah and watts, with a 2, 4, 5 and 9 Ah pack comparison.
Whip Light Height & Clearance Calculator
Add up roof or rack height, mount height and whip length, then check the total against a clearance limit you enter. Free, no sign-up.
Spot vs Flood Beam Width Calculator
Enter two beam angles from a spec sheet and compare how wide each beam is at 50, 100, 200 ft or a custom distance.
LED Light Bar & Whip Light Remote Control App Finder
Filter 24 verified iOS and Android apps that control LED light bars, whip lights, rock lights and underglow by brand, light type and features.