Ditch Lights vs Fog Lights: Different Jobs, Different Beams
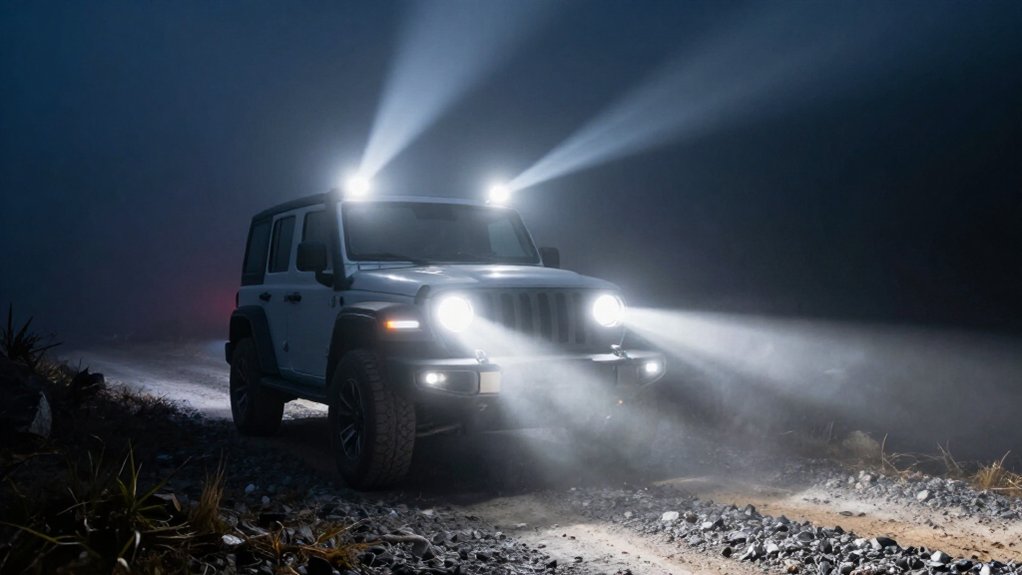
Ditch lights and fog lights solve different visibility problems.
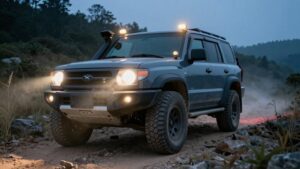
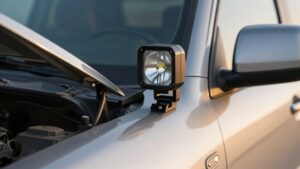
Mount ditch pods low near A-pillars and aim outward with flood or combo beams to reveal trail edges, ruts, turns, and roadside wildlife.
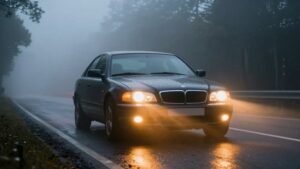
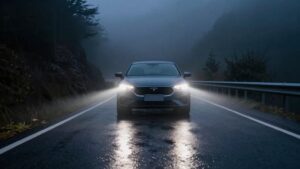
Fog lights use a wide, low beam with a sharp cutoff to light nearby pavement in fog, rain, or snow while limiting backscatter and windshield glare.
Keep their circuits separate so you can select coverage; what follows explains mounting, wiring, and setup safely.
Mounting Height and Beam Shape
Mounting height and beam shape determine how effectively ditch lights reveal hazards without adding glare. At lower A-pillar/hood-edge mounts, you can aim pods outward to expose ruts and trail edges while limiting hood reflection. Choose flood/combo optics for near-side rocks and tire-adjacent hazards; spot beams concentrate farther ahead but provide less side coverage.
| Setup | Best use |
|---|---|
| Lower outward | Flood/combo |
| Forward aim | Spot fill |
| Higher mount | Over rises |
Lower outward-facing pods with wide spread help you read tight turns and hazards. Forward aim benefits from tighter concentration for short- and mid-range fill. Higher mounts may help you see over rises, but can increase windshield or hood backscatter and driver glare. Adjust aim to keep the hood dark and trail edges visible.
Fog Lights for Low Visibility
Ditch lights reveal trail edges, but fog lights help you see the road directly ahead when fog, heavy rain, or snow reduces visibility. In these conditions, choose a controlled, wide beam that illuminates pavement close to your vehicle, not a long-throw pattern aimed far down the road. Fog and precipitation can reflect light toward you, increasing backscatter and glare.
A flood- or low-beam-style pattern limits that effect compared with auxiliary beams. Mount and aim your fog lights to create a sharp cutoff and low cutoff line; this fills the area you’re traveling through while reducing light that can bounce into the windshield. Unlike ditch lights, fog lights focus on the road immediately ahead. When haze or precipitation blurs the surface, prioritize low, wide, glare-controlled output.
Wildlife Detection on Shoulders
On narrow, technical trails, animals can enter the risk zone beside your vehicle before factory headlights reveal them. Ditch lights aimed outward help you detect deer or hogs standing just off the trail in this peripheral zone. Choose a flood or combo beam; its broad coverage exposes movement at varied angles along ruts, turnout edges, and drop-offs.
Mount lamps low, around A-pillar or hood-hinge height, to limit dust or fog backscatter that can obscure faint roadside eyeshine. When possible, test after dark and adjust aim so the brightest area stays off your hood and windshield while illuminating the shoulder. Coverage—not raw brightness—helps you identify wildlife early, especially where turns place animals beside your vehicle, reducing the chance you’ll brake suddenly or swerve.
Wiring and Switch Placement
After aiming ditch lights to scan trail edges for wildlife, wire them and your fog lights on separate fused relay harnesses matched to the vehicle’s 12V or 24V system. Use a dedicated dash or console toggle labeled “Ditch” to trigger the ditch-light relay; keep your headlight switch independent.
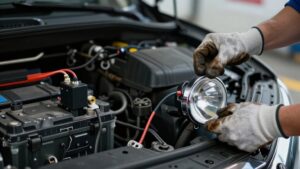
Give fog lights their own dash control and relay, with a ground, so you can select them for rain or fog without activating ditch lights. Position both controls within easy reach, but keep circuits distinct: run fogs alone in low visibility or ditch lights alone on technical trails. Size wire for the load and run length; seal connections with weatherproof connectors, and ground to the body or chassis. Poor connections can cause dim lamps or flicker.
Factory Fog-Light Integration
Factory fog lights, usually mounted low in the front bumper, cast a short-to-medium beam ahead along the road to improve visibility in rain or mist while limiting glare and backscatter. That pattern keeps illumination low and focused forward, but it won’t reliably reveal ditches or ruts beside your tires. Many assemblies use lenses that suppress glare and backscatter in poor weather; this control can also reduce lateral coverage on technical trails.
Check whether your fog lights produce a defined cutoff. If they’re integrated with the headlamp system and spread light broadly, you may get more scatter than useful low-glare output. Add ditch lights to provide outward coverage while retaining fog lights for low-forward fill. Aim each pair separately, then verify the beams don’t shine into oncoming traffic or obscure hazards with excessive glare. Don’t assume factory fog lights replace side lighting; match each beam to its task and driving conditions on your regular routes.
Lens Cleaning and Corrosion
Because ditch lights aim outward, dust, mud film, and bugs can noticeably reduce their side coverage. Keep each lens clean: LED pods and fog/flood optics lose output when grime coats them. Use a lens-safe cleaner or mild soap and water, plus a microfiber towel. Abrasive pads can micro-scratch the lens, adding scatter that appears as haze at night.
After washing, dry the housing and lens to limit trapped moisture at seams, where corrosion can damage mounts, bezels, and exposed screws. Inspect rubber gaskets and breather paths for tears or missing seals; failures can expose connections to salty water and humidity.
Apply a thin anti-corrosion coating to external metal hardware, never the lens. Seal wiring connectors with dielectric grease and waterproof boots. Recheck them periodically.
Road-Legal Beam Compliance
Even well-aimed auxiliary lights may not be legal for use on public roads. Check your local rules before you switch on ditch or fog lights; restrictions can require them off or covered. Use them only where conditions and law permit, such as unlit roads or off-road areas.
- Aim ditch beams outward along the trail edge, not into oncoming drivers’ eyes; this reduces hood glare and backscatter.
- Confirm permitted color—usually white, or amber/yellow where allowed—and intensity; excessive output can create dangerous glare at street distances.
- Verify fog lights produce a controlled beam cutoff and meet required mounting height and aim; a flood pod isn’t automatically compliant.
- Check switch controls and vehicle lighting standards before every paved trip.
An illegal beam can blind others.
Installation Cost Differences
Your upfront equipment cost depends on light size, model-specific brackets, and whether the kit includes required trim or alignment hardware.
Ditch lights often need simpler mounts and plug-and-play wiring, while fog lights may require bumper integration and more extensive electrical work. If you hire a shop, expect labor to rise when fog-light installation requires bumper removal, precise beam alignment, or headlight-module connections.
Upfront Equipment Costs
Upfront costs depend on the light type, mounting hardware, and wiring: compact ditch-light pods often need only vehicle-specific brackets and minimal fabrication, while higher-output light bars may require heavier wiring, relays, and sturdier mounts. Your equipment bill also reflects beam purpose and safe current handling.
Compare the options before buying:
- A fog-light housing swap can cost less, but its short, wide beam won’t illuminate roadside ditches.
- For true side coverage, outward-aimable flood or combination pods add optics and aiming brackets.
- Auxiliary pods may need a dedicated harness, switch wiring, and relays; budget for components that safely carry their current.
- Check compatibility and beam aim before purchase; undersized wiring or unstable mounts can compromise reliable, safe operation. Choose components rated for your vehicle’s electrical system.
Installation Labor Costs
Because ditch lights usually mount near the A-pillars or hood hinges, installers can often fit and wire them faster than fog lights, which may require bumper disassembly and work in tighter spaces.
That lowers your labor bill: compact pods need short harness runs and often allow aim-and-torque work, with less fabrication than fog-light brackets that need alignment to control glare. Fog-light labor falls between ditch lights and light bars, whose mounts and wiring add time.
Your cost depends on circuits and controls. Ditch lights commonly need a dedicated switch and relay; fogs may need integration with factory lighting controls. Without plug-and-play brackets, expect added fitment, drilling, fastening, connector weatherproofing, and aiming. Ask the installer to verify beam cutoff and secure wiring before you drive.
Ditch Lights for Trail Turns
Aim your ditch lights outward into turns to illuminate blind corners your headlights may miss. Flood or combo beams reveal inside-edge hazards, such as ruts, rocks, and drop-offs, beside and just ahead of your tires.
This wider coverage improves your view during steering input, helping you choose a safe line before you commit.
Illuminate Blind Corners
When a trail bends beyond your headlights’ reach, low-mounted ditch lights can reveal the turn before you commit. Mounted at the A-pillar or hood hinge, they throw light outward and slightly ahead, covering the blind corner where stock beams leave a gap. Choose a wide flood or combo beam, not a tight spot, so you can read the turn-in line and trail edge as you steer.
- You’ll see the curve sooner, reducing uncertainty at turn-in.
- You can judge nearby ruts and tire-side clearance without aiming down the hood.
- Outward aim helps limit hood reflection and backscatter from forward-facing lamps.
- At low speed, clearer edges make tight forest turns feel more controlled.
At night, adjust outward in small steps, testing coverage without excessive glare nearby.
Reveal Trail Hazards
As you enter a tight turn, outward-aimed ditch lights expose ruts, rocks, and drop-offs beside your front tires: hazards forward-facing fog lights may miss.
On technical, low-speed trails, broad peripheral coverage helps you read the ditch line and choose a safe path before reaching the corner. Forward-only fog lights may leave the trail edge outside their beam, where hazards hide.
A flood or combo pattern spreads light across nearby ground, favoring horizontal coverage over long-distance throw. Controlled outward illumination can limit hood glare and dust backscatter, preserving contrast when visibility worsens. Scan for loose rock, abrupt shoulders, and erosion; slow down if you can’t confirm a stable route. Ditch lights supplement headlights and careful driving; they don’t make an unseen or unstable trail safe alone.
Aim Into Turns
On tight trail turns, outward-aimed ditch lights reveal the inside edge, nearby ruts, and drop-offs as you commit; coverage forward-facing headlights may miss.
Aim them outward for true ditch use so you illuminate the near-side edge rather than duplicate your headlights’ existing beam. On slow technical corners, this side coverage can expose low obstacles and tire-adjacent drop-offs early enough to help you choose a safer line.
- Choose flood or combo pods: wide horizontal coverage follows trail edges better than spot beams.
- From A-pillar or hood-hinge mounts, tune the wash without glare reflecting off your hood or windshield.
- Test after dark; adjust until the near-side ditch lights without dusty backscatter ahead.
- Keep your pace slow; earlier visibility supports line choice but can’t reveal every hidden hazard.
Combined Ditch-and-Fog Setup
A combined ditch-and-fog setup separates two lighting tasks: ditch lights illuminate trail edges, shoulder ruts, and drop-offs, while fog lights fill the near foreground below the headlights’ cutoff.
Ditch lights mounted near the A-pillars or hood hinges should use flood or combo beams, which spread light across the ditch and track during slow technical driving. Spot beams concentrate too narrowly for this task. Keep the lamps low to limit hood and windshield glare, then aim them outward toward peripheral hazards rather than down the centerline.
Your fog lights should cast a wide, low beam that fills the ground just ahead of the vehicle and below the headlight cutoff. That close-in light can restore contrast in dust, mist, or light rain. Together, the beams support safer line selection: ditch lights reveal edge hazards, while fog lights define immediate terrain without adding unnecessary forward brightness or encouraging you to drive beyond your sight distance.
Conclusion
Choose lights by the beam you need, not by brightness alone. Fog lights mount low and spread a controlled, wide beam beneath mist; ditch lights aim outward to reveal shoulders and trail turns.
You can combine them, but wire each circuit to a separate switch and verify aiming, load, and road-use rules. Keep factory fog-light controls intact where possible. Before driving, test both systems on a road; misaligned light can reduce visibility and endanger others.