What Is CANbus in LED Headlights? Error Codes and Decoders Explained
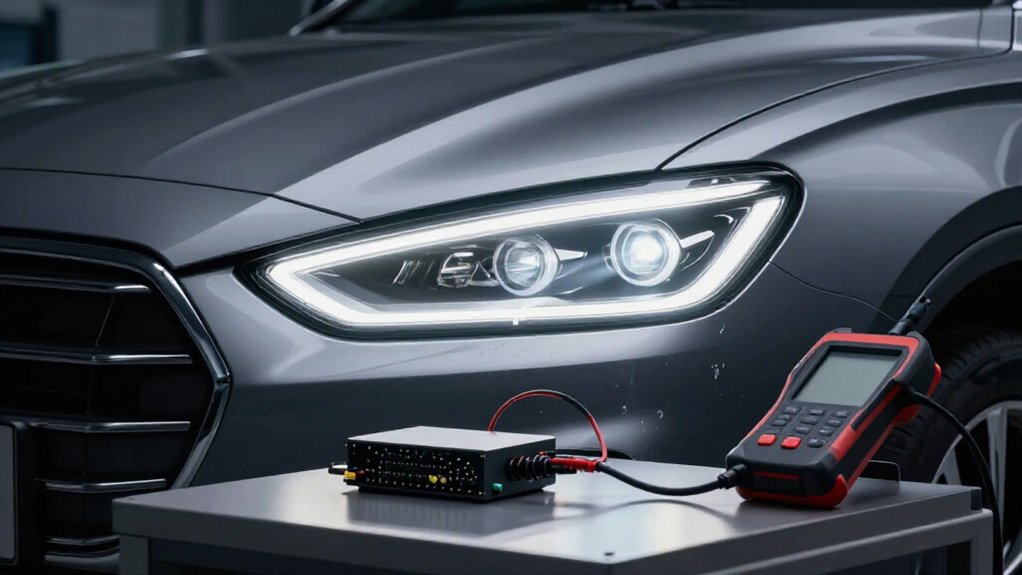
CANbus in LED headlights refers to your vehicle’s networked lighting diagnostics, which monitor circuit current and voltage rather than brightness alone.
A 55-watt halogen may draw about 4.5A, while an LED often draws less, triggering a bulb-out warning or fault code despite normal light.
A compatible decoder can add a simulated load or filter pulsed power, but resistors generate heat.
Check fitment, polarity, wiring, and mounting safely; the sections ahead explain cold-weather effects and fixes.
Bulb-Out Monitoring Thresholds
Bulb-out monitoring checks the headlight circuit’s current draw against an expected range, typically based on a 55W halogen bulb that draws about 4.5A. Your vehicle’s control module samples that load, often during startup self-checks, and compares it with calibrated limits rather than judging illumination alone. A replacement LED drawing roughly 20–35W may deliver useful light yet sit below the expected halogen-current range.
Tighter calibration can make this comparison especially exact. The module may register an electrical mismatch even when the beam appears normal; a substantial shortfall can be classified as a failed lamp without visible flicker, while a borderline reading may produce unstable operation.
Check the vehicle manual and approved fitment guidance before changing the circuit. If required, use a properly specified CANbus-compatible solution that simulates the missing load, and verify secure installation and heat management carefully. Don’t bypass monitoring or compromise wiring, fusing, or headlamp performance.
LED Swap Warning Causes
An LED swap can trigger a dashboard warning when your vehicle’s CANbus system detects less current than it expects from a halogen bulb.
Your ECU may expect an OEM 55-watt halogen drawing about 4.5A, while an LED often uses only 20–35W. It can interpret that lower electrical load as a failed bulb and show “bulb out” or “check headlight system.”
The mismatch can cause flickering or pulsing if your vehicle uses pulse-width modulation (PWM) or voltage and current thresholds. During startup self-checks, a wattage or current mismatch may keep the fault active even when the LEDs light.
Non-CANbus LEDs can raise the risk of hyper-flash turn-signal blinking or a circuit that the vehicle’s electronics won’t drive properly. Choose compatible bulbs and verify operation.
A 2018 Civic’s LED Swap
On a 2018 Honda Civic, replacing halogen headlights with lower-draw LEDs can trigger a “bulb out” or “check headlight system” message because the car’s diagnostics detect less current than the OEM halogen load, commonly about 55 W. Many LED replacements draw only 20–35 W, so the Civic may interpret the reduced load as a failed bulb. If you notice flicker or a warning, check lamp fitment and LED compatibility before night driving.
An appropriate CANbus decoder or load resistor can help the ECU see a more typical load during its self-check. Choose one matched to your exact bulb base, such as H11/H9/H7 or 9005/9006/9012, depending on your Civic’s headlamp. For turn signals, lower wattage can cause hyper-flash; a compatible decoder can curb it.
Decoder Circuit Components
Your decoder may use a load resistor to bring current closer to the halogen bulb’s expected draw, helping prevent ECU bulb warnings. Filtering capacitors or adaptor circuitry can smooth PWM-related voltage fluctuations that cause flicker.
Check that the control circuit and decoder match your bulb socket, and mount heat-producing components as the manufacturer directs.
Load Resistors
Because many vehicles monitor headlight current, an in-line load resistor can help an LED replacement avoid a “bulb out” warning by drawing power closer to the OEM halogen bulb’s level.
A halogen headlight draws 55W (roughly 4.5A), while LED replacements often draw 20–35W. An in-line decoder sits between your vehicle wiring and bulb, consuming excess power as heat to make the load appear closer to what the vehicle’s ECU expects during self-checks.
Choose a resistor rated for your bulb type, such as 9005/9006/9012, H4/H7, or H11/13; a mismatch may still trigger “Check headlight system” warnings or cause flicker or hyper-flash. Mount it securely on a heat-resistant surface, away from wiring and plastic parts, because it gets hot. Quality designs manage heat and current consistently, reducing warnings.
Filtering Capacitors
Load resistors address current mismatch, while filtering capacitors help stabilize the decoder’s electrical signal. Your LED driver may draw pulsed or unstable current, often from PWM. The capacitor smooths these variations, reducing visible flicker and intermittent “bulb out” readings.
By buffering voltage dips and momentary spikes, it helps your ECU see a more consistent electrical load during its self-check cycle. It works alongside resistors or load modules to keep monitored resistance and current closer to the OEM halogen baseline, commonly about 55W.
A properly sized capacitor can minimize rapid voltage fluctuations that trigger “Check headlight system” warnings. Without suitable filtering, your ECU may detect unstable power draw and display warnings; some vehicles may also hyper-flash.
Don’t assume every decoder needs the same capacitor value. Follow manufacturer ratings, and isolate power before wiring changes.
Control Circuits
A CANbus LED decoder typically combines a load module with control components that help the vehicle’s bulb-monitoring circuit recognize the LED. A resistor/load module draws extra current to mimic an OEM halogen load: a 55W bulb may exceed an LED’s 20–35W draw. Capacitors or anti-flicker components smooth PWM or pulsating voltage, reducing signals that may trigger ECU monitoring.
Some kits wire in-line, supplying expected current and return during ECU self-checks. Match the decoder to your bulb base—H4, H7, H11, H13, 9005, 9006, or 9012—because sockets may need different circuit specifications. This helps keep bulb-failure detection within expected thresholds and prevent “bulb out” or “check headlight system” warnings. Load resistors can get hot, so mount them securely on a heat-resistant surface, away from plastic and wiring.
Cold-Weather Voltage Effects
In freezing weather, your battery’s voltage can sag because its chemical reactions slow, especially under the load of a cold start. That change can disrupt the current your LED driver and CANbus decoder present during the ECU’s bulb check, triggering warnings or brief flicker.
If errors occur only after cold soaks, have your battery and charging system checked and use components rated for stable cold-start operation.
Cold-Start Voltage Changes
When cold weather makes the battery voltage sag during engine start, your headlight circuit may briefly fall outside the current or voltage range the vehicle expects during its bulb self-check.
Many OEM CANbus lighting modules compare measured headlight current with thresholds calibrated for halogen lamps, often about 55W and 4.5A. At reduced startup voltage, your LED driver may briefly ramp, pulse, or draw a different current as it regulates output. That temporary profile can trigger a bulb-out or check-headlight-system warning, even when the lamp works normally.
As voltage stabilizes after startup, your LED’s current draw usually becomes more consistent, so the warning may disappear or occur intermittently. A compatible CANbus decoder or warning-cancel resistor module can provide a steadier halogen-like load during these fluctuations. Choose a unit matched to your vehicle and headlight setup; an unsuitable resistor can create heat, so install it securely away from plastics and wiring, and verify operation safely.
Battery Load in Winter
Cold weather slows a battery’s chemical reactions, reducing its available capacity and often causing voltage to sag as the headlights start, even when the bulbs are sound.
When temperatures fall, your battery may deliver less cold-cranking current, and starter demand can leave less voltage available to the lighting circuit. LED headlights draw less power than halogen bulbs, so your vehicle’s CANbus load-monitor may read their lower current as a failed bulb. Low system voltage can make that interpretation less reliable, particularly if your terminals or headlight connectors are loose or corroded. Extra resistance compounds voltage drop and can trigger a “check headlight” warning or intermittent operation.
You should inspect battery condition if startup voltage dips; don’t assume an error code proves an LED has failed. Keep connections clean, tight, and dry, and follow your vehicle’s service guidance before testing or replacing components. If you’re unsure, have a qualified technician check the system.
Decoder Behavior in Cold Weather
Winter voltage sag can make a vehicle’s CAN-bus bulb-out detection more sensitive to the lower current draw of LED headlights. A 55-watt halogen may draw more current than your 20, 35-watt LED, so during a cold start, the ECU may not detect the expected load.
A matched CAN-bus decoder uses a load resistor to mimic halogen-like current, helping your ECU’s self-check recognize a normal return despite supply voltage. If it’s absent or undersized for your H7, H11, or 9005 fitment, winter voltage swings can cause flicker or recurring warnings.
Some LEDs may flicker in freezing temperatures when power interacts with pulse-width modulation (PWM). Use the matched decoder to stabilize the signal and reduce false alerts; it can’t fix a weak battery or faulty wiring.
Aftermarket Fog Lamp Retrofits
Aftermarket LED fog lamps can trigger “bulb out” or lighting warnings because they typically draw less power than the vehicle’s halogen bulbs, often around 55 W, compared with roughly 20–35 W for an LED retrofit.
Your CANbus checks circuit load during self-test. Too little current may log a fault, show a warning, cause flicker, or disable fog lamps on stricter vehicles. A decoder or load resistor simulates halogen load, helping the ECU recognize a normal circuit and prevent alerts. Match it to your bulb base—H11, H8, or H16—and your vehicle’s monitoring behavior; a generic unit may leave codes unresolved.
Follow wiring instructions, secure connections, and verify both lamps operate before driving in poor visibility. Use components approved for your vehicle and electrical circuit.
Thermal Overload Risks
Cancelling a bulb warning can add a heat risk: CANbus decoders and load resistors draw extra power to mimic a halogen bulb, so they may run hot inside the headlight area.
They mimic a higher load: a 55-watt halogen versus a 20–35-watt LED, forcing resistors to dissipate power as heat. If you leave a decoder dangling, mount it poorly, or put it where airflow is limited, heat can build up and accelerate resistor degradation.
An incorrectly rated unit for your H4, H7, 9005, 9006, or 9012 bulb may run hotter than intended. Heat can loosen terminals or promote corrosion, later causing flicker or intermittent operation despite cancelled warnings. Choose a decoder rated for your bulb’s fitting and wattage; secure it away from plastic to limit heat buildup.
Wrong Polarity Installation
A reversed connector can keep an LED headlight dark or make it behave erratically, even when the bulb and decoder are correctly rated. Many LED modules contain CANbus electronics that need the correct positive and negative orientation to simulate load and maintain stable voltage signaling.
Reversed polarity can trigger “bulb out” or “check headlight system” warnings because the ECU detects no or abnormal current during its self-check. This matters especially when your vehicle expects a halogen-like draw, such as an OEM 55-watt bulb.
To correct it safely, first:
- Switch off the lights and vehicle before touching connectors.
- Unplug the connector; inspect polarity markings before changing orientation.
- Flip the LED adapter, or swap leads if designed.
- Reseat firmly, then restore power and verify stable operation.
Check Bulb-Socket Compatibility
Correct polarity won’t prevent errors if the bulb base or decoder connector doesn’t match your vehicle. Check the bulb type in your owner’s manual; common fittings include 9005, 9006, 9012, H4, H7, H11, and H13/9008. Match the decoder or adapter label to that exact socket: an H13 kit won’t correct an H11 fault.
Confirm whether you have separate low- and high-beam bulbs or a dual-beam design such as H4, because the decoding components differ. If you’re replacing a 55-watt halogen with a 20–35-watt LED, choose a CANbus-compatible LED in the same base so its load simulation suits your vehicle’s monitoring. Install with lights off, seat the bulb, and secure the connector; a loose fit can cause flicker that resembles CANbus error.
Conclusion
When you install LED headlights, treat a bulb-out warning as a diagnostic clue, not a reason to add a decoder blindly. Check bulb polarity, socket compatibility, vehicle monitoring thresholds, and wiring first.
A decoder can mimic the load your car expects, but its resistors may become hot enough to damage nearby parts. Secure heat-producing components away from plastic and wiring, and follow the manufacturer’s instructions. If warnings persist, consult a qualified technician before driving at night.