How to Choose Whip Lights: Length, App Control, Mounts and Durability
Choose whip lights by measuring your vehicle’s highest point and checking clearance through suspension travel and on slopes.
Select the longest length that won’t strike obstacles or cargo.
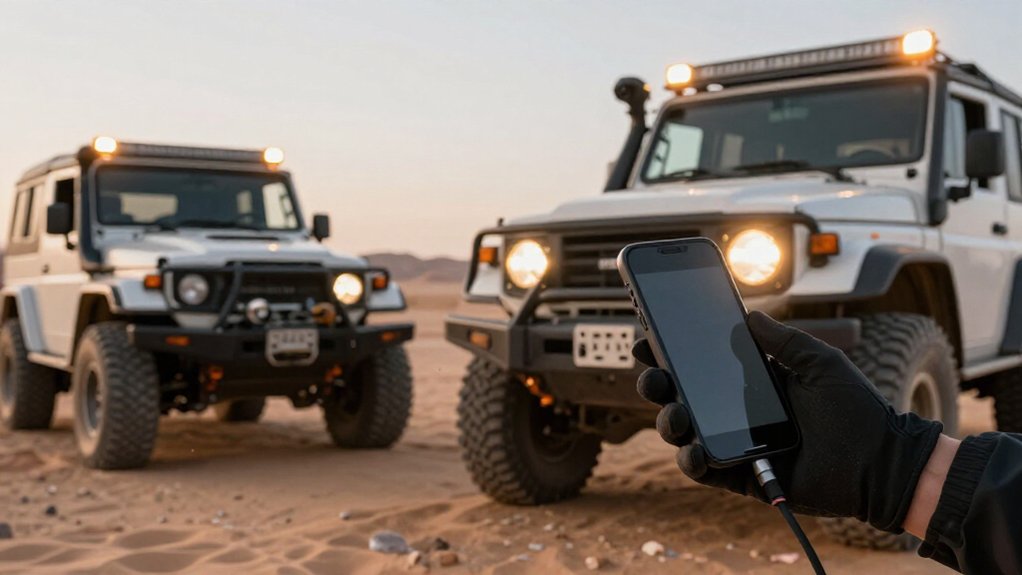
Pick Bluetooth controls for colors, effects, and speed, but confirm app compatibility and memory recall.
Choose RGB for patterns or single-color for consistent output.
A stainless-steel spring base, secure wiring, weatherproof connectors, correct 12-volt fuse, and warranty help withstand trail impacts.
More checks can guide your choice.
Bluetooth App Control Options
Bluetooth app control lets you adjust whip colors, patterns, brightness, and animation speed from your phone, often with a memory setting that restores your preferred setup at startup.
Choose an app that matches your control needs. Basic systems may offer 20 colors and 22 functions, while premium options can provide 300 colors, 200 functions, and music synchronization.
Check whether the controller can operate multiple LED sets together to synchronize whips or side pairs. Before buying, confirm that the app supports your phone and the whip kit; compatibility may be brand-specific. Set your pattern and brightness while parked, then keep the phone secured and out of reach while driving. That reduces distraction and helps you maintain control.
Measure Vehicle Clearance
Before choosing a whip length, measure the highest point on your UTV or ATV, such as its roof rack, spare tire carrier, or roll cage. Determine how much height you can add without the tip contacting obstacles on jumps, washboards, or rocks. Check vertical clearance through full suspension travel by cycling the suspension; confirm the tip won’t strike the ground when it bottoms out.
Measure at your steepest hill and side-slope too, because a tilted whip can swing closer to the ground. Ensure the mounted whip rises above the roofline enough for other riders to see it from a distance. Compare your limits with available lengths: 2′, 3′, 4′, 5′, 6′, and 8′. Select the longest option that maintains safe clearance and visibility across varied terrain.
Memory Function for Presets
Check for a memory function that restores your last whip-light preset: color, effect, and brightness when you power the controller back on.
With memory, you can return to a solid setting or chosen pattern without the app each ride. If your kit uses Bluetooth, confirm recall includes app-stored settings, not remote selections. Otherwise, a power interruption may reset the lights to their default, undermining your planned visibility setup.
| Check | Why it matters | What to verify |
|---|---|---|
| Preset recall | Consistent visibility | Last mode returns |
| App memory | Settings persist | Test power cycle |
Choose a model that explicitly lists “memory” or “preset recall.” Test it before riding: select your intended mode, cut controller power, then restart and confirm color, effect, and brightness return. A tested preset supports visibility; don’t trust defaults.
RGB Versus Single-Color Whips
RGB whips give you multiple colors and effects, while single-color models provide consistent, straightforward illumination. Use RGB to distinguish your vehicle or add chase patterns, but keep signaling clear and visible to other riders.
Choose single-color for simpler, uniform lighting, or RGB if you’ll manage its added settings safely.
Color Options
Your color choice determines how much control you have over your whip’s appearance, not how visible it’ll be by itself. Choose RGB when you want several color options; SOL PRO provides 20 colors, while SOL DELUXE offers 300.
Those differences can help riders identify vehicles in a group, especially when you select contrasting hues.
If you prefer a simpler, consistent appearance, a single-color whip reduces choices and keeps its output visually uniform. Oracle Lighting offers single-color models in 4 and 6 feet, priced at about $70 and $80, respectively.
Oracle ColorSHIFT models add color-shift selection through a wireless remote, at about $90 for 4 feet or $100 for 6. Regardless of hue, prioritize brightness and placement for visibility; use contrasting colors to identify vehicles.
Customization And Effects
Beyond choosing a hue, decide how much control you want over your whip’s effects.
RGB systems can offer 20–300+ colors and 22–200+ functions, including solid, flashing, chasing, fade, pulse, and rainbow patterns. Check controls before riding. Higher-tier systems may add music sync; simpler RGB models may limit control to patterns and brightness.
Some designs illuminate separate sections in colors, such as a Double Helix chase, while outlaw-style whips can run multiple colors at once. Check what the product supports rather than assuming every RGB whip includes these features.
A single-color whip gives you simpler, less variable output. Choose it if you don’t need pattern changes; options include Oracle Lighting models in 4-foot and 6-foot lengths. Make sure effects stay appropriate for trail use and don’t impair your attention or other drivers’ safe operation.
Visibility And Style
In dusty, low-visibility terrain, 360° RGB whip lights can make your vehicle easier to spot with changing colors and patterns. Bright chase, pulse, or rainbow effects can improve long-distance detection over a solid color, especially at night or across hills.
In a group, you can use distinct colors or patterns to identify vehicles; brake- and turn-synchronized lighting can make changes in movement clearer to others.
Single-color whips offer simpler illumination without complex effects, yet they can still provide strong visibility. Your choice of style should account for how you’ll control the lights: Bluetooth app control is common on RGB systems, but added effects help only if you can operate them reliably on the trail. Keep displays recognizable and avoid distracting other nearby riders, too.
Choosing The Right Type
Choose RGB whips if you’ll use color changes to distinguish vehicles or signal group identity; choose single-color whips for consistent illumination with fewer settings to manage. RGB systems let you select colors and patterns to improve recognition during group rides. Options vary widely: SOL DELUXE lists 300 colors and 200 dynamic functions, while SOL PRO offers 20 colors and 22 functions.
Use app or Bluetooth controls, such as Pyramid 3D’s Lightmesh App, to configure effects before riding; avoid distracting changes while moving. If you want bright output across the whip, check LED density: Outlaw Whips’ Tombstone Series claims double the LEDs and 300 color-function changes. A single-color model can keep visibility straightforward and reduce visual distraction. Oracle Lighting, for example, sells single-color 4-foot and 6-foot whips.
Match the color to your riding conditions, then choose the control style you can operate safely without taking your attention from terrain or other riders.
Heavy-Duty Spring Bases
Choose a whip light with a heavy-duty stainless-steel spring base to resist corrosion from wet, muddy, or dusty conditions. Its spring absorbs shocks from rough trails and sudden suspension movement, reducing stress on the mount. Confirm the base seats securely and suits your vehicle, especially if you drive a UTV or dune buggy over repeated impacts.
Stainless Steel Construction
On rough trails, a heavy-duty stainless steel barrel spring base helps keep your whip securely mounted despite constant vibration.
Check the base for a no-memory stainless steel spring that maintains consistent whip stability over time. If the spring loses tension over time, your whip may lean or become less secure. A spring-based mount can handle terrain jolts and impacts, reducing the chance of loosening during high-speed rides.
Choose stainless steel construction for corrosion resistance when you’re riding through rain, mud, or dust-heavy conditions. This resistance helps extend service life. Before riding, inspect the base, fasteners, and mounting point for wear or cracks. Follow the manufacturer’s installation instructions, and tighten the hardware to its torque. A quick, secure installation keeps the whip firm without compromising your setup.
Shock Absorption
When washboard, rocks, and repeated impacts jolt your rig, a heavy-duty spring base absorbs shock and helps keep the whip secure.
Choose a no-memory stainless-steel barrel spring design to help the spring retain its performance through repeated flex cycles. An integrated spring mount can limit vibration transfer into controller wiring and pole connection points, reducing stress during rough rides.
Confirm the spring base is rated for off-road use; it’ll let the whip bend under impact and return without cracking or loosening. If you ride through mud or dust, choose a sealed housing to keep debris from interfering with the shock-absorbing mechanism.
Check the spring and housing for damage before each ride, and replace worn parts. A fatigued or obstructed spring may transmit harder jolts to the whip and its electrical connections. Match the base to your whip’s weight and intended terrain for predictable movement.
Secure Mounting
A heavy-duty spring base helps keep your whip light secure and visible above racks or roofs without bouncing loose at trail speeds. Choose a base built to absorb vibration and maintain firm contact over rough terrain. Position it at a rear mounting point where the whip clears the roofline or rack, yet remains firmly fastened against trail-speed movement.
Check the full flex range before driving: the whip must not strike cargo, bodywork, or suspension components as your vehicle moves.
Secure the base using its hardware instructions, then route wiring with enough slack for movement. Keep cables clear of pinch points and sharp edges, and protect connectors from strain.
After installation, cycle the whip and recheck fasteners; inspect the setup after rough trips through dust, mud, or rain.
Corrosion Resistance
Secure mounting also depends on resisting corrosion. Choose a heavy-duty spring base made from no-memory stainless steel to maintain tension as your whip flexes over rough trails. This helps limit fatigue and keeps the mount stable, reducing wear at mounting points.
Pair the spring with corrosion-resistant hardware; mud, rain, and dust can pit fasteners or seize joints. Use weatherproof connectors and apply dielectric grease at spring-to-base interface to help block moisture and protect electrical contacts.
Before installation, check that the base and mounting components carry an outdoor or all-weather off-road rating. Inspect the assembly regularly for rust, looseness, or damaged seals, especially after exposure to salt or standing water. Replace compromised hardware; a corroded mount can let the whip detach or strike occupants.
12-Volt System Compatibility
Before buying whip lights, confirm they’re designed for your vehicle’s 12V electrical system; most off-road kits are, and UTVs commonly use 12V power. Check the kit’s voltage rating before connecting anything; don’t assume a product works across different systems. Match its controller and wiring harness to your vehicle’s 12V source, following the manufacturer’s wiring diagram.
Route power securely, protect connections from abrasion and moisture, and keep wiring clear of moving parts and hot surfaces. If you’re using Bluetooth, an app, or a remote, remember the controller still draws power from the battery; correct 12V routing supports reliable operation. With multiple lights, verify their combined electrical load is safe for your vehicle’s 12V system. Confirm any switch or cutoff fully disconnects power to the controller when you shut the lights off. Have an installer check compatibility if your vehicle’s wiring capacity or power source isn’t clear.
Replacement Blade Fuse Ratings
When replacing a whip light’s blade fuse, use the exact amperage and voltage rating specified in the light or controller manual. Many 12-volt UTV setups use standard automotive mini blade fuses, but don’t assume every system uses the same rating. Check the number stamped on the existing fuse and confirm it matches the manual before buying spares.
A higher-rated fuse may let excess current damage wiring; a lower-rated fuse can shut the lights down unnecessarily. Keep spare fuses for each rating your system requires, including separate controller and inline fuses, because revisions may differ. If a replacement blows again, stop using the lights and inspect for pinched wires, exposed conductors near sharp edges, or a short to chassis ground. Don’t keep replacing blown fuses.
Waterproof Connector Ratings
For rain and heavy splash exposure, choose whip lights with explicitly waterproof, IP-rated connectors, such as IP67-rated systems. Check the rating on each plug, not just the light housing; water often enters at splice points or the whip interface. Choose sealed, enclosed service connections, protected wire routes, and corrosion protection such as dielectric grease.
- Confirm the connector’s IP rating applies to the connector assembly.
- Check for exposed plugs where the whip meets its pole.
- Prefer weatherproof plugs with sealed splice and junction points.
- Keep wiring routed away from abrasion, heat, and standing water.
- After muddy or rainy rides, clean and inspect seals, insulation, and fit.
Replace damaged seals; a loose or compromised connector can admit moisture, cause intermittent lighting, or create an electrical fault.
Confirm Warranty Coverage
Confirm warranty coverage for every part of the whip light kit, including the controller, app or remote receiver, wiring harness, and fiberglass or polycarbonate rod. Don’t assume “lifetime” coverage applies to the whole system; verify exclusions and claim steps before you buy.
- Ask whether coverage includes labor and replacement, not parts alone.
- Check whether rain, mud, dust, and other weather exposure qualify.
- Confirm improper wiring or mounting voids protection; install securely to reduce electrical and road hazards.
- For app models, verify controller and antenna coverage; for non-app models, check LEDs and connections.
- Get registration deadlines and required proof, such as your order number, serial number, and damage photos.
Ask how the policy treats corroded connectors, cracked UV housings, and broken mounts. Keep records ready.
Conclusion
Choose whip lights by checking clearance, mount strength, 12-volt compatibility, and connector ratings before installation. Pick app controls and RGB or single-color output to suit your needs, and confirm that presets return reliably after power loss.
Use the specified replacement fuse—never bypass it—and inspect wiring, seals, and spring bases regularly. Verify warranty coverage, secure every connection, and test visibility and clearance at low speed before riding. If anything feels loose or overheats, stop and correct it.