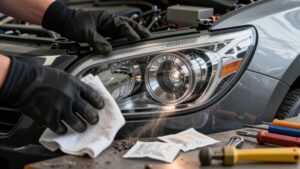
Why Is There Condensation in My Light Bar? Vents, Seals and Heat
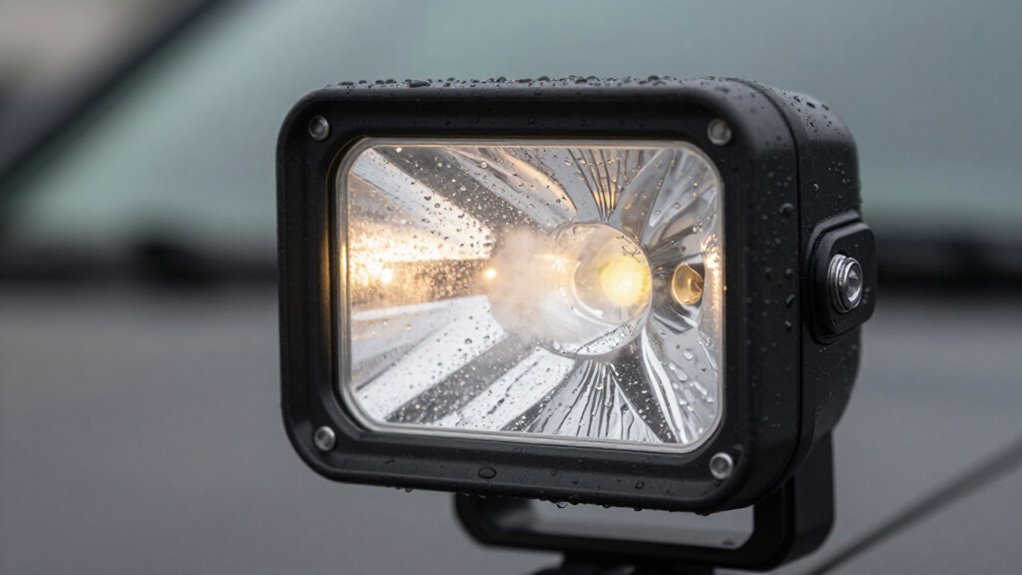
Your light bar fogs when humid air cools below its dew point and moisture condenses on the lens.
A breather vents air during warm-up and draws it back as the housing cools, while seals keep water out.
Brief mist after a cold night or wash often clears as the LEDs warm the lens.
Persistent droplets or recurring fog can indicate a blocked vent, poor gasket compression, or drainage trouble; checks can help pinpoint the cause.
Light Bar Vent Behavior
A pressure-equalizing vent lets air move in and out of a light bar as temperatures change.
During warm-up, expanding internal air exits through the vent, limiting pressure buildup that could stress the housing and promote leaks. When you switch the bar off or expose it to cold, wet conditions, cooling air contracts and the vent draws outside air inward to rebalance pressure.
That exchange can briefly raise internal humidity, and moisture may condense on a cooler lens. Intermittent fogging after installation or a temperature change can occur even when the vent keeps bulk water out under rated conditions.
If fogging continues to recur after heat cycling, inspect the breather path for blockage, incorrect installation, or contamination. Check the vent before blaming waterproofing.
How Seals Trap Moisture
Even a “waterproof” light bar can trap humid air during assembly; when the housing cools below the air’s dew point, moisture condenses as a thin film inside the lens.
Your gasketed enclosure can block bulk water while still retaining humidity. If the lens-to-housing gasket lacks compression at any point, tiny leak paths may admit moisture or draw it inward during pressure equalization. Check screw-hole torque and housing flatness; uneven loading or warping can leave gaps.
After installation, vibration or remounting can shift gasket compression, so a seal that sat correctly may no longer hold. Inspect for poor alignment and damaged sealing surfaces, including scratches, deformation, or molding flash. These defects weaken perimeter contact and can create localized condensation points. Reseat or replace the gasket.
Cold-Start Fogging Pattern
After an overnight temperature drop, you may see a thin mist inside the lens as humid air cools below its dew point. You’ll often notice this pattern after parking through a cold night or after rain or washing, since the optical surface reaches the cold spot first. As the light warms, LED and driver heat raise the lens temperature, evaporating condensed moisture back into vapor.
Recheck the lens during the first operating period; the mist should lighten or disappear rather than develop into persistent droplets. That brief surface fog can fit normal moisture equalisation: a functioning vent lets condensation appear at the lens rather than remain near electronics. Record when it appears and clears; persistent droplets after warming warrant further inspection of the assembly.
Breather Membrane Failure Modes
Check the breather membrane for clogging from dirt, salt, or debris that can trap humid air and prolong fogging. Inspect it for cracks or incorrect seating, and verify that its seal hasn’t detached, allowing water to enter at the vent interface.
If condensation persists or worsens after one or two heat cycles, treat impaired pressure equalization as a likely fault.
Membrane Clogging
A clogged or partially blocked breather membrane can trap humid air inside a light bar, making condensation persist through repeated heat cycles.
When the valve can’t equalize pressure, trapped moisture may fog the cooler lens as it cools. Dust, insect residue, salt spray, or contaminated sealant can obstruct airflow. Use this pattern to guide inspection:
| Symptom | Likely clue | Check |
|---|---|---|
| Lens fogs | Moisture condenses | Observe lens cooling |
| Fog persists | Vent may be blocked | Inspect membrane surface |
| After heat | Fails to clear | Recheck after operation |
| Electronics clear | Vent humidity likely | Compare lens and LEDs |
If fog doesn’t clear after extended operation or sun heating, inspect the breather for clogging or a bypass path; pressure cycling can repeatedly draw humid air inward rather than restore normal ventilation.
Membrane Damage
When a breather membrane is damaged, torn, cracked, or deformed, water can bypass it during rain or washing, while clogging or persistent wetting can disrupt pressure equalization and trap humidity. Incorrect installation torque, misalignment, or impacts can deform it, letting rainwater or wash jets pass. Dust, salt, mud, insect debris, or sealant can clog its pores, impairing pressure equalization and trapping air that condenses as the lens cools.
Heat cycles may keep it wet, limiting humidity exchange and sustaining fog. Check whether moisture clears after one or two heat cycles: a healthy membrane clears it, while damage often brings condensation back quickly or leaves pooling droplets near the PCB or reflector instead of brief mist. Persistent droplets near electronics warrant membrane inspection before exposure.
Seal Detachment
Even an undamaged breather membrane can fail if its seal detaches or sits out of position, letting humid air bypass the vapor-only path. After repeated heat-and-cool cycles, expansion, contraction, and pressure equalization can stress the attachment until a leakage gap forms. You may notice the pattern after rain or cold starts: mist becomes recurring droplets instead of clearing.
A loose or misseated seal may lose compression when lens and housing fasteners sit unevenly, or when the breather’s gasket-like mount shifts. Then humid air enters around the membrane, and moisture condenses on the coldest optical surfaces rather than clearing during warm operation. Displacement can prevent the breather from regulating internal and external pressure, increasing condensation during cooldown.
Test the symptom: if moisture clears after one full warm cycle, humidity carryover is plausible. If it persists or returns after drying and operation, inspect the membrane’s seating and seal.
Mounting Angle and Drainage
If you mount the bar too level, condensation may not reach the drain and can persist across the lens.
Set the manufacturer’s intended tilt, keep the drainage path clear, and check whether droplets collect only at the bottom edge after rain, washing, or a cold start. If fogging repeatedly spreads across the optics, correct the bar’s position and verify that the brackets support the housing evenly without twisting it.
Mounting Angle Effects
Mounting a light bar nose-up can trap water and humid air, letting moisture reach cooler lens areas instead of draining away. That raises the chance you’ll see condensation, especially after rain followed by a temperature drop.
As trapped air cools below its dew point, droplets form on the coldest lens regions; a poor pitch can leave them sitting on the optical surface.
Set the bar with a slight pitch toward its low points so moisture can run off. Check that brackets support the housing evenly and don’t twist it: distortion can reduce gasket compression on the low side and let moisture migrate inward. Inspect the lens on evenings.
Fog that repeatedly appears along the lower edge points to an angle or drainage problem, not necessarily a seal failure.
Drainage Path Clearance
Your light bar’s angle only helps if moisture can reach a clear drain path. Check whether the housing’s lowest internal surfaces lead to intended weep points; condensed water should migrate there, not pool against the lens. Inspect each drain opening for blockage from brackets, bumper contours, splash guards, or squeezed-out sealant. Even slight obstruction can leave droplets lingering.
Also check mounting screws for overtightening or uneven torque. Housing distortion can alter internal flow paths and create local low spots. After a wash or cold overnight, observe the bar through one operating heat cycle, often 30–60 minutes. If droplets persist and don’t move toward the drain points, suspect a blocked or ineffective path. Follow the manufacturer’s specified mounting orientation to support drainage and pressure equalization.
Correcting Light Bar Position
Set the light bar to the manufacturer’s recommended pitch, with the lens aimed at the road; excessive upward tilt can trap droplets and prolong condensation. Check the housing position after tightening mounts evenly.
Avoid twisting the bracket; uneven pressure can distort the sealing interface and create a local pocket where moisture collects.
Confirm the bar’s drainage path remains clear, so condensed moisture runs downward instead of pooling at low points. Keep the breather area unobstructed; tight brackets or sealed gaps can block pressure equalization and worsen condensation cycling.
After installation, run the bar for 30 minutes, then let it cool. Recheck the lens and housing for pooled water. If droplets re-form or water gathers at the same spot, suspect an incorrect angle or restricted drainage.
Adjust the pitch and mounting position, then repeat the heat-and-cool check. Don’t cover the vent while securing the assembly, and verify it stays clear.
Post-Rain Trail Inspection
After rain or a creek crossing, let the light bar cool before checking inside the lens: a thin, temporary mist usually signals condensation, not water ingress.
Photograph the lens, then run the bar for 30 minutes and compare the view; check again the next day.
Fog from humid air exchanging through the breather should fade over one or two heat cycles as the lens warms and moisture evaporates. If it clears progressively, normal condensation is more likely.
Persistent droplets, fog that returns with each cold-to-warm change, or water pooling at the housing’s bottom point to a vent or seal problem. Check that the breather is open and seated correctly; inspect the lens gasket for even contact around its perimeter, especially after installation or re-torquing. A blocked or damaged vent can keep moisture trapped.
Warranty and Sealant Risks
Before opening the housing or applying sealant, document the first occurrence with clear photos: most warranties exclude thin mist that clears during operation, and unapproved repairs can affect coverage.
Next, run the light bar through a proper heat cycle on a dry day, then recheck after cool-down, following the manufacturer’s test procedure. If mist clears, record that result; if droplets or pooling remain, photograph them and contact support before dismantling anything. Warranty teams generally need evidence of persistent moisture, not transient fog.
Opening the housing or resealing it without the torque sequence can jeopardize coverage. Don’t use silicone: residue can obscure gasket or vent defects. Keep sealant clear of vents; blocking pressure equalization traps moisture and makes a venting fault look like water ingress.
Condensation After Pressure Washing
Pressure washing can rapidly cool the lens, drawing humid air and fine mist through the light bar’s breather, where moisture condenses on colder internal surfaces.
Even an IP69K-rated light can fog: its rating limits bulk water ingress under test conditions, but trapped humid air may condense after a wash and temperature drop. Brief fog should clear as temperatures stabilize.
- Run the bar to warm, evaporating moisture.
- Park in direct sunlight to raise internal temperature.
- Check that the breather valve isn’t blocked, missing, or mis-assembled; poor equalisation can leave persistent droplets or pooling.
- If fogging repeats after washing, or remains after a heat cycle, inspect and correct failed seals or cable or gasket interfaces.
Once the temperature gradient reverses, moisture can vent through the breather.
Connector Moisture Inspection
When you inspect for connector moisture, start at the connector-to-cable entry and cable glands; poor compression or a incorrectly positioned O-ring can let moisture in even when the light bar is IP-rated. Then inspect both connectors for droplets, trails, or corrosion. Repeated wet-dry cycles can leave tracks and exacerbate ingress.
Check seals for damage, alignment, or twisting; a misplaced seal can form a capillary path as pressure equalizes. Ensure wiring and boots don’t block the breather or drainage. Trapped water may later condense on cooler internal surfaces.
Liquid water after rain or a temperature drop indicates likely ingress, not normal fogging. Dry the connector, inspect seal surfaces, and reseat it correctly. If moisture returns, check gland compression, O-ring seating, and connector sealing again before operation.
Conclusion
Condensation in your light bar usually points to normal venting, trapped moisture, a blocked breather, or a compromised seal.
Check whether fog clears as the unit warms, then inspect vents, seals, mounting angle, drainage, and connectors after rain or washing. Don’t seal over a vent or apply unapproved sealant; you may trap more moisture and void your warranty. If water persists, corrosion appears, or fog doesn’t clear, document the condition and contact the manufacturer for repair guidance.