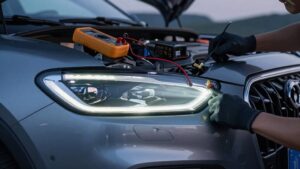
How to Clean and Restore Hazy Off-Road Light Lenses
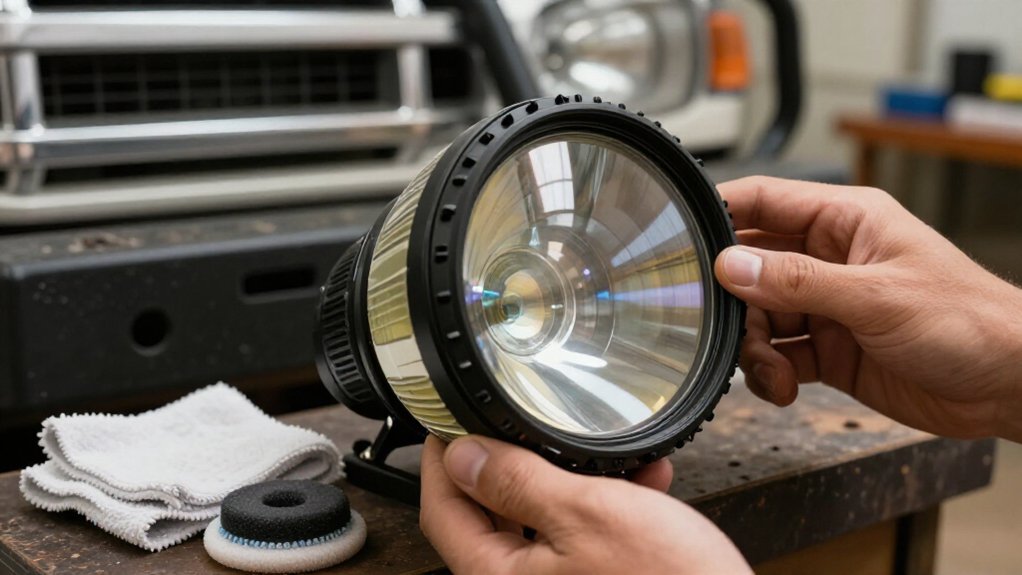
You can restore hazy off-road light lenses only if the polycarbonate isn’t cracked and the housing has no internal moisture.
Switch off the light, let it cool, flush away trail grit, then wash gently with mild cleanser and microfiber; dry it.
Mask paint before polishing with a dedicated headlight compound, then apply a UV-protective coating.
Avoid household cleaners.
Check seals, vents, mounts, and beam alignment; persistent fogging needs repair.
The steps below help you finish safely.
Off-Road Lens Exposure Conditions
On off-road lights, prolonged UV exposure breaks down the thin factory protective coating, allowing the polycarbonate beneath it to oxidize, yellow, and haze. Your exposure pattern determines how quickly that damage advances.
High-altitude, clear-sky sunlight, long daylight rides, and frequent direct sun typically fade lenses faster than shaded routes or garage storage. Repeated heating and cooling during dusty trail driving can accelerate degradation: oxidation and micro-cracks trap fine dirt, reducing beam clarity even after a wash. Road grime and dust also act as abrasive contamination on the weakened surface, increasing roughness and haze if you disturb it without appropriate restoration.
Check lens condition before night driving; reduced output can limit your ability to see obstacles and make your vehicle less visible to others. If you find deep cracks, chips, or moisture inside the housing, exposure has caused damage beyond surface restoration, and you’ll need to replace the lens.
Microfiber Cloths and Cleaner
Once you’ve ruled out cracks or internal moisture, clean the lens before restoring its surface. Wear eye protection and work with the light switched off and cool. Use clean microfiber cloths and a mild cleanser; avoid gritty wiping that can score plastic.
- Lift loose dirt and bugs with a clean, dry microfiber cloth before applying pressure. Replace it if it looks dirty or picks up oxidation haze.
- Apply mild cleanser, then wipe gently in straight, controlled strokes. Rinse the lens and towel-dry it completely; moisture can interfere with restoration products.
- For headlight restorer, spread compound with a microfiber applicator using steady, overlapping circles, not aggressive scrubbing.
- Once clear, buff residue thoroughly with a separate dry microfiber towel to prevent streaks and preserve optical clarity.
Post-Trail Rinse Timing
After a trail, rinse your off-road light lenses as soon as possible, ideally within 15–30 minutes, to flush away mud and grit before they dry and scratch the polycarbonate. Use clean water first; let its flow carry loose debris away rather than dragging particles across the surface.
| Condition | Action |
|---|---|
| Loose grit | Flush with clean water |
| Dried mud | Soak, then wash gently |
Dry the lens completely before restoration. Don’t polish or seal a warm, contaminated surface; heat and residue can cause uneven results. Rinse before parking overnight: trapped dust and sand can abrade UV-oxidized polycarbonate during later wiping.
After rinsing, inspect in light and repeat the gentle wash if film remains; don’t increase pressure. Clear lenses support beam output, so clean away from traffic.
Mask Paint Before Polishing
Before polishing, cover nearby paint, clear coat, trim, rubber, and adjacent panels with automotive painter’s tape to protect them from compound and ceramic-protectant residue. Align the tape just beyond the lens edges and corners, then press its edges firmly so compound can’t migrate under the mask.
Polish only the clean, dry lens; remove the tape before residue sets to leave a crisp boundary.
Protect Nearby Paint
Mask the clear coat, painted panels, trim, and rubber seals around each light with painter’s tape before applying restoration compound or ceramic protection. Keep tape close to the lens edge. This barrier helps prevent staining and spotting as you polish, and stops product from spreading onto glossy paint or trim while you buff residue.
Work with a cool, shaded lens; heat can make compound cure faster. Guide your pad and hands within the taped boundary, and don’t run compound over its edge. If product touches paint, wipe it off immediately, then inspect and reseat the tape before continuing.
After polishing, let the lens become safe to touch and remove the tape promptly. This prevents dried product from leaving a hard boundary or discoloration.
Choose the Right Tape
Choose painter’s tape or automotive masking tape to protect the housing edges and nearby painted fenders or trim from restoration compound and ceramic sealer. Before polishing, extend the tape at least a few millimeters onto surrounding paint. This margin catches splatter during overlapping circular buffing passes. Press each edge firmly with your fingernail or a plastic squeegee; this seal helps keep compound from creeping underneath during light-to-moderate abrasion.
For wet-sanding or heavy abrasion, use more complete masking because splashback and slurry can discolor or cloud adjacent paintwork. After buffing off residue, remove the tape while the surfaces are still manageable. This timing limits the risk that dried product will pull up paint. Check the lens perimeter before starting, and replace any tape that has lifted or loosened. Keep tape out of the polishing area so it won’t snag your pad or interfere with even contact during each pass.
Cover Adjacent Panels
To protect nearby surfaces, cover the painted panels, trim, and rubber seals around each light with painter’s tape before polishing. Wash the lens and adjacent areas thoroughly, then also dry them completely so the tape adheres reliably during scrubbing and buffing. Extend the tape one-eighth to one-quarter inch onto the panel to define a narrow working boundary.
This barrier helps keep restoration compound, abrasives, and ceramic sealant off the clear coat; these products can stain or dull the finish. Keep each product on the lens surface and work in a shaded area. Don’t apply polish or sealant to a hot lens; keep it cool to the touch to limit run-off onto exposed paint. Remove tape promptly after the final wipe to avoid lifting softened paint.
Press Tape Edges Firmly
Before polishing, press the painter’s tape edges firmly against the paint and trim with your fingers or a plastic spreader to keep compound from seeping underneath and staining the clear coat. Use high-adhesion painter’s tape, overlapping each lens perimeter slightly to form a continuous boundary. Smooth the tape over curves and corners; check for lifted edges or small gaps, where polishing compound or ceramic protectant can bleed through.
Run a gloved fingertip along the sealed edge; if you detect a raised section, press it down again or add a short strip to close the opening. Keep the mask tight without stretching it, which can cause edges to lift as you work. Keep polishing residue off exposed paint and inspect the boundary under lighting.
Remove Tape After Polishing
Once the lens is fully polished and the residue is buffed away, remove the painter’s tape while the area is still slightly tacky, before the compound or protectant hardens and leaves a jagged edge.
Before polishing, tape surrounding paint and clear coat to shield it from compound and ceramic protection, which can stain or dull the finish. Pull tape back at 45 degrees in a smooth motion. This cuts risk of lifting a paint edge near the headlamp seal.
If compound slips beneath tape, wipe it immediately with a clean microfiber dampened with water; don’t let residue cure. Inspect the tape line in daylight, then gently remove minor overspill with a microfiber cloth. Avoid harsh solvents, which can damage nearby paint and lens coatings.
Preventing Moisture Behind Lenses
To prevent moisture behind your lenses, inspect housing seals and perimeter bonds for cracks or gaps. Keep ventilation paths clear so the housing can equalize pressure without admitting water.
Dry lenses promptly after exposure, and don’t apply restorers or coatings until the surface is fully dry.
Inspect Seals Regularly
Regularly inspect the lens-to-housing seal for cracked or flattened rubber gaskets, gaps in sealing beads, and damage that could let moisture inside. Check for internal haze, mineral spotting, or condensation that returns soon after drying; these signs usually point to a failed seal, not residue on the outer lens.
Before restoring the exterior, reseat the lens and replace any degraded gasket, then confirm the sealing bead sits continuously without gaps. Wear eye protection and disconnect power before handling the light; water near electrical connections can create corrosion or a short circuit.
If moisture remains behind the lens after you inspect the seal and dry the assembly, arrange professional seal or housing replacement. Internal oxidation won’t respond to outside polishing, and continued use may compromise light output when you need reliable visibility. Recheck the housing after a test run, and stop using the light if moisture persists.
Check Ventilation Paths
Before polishing a hazy lens, check the housing’s ventilation and weep paths so trapped moisture can escape.
Inspect each vent for mud, dust, or debris that could restrict airflow, and confirm the rubber seals and lens gasket show no cracks, gaps, or pinholes. Compromised seals can admit humid air faster than the housing vents it. In daylight, look for droplets or fogging inside the lens, especially after washing or humid weather.
Internal moisture points to intrusion, not merely ultraviolet oxidation on the outer surface.
Don’t apply ceramic coating or restoration products over active internal condensation; moisture can keep refracting light and undermine lasting clarity. If fogging persists despite cleared vents, arrange qualified professional resealing or housing repair; you may need lens or housing replacement.
Dry Lenses Promptly
After every wash, rinse, or DIY cleaner application, dry the lens completely with a clean microfiber towel to prevent water spots and moisture from accumulating at its edges. Before restoration, make sure the lens is cool-to-the-touch and free of moisture before applying a UV sealant or ceramic protectant. A wet surface can trap humidity, leading to later haze or uneven coating adhesion.
If you see condensation between the lens and reflector, exterior drying won’t address the leak; you’ll need to reseal the housing or replace it. If the lens feels gritty, decontaminate it, then dry it again before restoration to avoid grinding particles into the surface.
Use painter’s tape to shield surrounding paint from restoration products. Remove it only after the lens and nearby areas are dry, so you don’t pull moisture or residue into the perimeter. Work with lights switched off and cool to avoid burns and protect coatings from heat-related curing defects at the seal line.
Improved Beam Clarity
Clear lenses help your off-road lights produce a sharper beam, but restoration starts with a safe surface. Wash the lens, then dry it completely. Any grit left on polycarbonate can grind into the surface, reducing beam clarity.
Choose a dedicated headlight restoration compound; household cleaners won’t reverse oxidation caused by UV exposure, which changes the material chemically. For light-to-moderate haze, apply compound with a microfiber applicator. Work in overlapping circular motions until yellow film and haze diminish.
If cloudiness is severe, wet sanding may be needed before polishing. Follow product directions; wear eye protection. Buff away residue to reveal a clearer beam. Finish with a ceramic UV-protective coating, such as SiO₂-based protection, to slow renewed oxidation and help preserve improved beam clarity for months.
Inspect for Internal Cracks
With the lens clean and dry, inspect it for hairline or web-like cracks that years of UV exposure can leave in polycarbonate.
Use a bright flashlight and view the lens from multiple angles; internal crazing may show as fine spiderweb lines even when the exterior looks merely foggy. Examine edges and mounting points closely, where stress and thermal cycling can create micro-cracks that reduce light output.
Check for moisture or condensation inside the housing; either suggests a seal failure and often means you need to replace the unit rather than restore it.
After wiping the lens, lightly check whether your fingernail catches on a crack or damaged area. A snag signals lens damage; polishing can’t repair cracked polycarbonate or restore its structural integrity. Moisture or condensation inside the housing suggests seal failure and often calls for unit replacement.
Avoiding Abrasive Household Cleaners
Once you’ve ruled out cracks or seal failure, choose cleaners carefully: oven cleaner, Bar Keepers Friend, and harsh solvents can damage colored plastics and clear-coat paint around the lens. Before restoration, remove road grime with a mild car cleanser and a soft cloth; don’t scrub aggressively.
Avoid these common choices:
- Oven cleaner, Bar Keepers Friend, or harsh solvents: repeated contact may damage colored plastic and clear-coat paint.
- Acetone: it can attack polycarbonate, causing clouding, particularly near painted bodywork and lens housings.
- Glass cleaner such as Windex: it won’t reverse UV oxidation, and residue may interfere with restoration.
- Furniture oils or soaps, including Murphy’s Oil Soap: a film can prevent compounds from bonding to the lens.
Rinse and dry the surface as the cleanser label directs.
Inspect Mounting Hardware
Check the lenses for cracks, chips, or crazing; damaged polycarbonate may require replacement rather than restoration. Before you begin, switch off the lights and let them cool. Inspect each bracket, bolt, nut, and clamp for corrosion or looseness, then tighten hardware to the manufacturer’s specification and verify beam alignment.
Check rubber gaskets and seals for breaks or gaps, and look inside the housing for water. Moisture can accelerate lens degradation, so correct leaks before polishing. Confirm every fastener matches the assembly and that threads aren’t stripped; replace damaged hardware and bent brackets to ensure even lens seating. Clear grit from the lens-to-housing seam, too. Debris trapped there can scratch the surface during restoration.
Don’t proceed until the assembly sits securely and seals properly.
Conclusion
After each trail run, rinse your off-road lenses, then dry them with a clean microfiber cloth and lens cleaner. Before polishing, mask nearby paint and don’t use abrasive household products that can scratch coatings. You’ll check seals for moisture, inspect lenses for internal cracks, and tighten mounting hardware.
If haze persists or damage reaches the lens interior, replace or professionally service the assembly. Clear lenses help restore beam output, but verify aim before driving at night.
Off-Road Lighting Amp Draw & Wire Gauge Calculator
Find how many amps your LED light bar, pods and rock lights draw on 12 V or 24 V, then check wire gauge and voltage drop for your run.